The fourth batch of Mustang grape jelly is complete and it appears to be set and clear, although it is a dark maroonish color. I thought I would post a more detailed description with some excellent guidelines for novice jelly makers…..FYI I am not to far beyond novice when it comes to jellies…..I am much more experienced with jams!
Mustang Grape Jelly
5 cups strained juice
7 cups sugar
1 package Sure Jell Premium pectin
1 tsp butter
Prepare juice
In a large pot add 1 to two gallons of washed and de-stemmed Mustang grapes. Add enough water to cover the grape. Heat to a boil and use a potato masher to burst skins and mash the pulp. Boil for 20-25 minutes. Strain through a double layer of cheesecloth. Do not squeeze the pulp, let Mother Nature and gravity do the work. Your patience will result in a much more clear jelly. Store in the refridgerator until ready to use….probably no longer than one week.
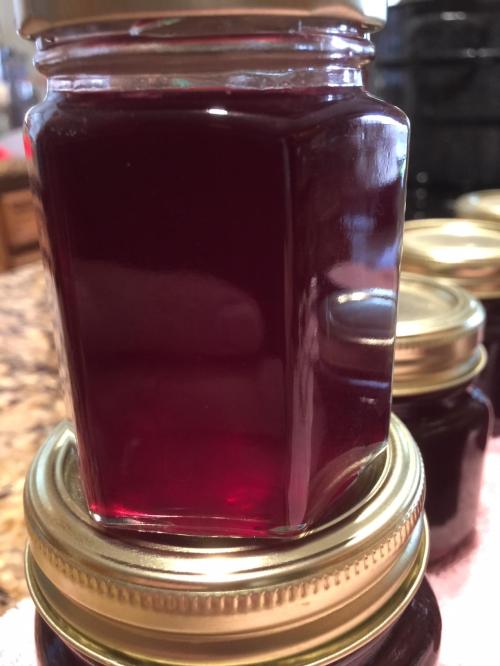
Gift sized jar. Love the beautiful clear color.
Jelly making
Add 5 cups of juice to a “tall” pot. Add pectin and butter and heat on high, continually stirring, until it is at a rolling boil, one that cannot be stirred down.When it boils it foams up pretty high. Add the 7 cups of sugar all at once. Heat until to a full boil again while continually stirring. Boil 3-5 minutes. This is a bit of a subjective – to test if the jelly has cooked long enough – I found this great description with photos….unfortunately I couldn’t seem to get them to embed themselves so I grabbed a few off the web. My experience is that it takes a good 5 minutes to get to the sheet test stage for this jelly….The sheet test is when I take it off the heat and ladle into the jar. I sometimes use the wrinkle test but i look to see how slowly it sheets off the spoon as my gauge. Process in boiling water bath for 10 minutes.
https://www.thespruceeats.com/testing-homemade-jellies-for-gel-point-1327874
“In theory, you can use a candy thermometer to check when the jelly’s temperature reaches 220 degrees Fahrenheit (at sea level), but that’s not always the most reliable way to ensure your jelly is ready to cool.
Fortunately, there are other methods for testing jelly. Descriptions of how to do a jelly “sheet test,” “spoon test,” or “wrinkle test” can seem mysterious if you don’t know exactly what you’re looking for. Let’s demystify those methods so that you can make jelly with confidence.
During the early stage of cooking jelly, the liquid is visible while it boils. It’s nowhere near ready yet. You’ll need to let the liquid boil until it becomes one gelatinous liquid with no separate liquid visible boiling to the surface.
Once you’ve established that the liquid is condensed into one form, then and only then should you apply the sheet or spoon test, but the temperature of the liquid is likely to be below 220 degrees at this point in the process.
Still, when you’re satisfied with the consistency of your jelly, dip a large spoon into the boiling pot and lift it about one and a half feet above the pot to pour the liquid jelly out all at once. What you’re looking for is the very last bit of jelly to come off the spoon. During the early stage of cooking, the last bit will pour off in a single drop.
As it gets near the gel point, bubbles will cover the entire surface of the boiling jelly and start to climb up the sides of the pot. This is when you know your ingredients have condensed into one liquid form and are just about ready to set. Temperatures inside the liquid should be in the 220 degree-range no matter where you stick the candy thermometer.
Do another spoon test – When the jelly is almost done, the last bit of liquid jelly will come off the spoon in two drops rather than one. This means that the jelly has already begun to form into a new jelly-like compound and should theoretically be ready to take off the heat and let cool in your jelly molds. Still, you should apply the sheet test to make sure it’s fully ready.
The sheet test – When the jelly is ready, the last drops pouring off the spoon will run together and “sheet” off the spoon. What you want to look for at this stage is the absence of large droplets replaced by these amorphous globs instead. Once the liquid no longer pours off in drops but slide off in sheets, you’re ready to apply the final test: the wrinkle test.

The Wrinkle Test – In order to apply the wrinkle test, have a small plate in the freezer while you are cooking the jelly. When you think it is done (based on the spoon test or temperature), place a small amount of jelly on the plate and return the plate to the freezer for 1 minute. If the jelly wrinkles when you push it with your finger, it is done.”

Results have been good through 3 batches. I will attempt to do a batch with the Sure Jell light pectin in the very near future. Fingers crossed. The Sure Jell Low/No sugar pectin recipe guide lines for the grape jelly uses 5 ½ cups of juice and 3 ½ cups of sugar. That is HALF the sugar of the other recipe.
TTFN
Bishop

Jul 10, 2018 @ 04:06:01
Beautiful! Thank you!
LikeLike