Home

Catching Up…..Spring is on the Way

2 Comments

The quiet time of winter is over here in my backyard just north of Houston. I have been eating beets from the garden as well as some carrots. In fact, last night I grilled a spatchcock chicken along with a handful of freshly pulled carrots…….FYI, I should have pulled up a few more carrots!

I love this water color app called Waterlogue…..orange and a couple of yellow carrots freshly pulled.
Obviously not enough carrots. Olive oil, a little sea salt and rosemary. 8-10 minutes over direct heat and about 15 minutes over indirect heat with the foil sealed shut. FYI, this is a good size of carrot to cook through and not be crunchy in the center.

I have both red and gold variety beets growing along with Romaine lettuce, about 50 new Chandler strawberries. The radishes are done and I could probably plant more but I’m the only one that eats them! Sugar snap peas have been planted, along with some turnips and another round of beets.

Bees are doing well and the early spring bodes well if the weather stays wet enough for the early spring nectar flowers. For you folks in Texas here is a very good list, link attached. Late winter does include my Meyer Lemon tree as a good nectar source….. looks like it will bloom very soon. https://aggie-horticulture.tamu.edu/travis/wp-content/uploads/2016/04/EAGF-2017-Central-Texas-Bee-Friendly-plants.pdf

My backyard topbar hive. Bees are storing honey…..this comb is a little wonky so I will pull it and maybe two other misshapen bars to crush and squeeze in a few weeks once I see more nectar flowers blooming.
Suited up but not for the backyard bees….my backyard bees are pretty sweet, no gloves or suit needed but I do always wear my veil. I was suited up here because I was cutting weeds and brush around some of my friskier bees!
Bonus image from our recent trip up to North Dakota. These two whitetail boys were sparring a bit, not real energetically but grunting a little.

More spring stuff in the works.

TTFN

Bishop

Strawberry Fields – Not Quite Forever

Leave a comment

Last fall I planted about 75 Chandler June bearing plants……they began producing at the beginning with a “beauty” on February 14th, scored a few points by giving the first Berry to my bride…….yeah, almost June bearing LOL. Half of the new plantings were in plastic covered raised beds, about a quarter in version #4 of my strawberry tower and the remainder in a strawberry specific pottery vessel. The link included goes back into the history of my efforts with strawberry towers. The three inch diameter towers have been mothballed for a couple of years. Fall of 2019 I snagged a piece of heavy wall 6 inch pipe…..it was challenging to build the pockets.

Not perfect and the thick pipe wall created challenges making the pockets. I will need to write a separate post with details!

Strawberry Towers Forever V 3.1

Surprisingly this has been my most successful use of the pottery style planter for strawberries. Previous years were sparse.

My raised bed planting under the plastic sheet have been disappointing. The biggest source of my disappointment is with my poor choice of plastic covering. In fact, it was much more than disappointing, it was a bonehead mistake. Yes, in my haste, I grabbed the wrong material, didn’t read the label, installed it and planted all the berry plants before I realized my mistake. I will remedy the error at the end of picking season.

One of my 4’ X 24’ raised beds has been fallow for two years due to my laziness. Lazy no more! By the coming weekend it will be reframed and planted. Most likely candidates will be cucumbers and pole beans. I am growing potatoes in pots again this year and will place them strategically around the beds. The sugar snap peas went in late but I should be able to harvest before the Houston heat lays them low. Carrots and beets also went in late but …….. life goes on.

Bees will be keeping me busier as the summer approaches. It looks like it could be a very bountiful year. I sure wish I hadn’t wrecked my truck. Turns out it is too expensive to repair so I have to jump through the hoops to get the check and shop for another. I think I said it before……. life goes on.

FYI- gardening is a pretty good social distancing tool or activity. Frame building for the beehives also works well.

TTFN

Bishop

Cutting Squares – Cut Honeycomb

Leave a comment

My topbar hive was becoming loaded, so heavy, that my poorly constructed hive support legs  were breaking. I needed to both harvest and stabilize the hive. Stabilizing was quick and easy but- we nearly tipped the hive over as one of the existing legs nearly failed completely as I lifted it to supports in place.  Now on to the harvest. 

I built a set of racks, half sheet wire cake racks, to keep the slabs from breaking up into less than desirable pieces that wont make “pretty” squares. The set-up will hold 4 slabs, stacked and spaced so the slabs hold their shape…… in theory! My Goo friend John helped me out. 

It was more or less successful, albeit, a little awkward! I will need to prevent the slabs from sliding around on the parchment paper I placed under each slab to minimze damage to the slabs, i. e., wire rack embedding in the soft wax. 


A nice full slab, beautifully capped, thick and very yummy. 

I filled 14 boxes of 3.25 X 3.25 inch squares of honeycomb. The slab pictured above was thicker than some of the others. The old shaped pieces were squeezed for the honey. 


I was able to get 5 nice squares out of the beautiful slab above! Almost perfect! 


I dropped 3 odd shaped chunks of comb into a pint jar. About 1.5 pounds of honey and honeycomb goodness! 

Looks like I have about $ 150.00 of product at my retail prices. I may be able to pull a little more from this hive but I won’t get too greedy! This hive is so strong and full,  I will more than likely split it again this year. 

TTFN

Bishop

Do You Really Know Your Honey?

5 Comments

No, I am not talking about the person you met through “Match.com” or for that matter, your significant other. I am talking about the liquid gold in the bottle called “Honey”. I have done my own sleuthing on the local supermarket shelves and I have been surprised. There is not much truth in labeling at the supermarket. Local raw honey is a real treat, if you spend the time and effort necessary to verify the moniker, “Local Raw Honey”!

I ran a cross this article while looking around and thought it did a great job illustrating the point….”do you really know your honey?”

“…..Research at Texas A&M University shows that most honey labels aren’t telling the truth, and 75% of the honey in the U.S. is not what it says it is on the label. And this could apply to as much as 90% of the nation’s honey, according to lead federal honey investigator.”

Dr. Vaughn Bryant is an anthropologist and a bit of a honey sleuth at Texas A&M University. He utilizes A&M’s extensive pollen library to identify where honey originates by it’s pollen “fingerprint”. A Michigan TV station did a little test of honey off the shelf at a local store.

“……..So, we took some samples and sent them to Texas A&M University. Our five samples included a bottle from the company formerly known as Groeb Farms, Honey Tree’s Michigan Great Lakes Raw Honey, Organic Rainforest honey, plus a Meijer brand and a Spartan brand.” Just an FYI, every bottle of “USDA” labeled honey I found in local supermarkets comes from either Brazil, Argentina or Mexico….the USDA labeling is based on the country certifying that the honey meets the standards. Long story….

So, what did Channel 17 learn from the samples? You have to read it to believe it….3 of the 5 samples had no pollen present…..it is a great way for distributors/bottlers to disguise the origin of the honey by ultra-fine filtration and usually done under high temperatures, destroying any beneficial properties.

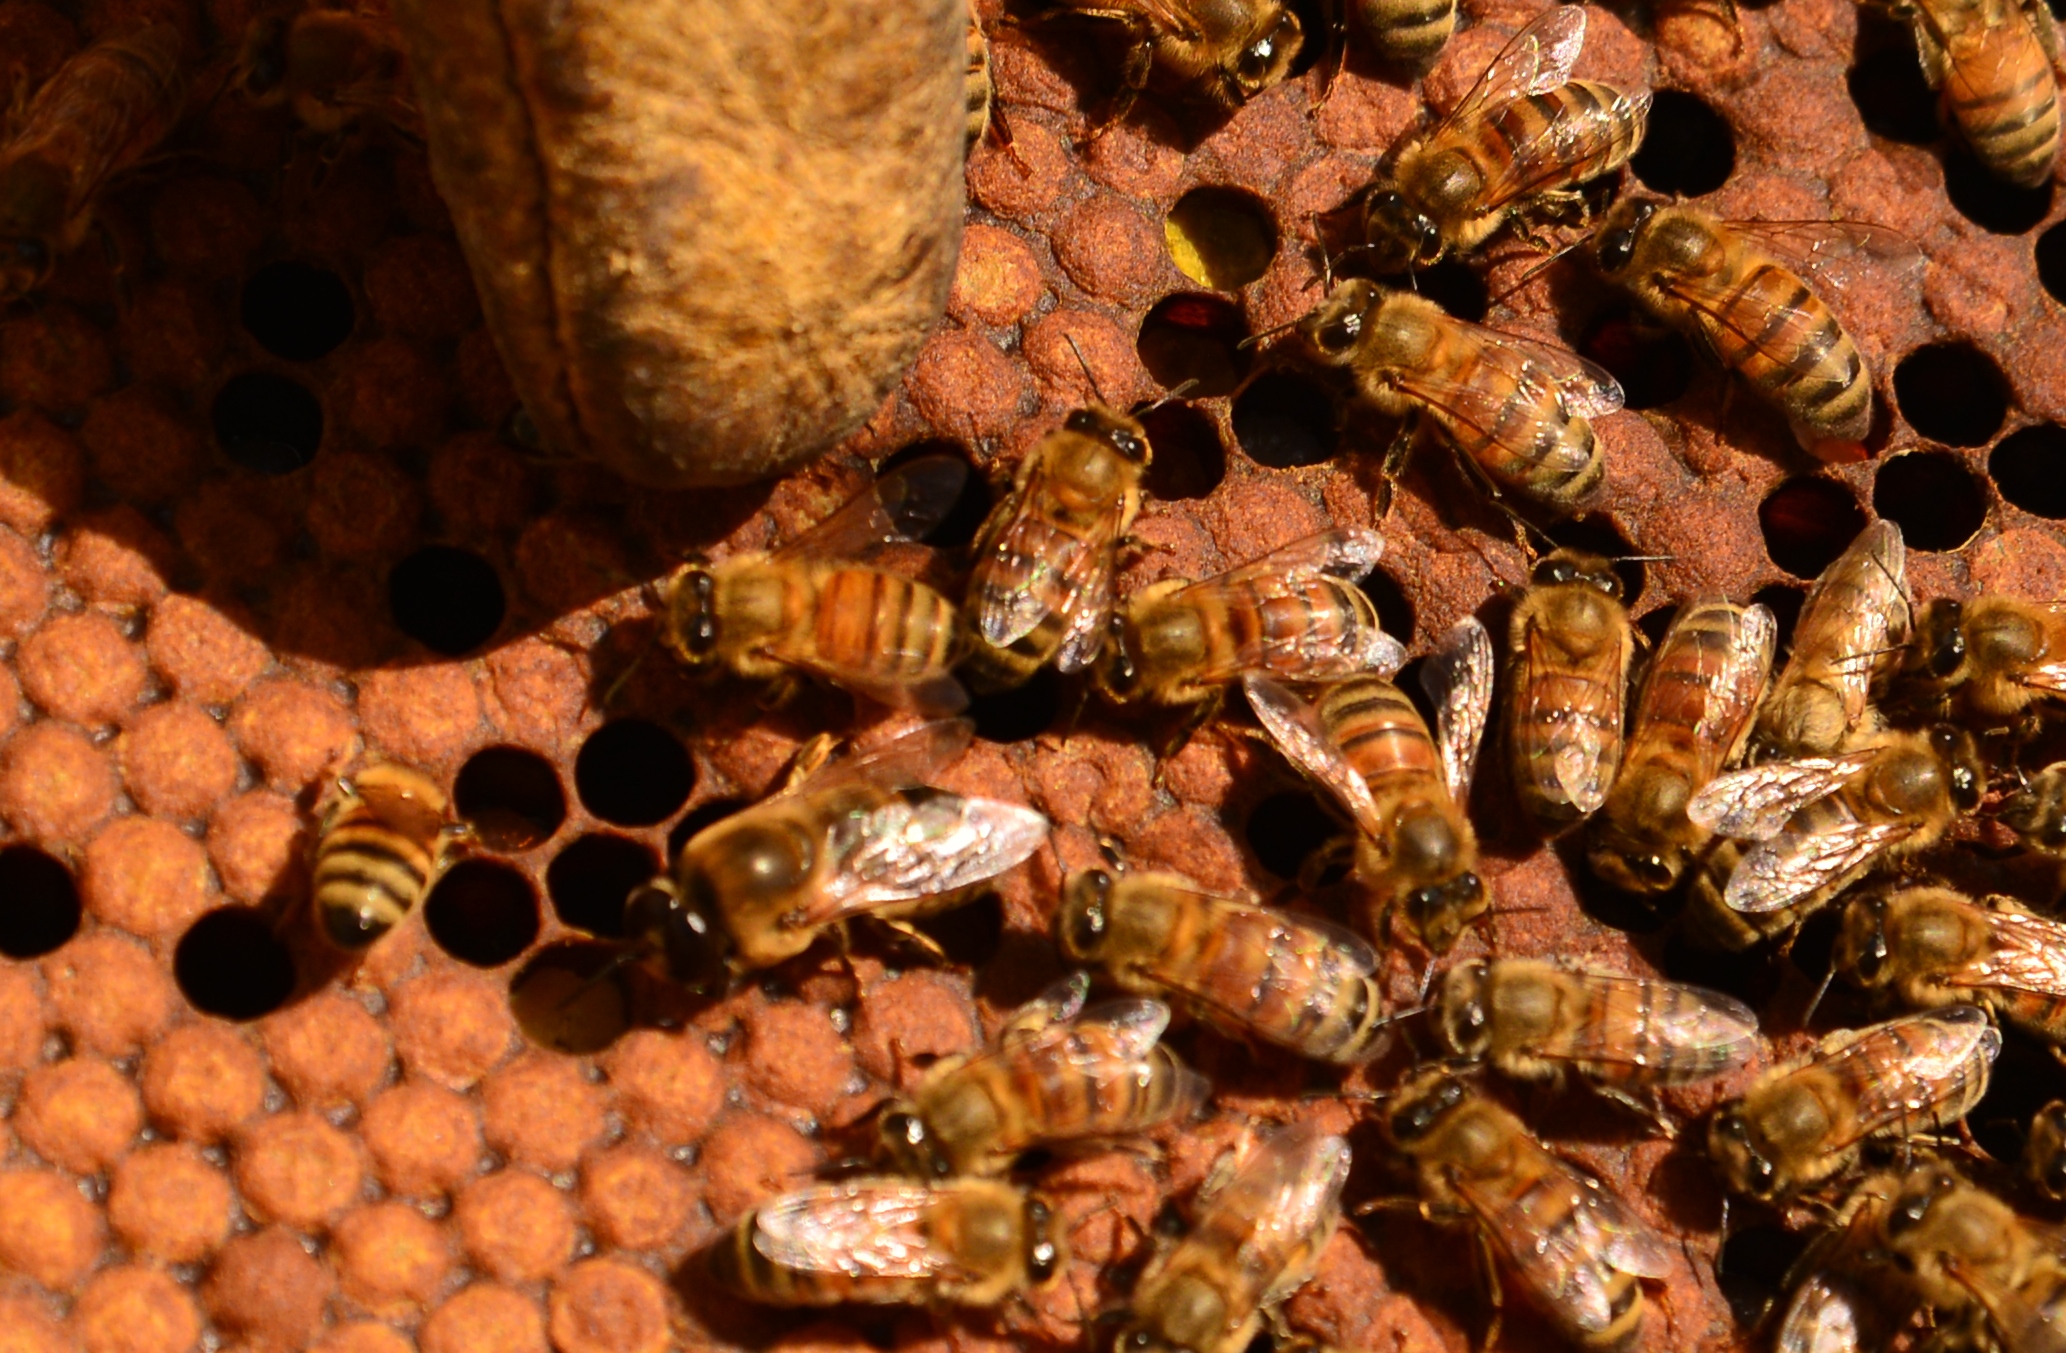
Local raw honey will be cloudy due to fine bubbles and pollen in the honey….

“Most of them were not what they claimed to be,” said Bryant.

First, he looked at the honey bottled from the company formerly known as Groeb Farms. They were previously fined for mislabeling Chinese honey. The label on this particular bottle said “Pure Honey Clover.” Although Dr. Bryant said the sample wasn’t from China, he said there was still a problem with the label. “It turned out not to be clover honey.”

There was “not enough clover pollen to warrant the honey being called a unifloral clover honey,” his report said. The other flower pollens found in the honey included “soybeans, chestnut, mesquite, and eucalyptus.”

“A little bit of clover pollen in here,” said Vaughn. “But it would not qualify as clover pollen. So here’s the case where it’s sold as pure clover honey, but it’s really not.”

Onto jar number two, a jar labeled Great Lakes Raw Michigan Honey. This honey appeared much more true to form according to Dr. Bryant’s analysis. He said there was “sumac” pollen in this sample, which grows commonly in the state. “It could well be from Michigan,” said Bryant. However, a few other suspicious pollens were discovered, too, which could indicate there was other honey mixed in from southern regions, or it could simply mean that the pollen accidentally got in there some other way. Bryant’s report showed pollen from citrus:  lemon, orange, sweetgum, mesquite, eucalyptus and magnolia.

“Those could have been contamination from some other source,” said Bryant. “Or, they could have been part of a mixture. It’s hard to tell.”

Chris Olney, the Vice President of Sales and Marketing at Honey Tree said that the pollen from southern regions likely came from hives that were used in Florida, then brought to Michigan.  He said 50% of the hives are transported by beekeepers to southern regions like Florida to pollinate citrus crops, then they are brought back to Michigan to pollinate crops here in the summer.

Now on to sample 3, which was labeled Organic Rainforest honey. “We don’t know what it is,” said Bryant.

The label had the abbreviation “BR” on the back, which stands for Brazil. However, Bryant couldn’t prove it came from rainforest flowers. It came back from testing as a question mark, because someone had strained all the pollen out. “We have no idea whether it’s organic,” said Bryant. “We have no idea whether it’s from the rainforest or anything else.”

Sample 4, the Meijer Pure Clover honey, had stamps for USA, Canada, and Argentina on the label, but for Bryant, it remains a question mark because, according to the test, “all of the pollen has been removed.”

Sample 5, the Spartan premium golden honey had the markings of “AR” and “CA” stamped on the back. AR stands for Argentina according to country code listings, and CA stands for Canada. However, Bryant couldn’t prove where this sample was from either country. “One certainly could not prove that the contents of this honey is what is claimed on the label.”

So, what is your best option? Know who your beekeeper is, ask to go see the hives, maybe even ask to help gather the honey……. This maybe a little TMI, but you will be tempted to lick your fingers every once in a while as you go through the extraction process……FYI I do keep a bowl of sanitary water in the extraction area to dip fingers and hands in while working with the very raw honey. Just saying! Link to the article below.

http://fox17online.com/2014/02/25/the-truth-behind-the-honey-labels-a-fox-17-investigation/


IMG_0867

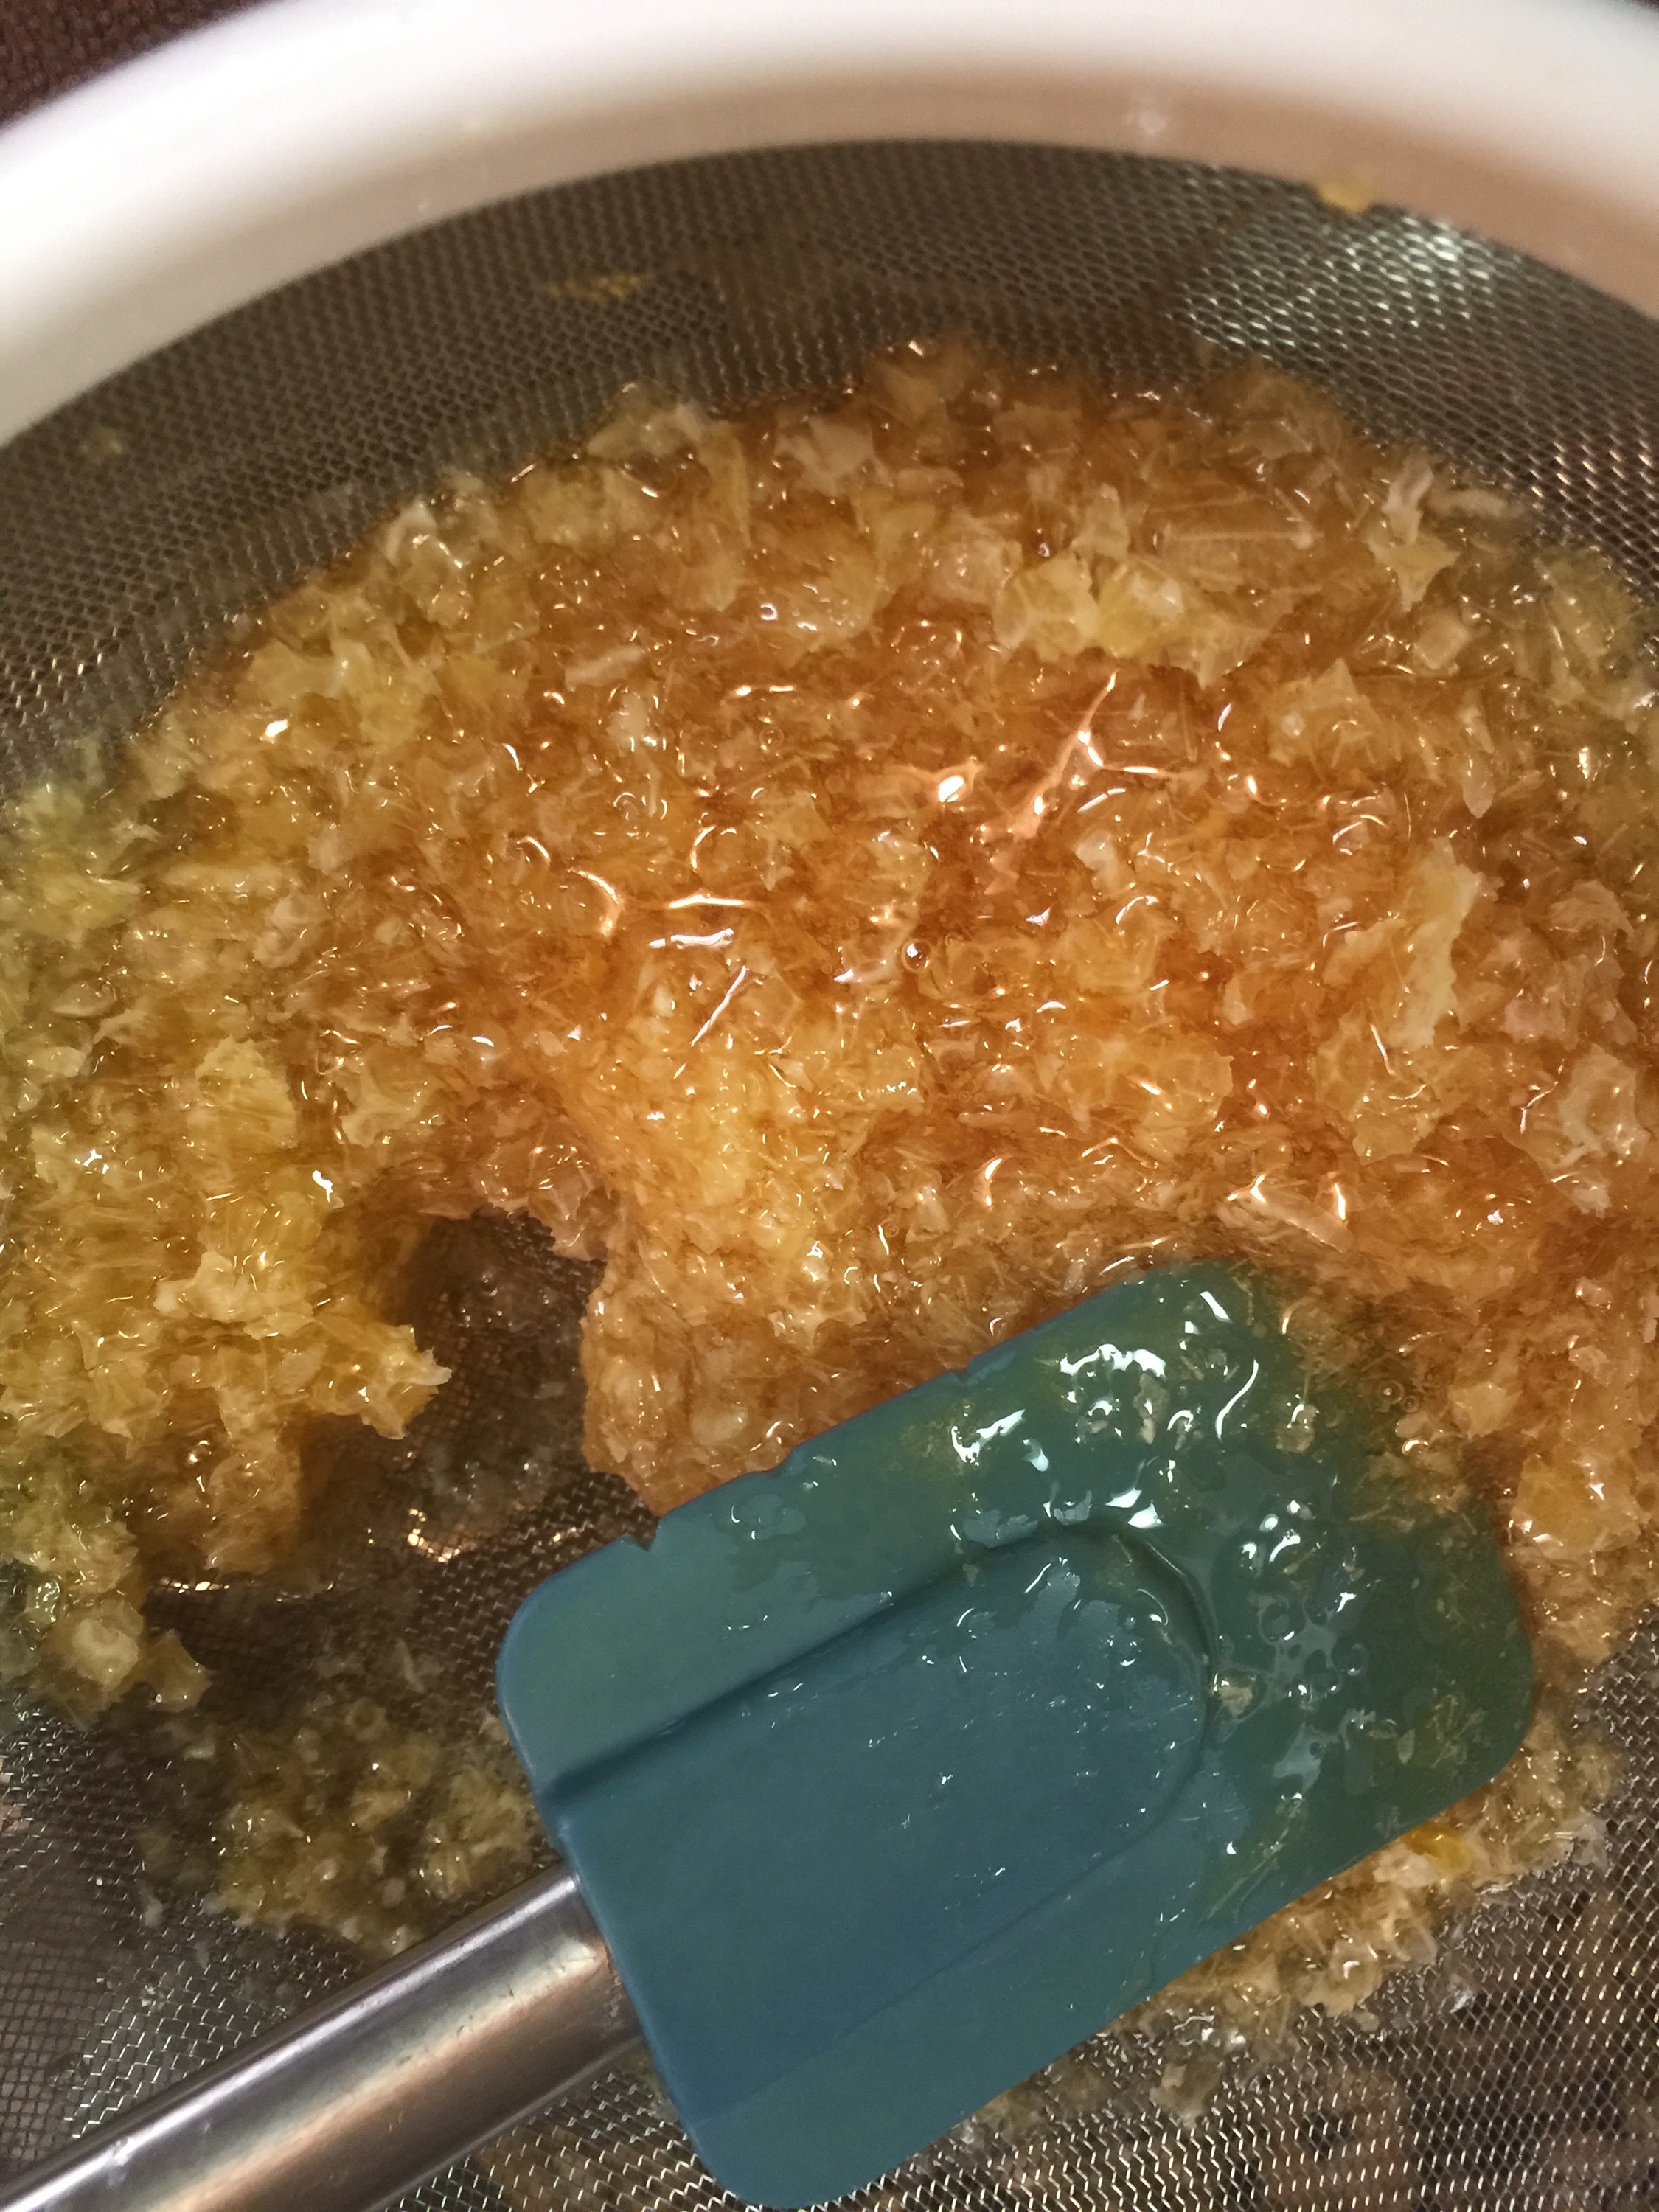
This is hand crushed honeycomb from my topbar hive.

DSC_9701

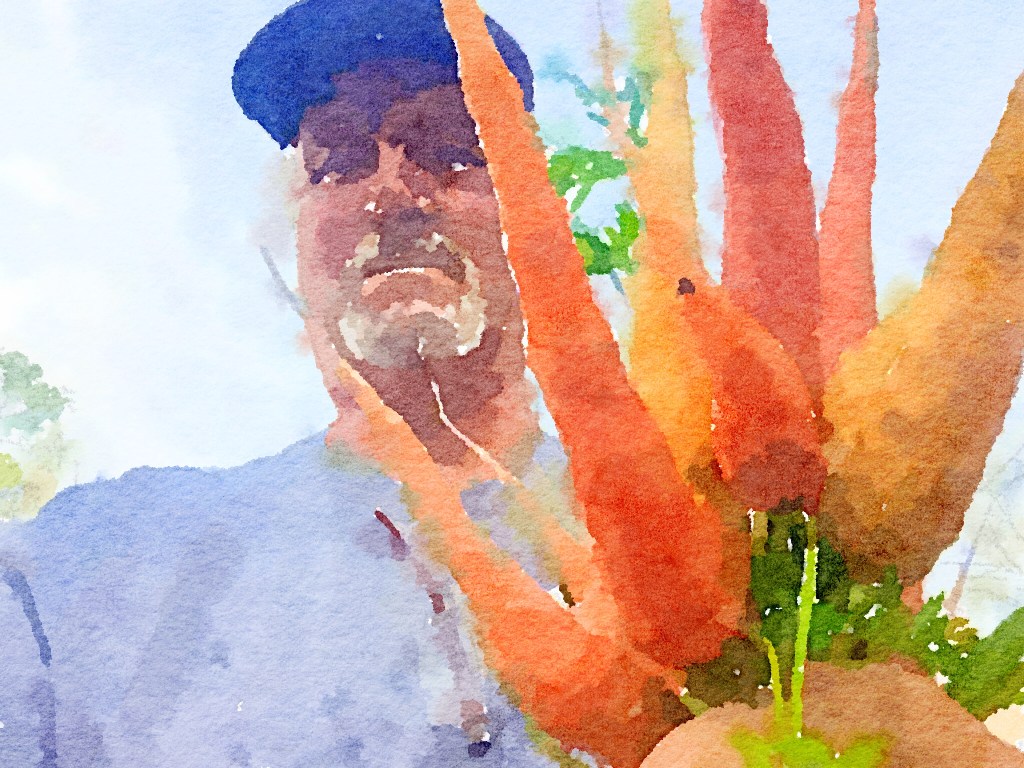
Here is a shot of me squeezing the honey from the wax. I would squeeze and compact the was as tight as I could. I then place it out near the hive and the next several days it is wild watching the bees from the neighborhood clean the wax.

DSC_9673

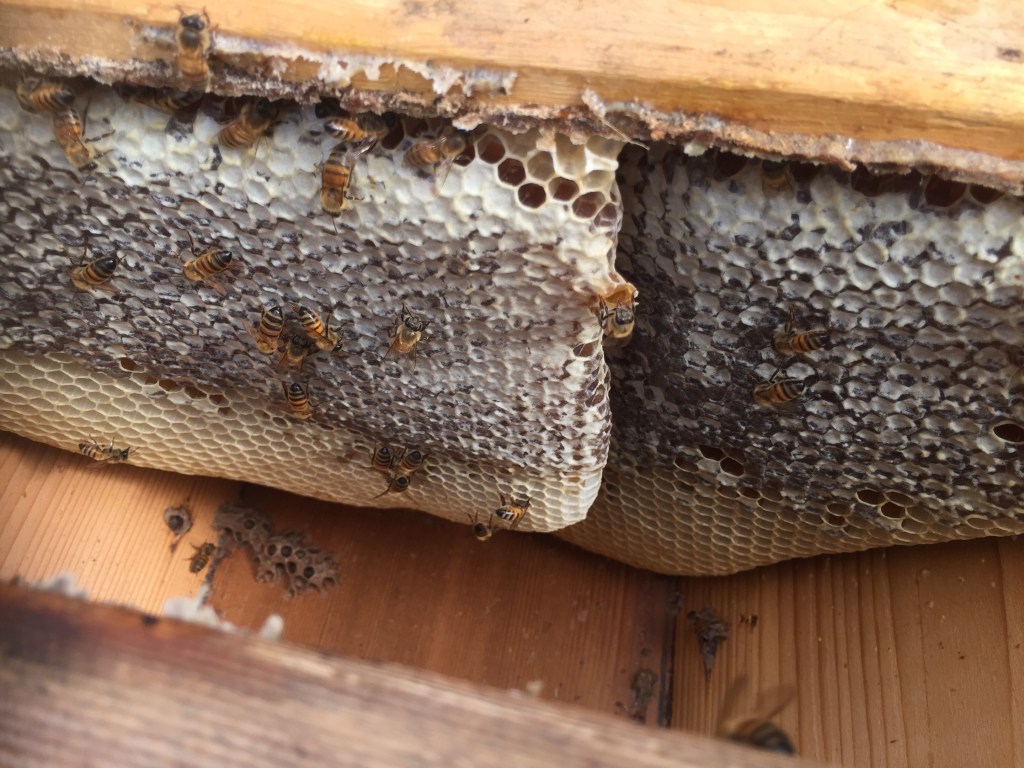
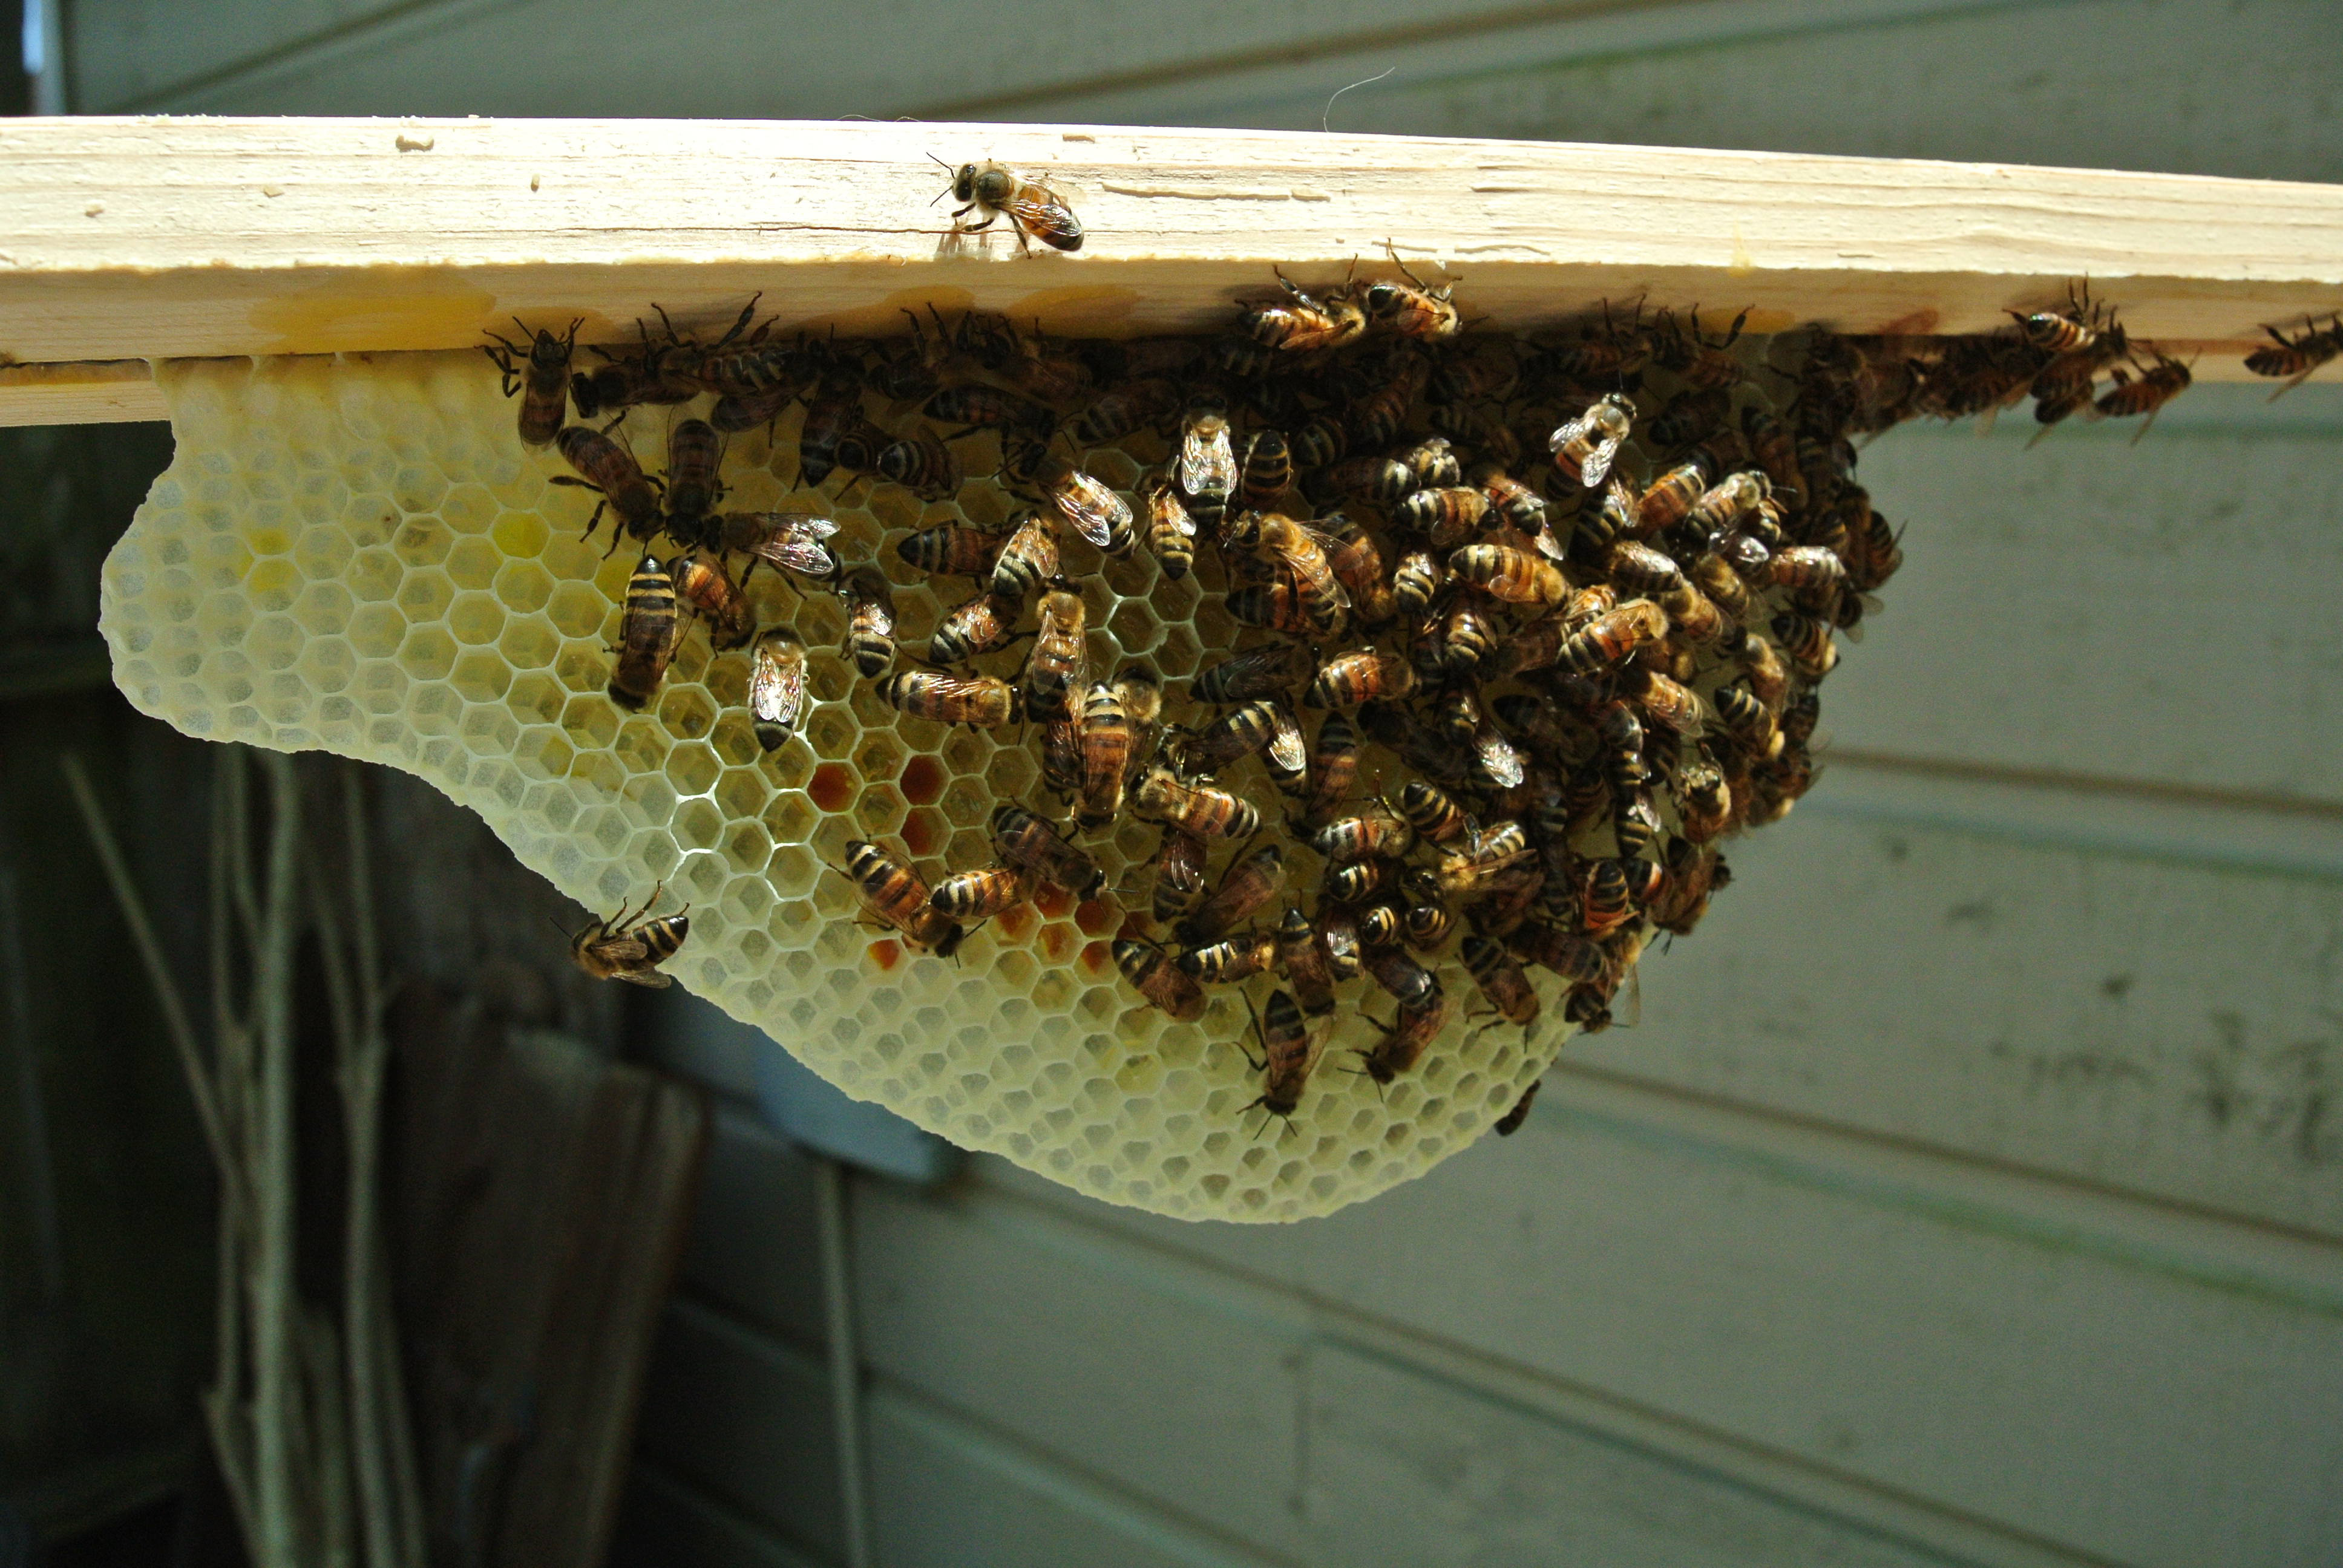
A nice capped section of honeycomb ready to be cut off the bar.

JBD_4619

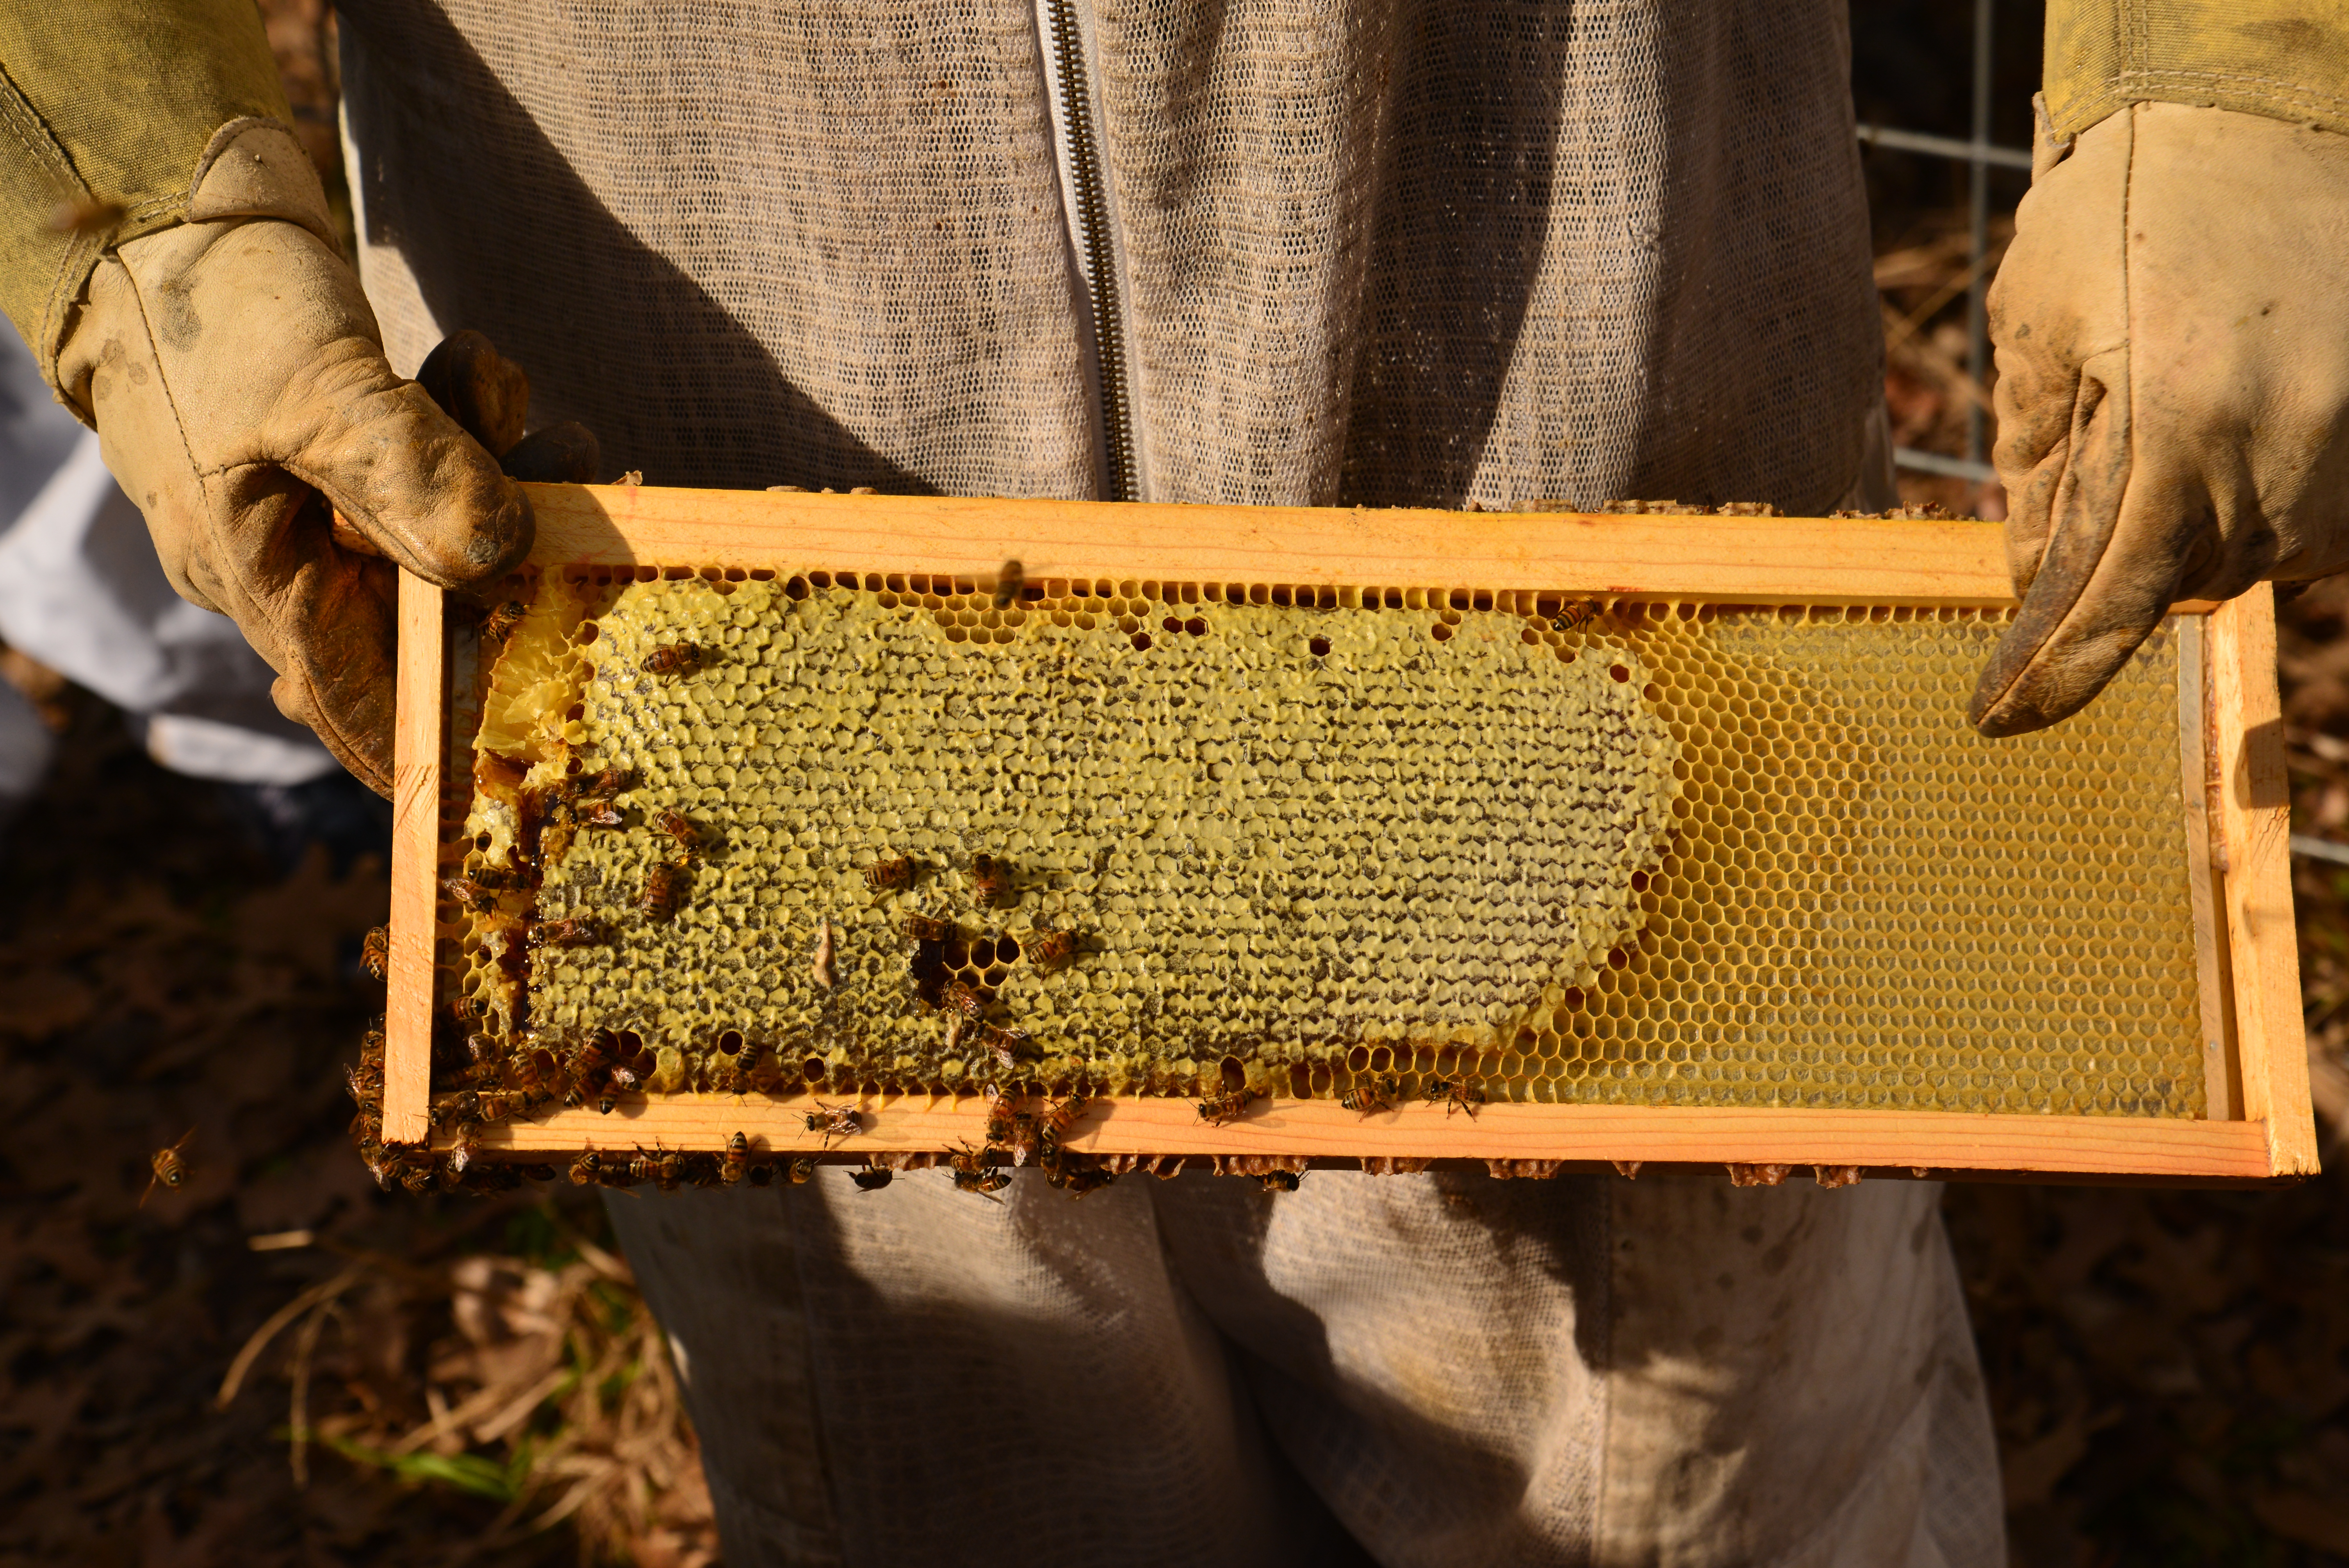
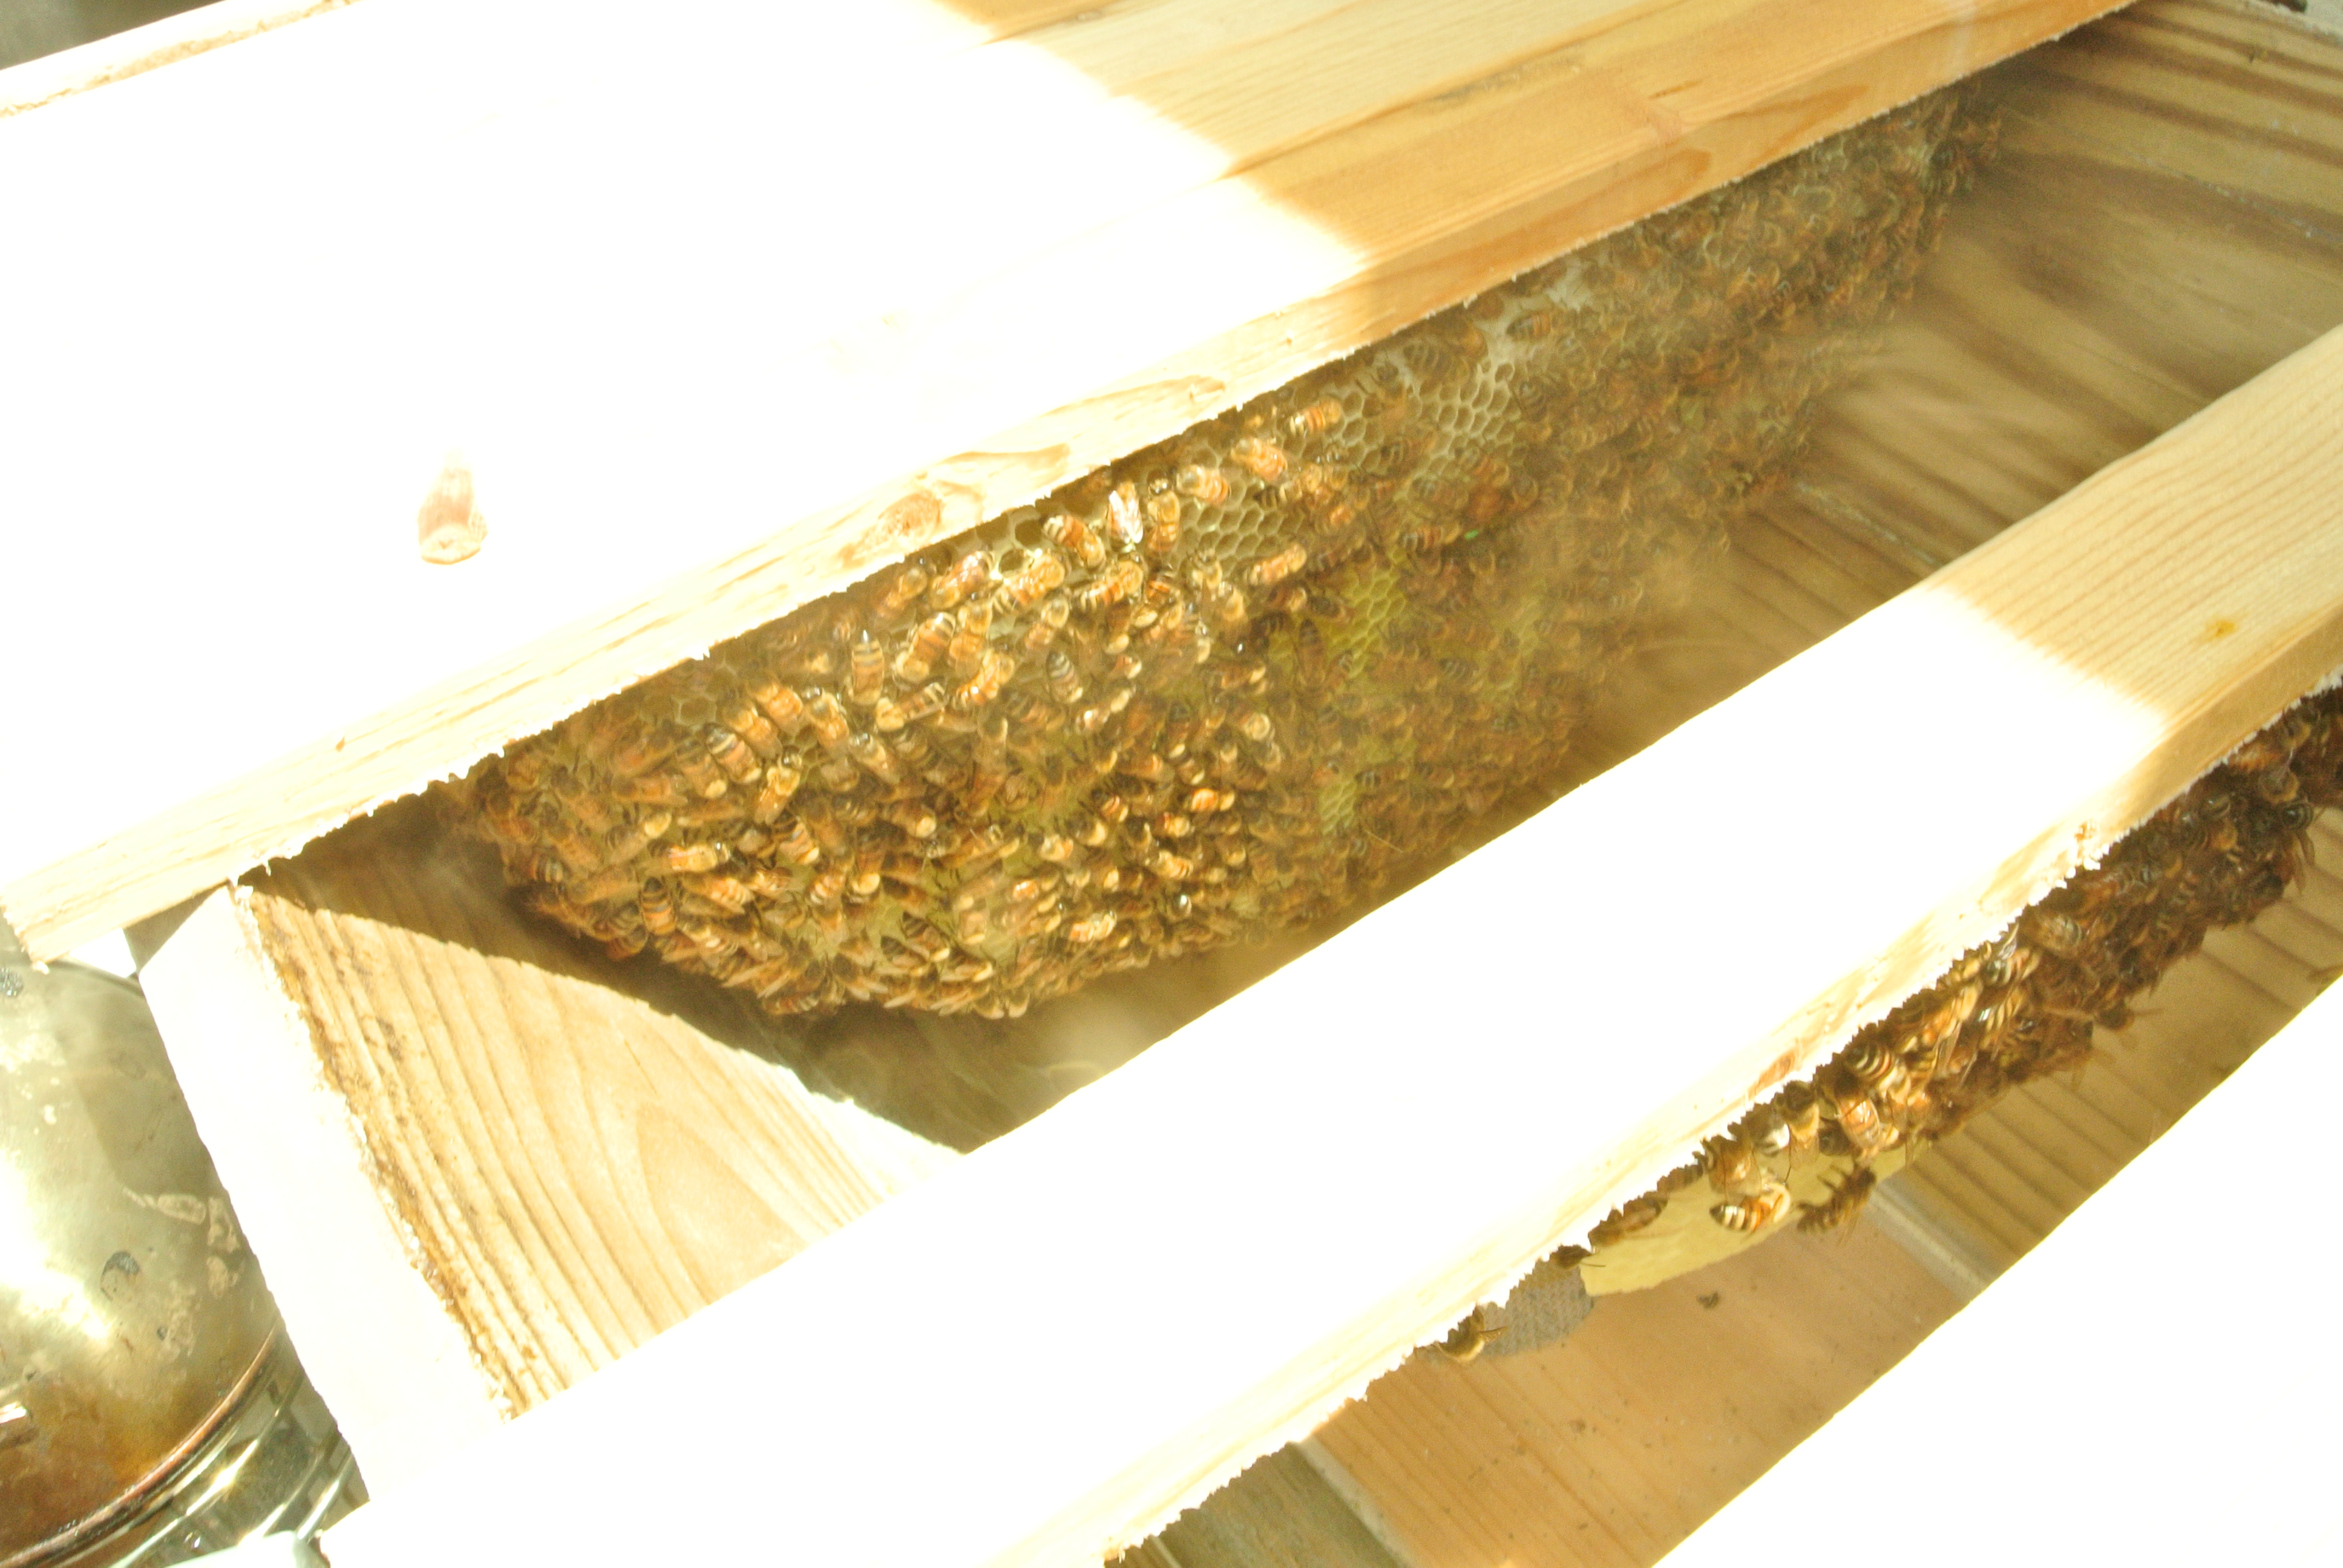
Honey….being added to a frame. Not ready to extract but looking good.

Buy Local and know your honey.

TTFN

Bishop


Beekeeping Lesson 11

Leave a comment

I rescued a bee colony from a tree that broke off during a storm. The tree snapped at a large knot hole, splitting the colony into two sections. When I arrived the bees were calm and well behaved in the section that was on the ground. To get a better look into the cavity holding the bees, I pulled some of the vines from the trunk section. Here is part A of the lesson; try to identify the vine species prior to handling it, especially if you are highly susceptible to poison ivy or poison oak!!!!!! I am highly susceptible and I am now paying the price.

Lesson 11 – it has several elements. Part A above.

Helpful tips;

B. Thoroughly wash with hot soapy water, any skin surface that may have come into contact with the vines. Touching body parts with hands coated with the plants oils leads to a spreading of the rash. Trust me – sensitive skin parts should never be touched! Nuff said.

C. Contaminated clothes, like my bee suit, should be washed in hot water. Sometimes it may require several washings. I am putting my bee suit back int to wash for a second go…… Yes, I am dealing with a second round of rash breakout.

D. Aveeno works well on the rash. I have also found, at least for me, a very hot shower, as hot as you can physically stand, blunts the itching for 4-5 hours.

Unfortunately, I seem to discover lessons the hard way! I will keep you posted on my future adventures that become lessons for others.

Suited up - the end of the section is open to the colony. Bees were buzzing before I secured the end. Suit is in the wash.....again

Suited up – the end of the section is open to the colony. Bees were buzzing before I secured the end. Suit is in the wash…..again


TTFN

Bishop

Going Bananas in the Garden

6 Comments

The surprise success with plantings this year has been the banana “plant”….. Not really a tree but most folks refer to them as trees. This was the second year after panting the first corms. I was given one that should have produced “Manzano” bananas but has yet to fruit. The other was a mystery….If Marcelino’s father told me I must have not understood or heard. The unknown variety has produced a very nice large bunch and along the way I learned a lot about the growth habits of bananas. An internet search leads me to believe that the bananas  are “Pera”.

Once the plant matures a stem growing inside the pseudostem (trunk for lack of a better term) emerges from the top. As it curls downward it has what looks like a purplish heart looking bulb, an “inflorescence”. Looks like tightly wrapped paired leaves.

Female flowers beginning to expand.

Female flowers beginning to expand.

“A stem develops which grows up inside the pseudostem, carrying the immature inflorescence until eventually it emerges at the top. Each pseudostem normally produces a single inflorescence, also known as the “banana heart”. https://en.wikipedia.org/wiki/Banana#CITEREFStoverSimmonds1987.

It was interesting watching the top two leaves open up and expose the flowers. The first that are exposed are the female flowers that develop into fruit. Each time the purple leaves open it exposes another tier of flower bracts. As the bananas fill in, maybe 8 to as many as 20 tiers the heart now begins to produce male flowers that appear to be useless….once they appear, they dry up and drop off. At first I thought I had a problem but learned that was normal.

My hanging banana storage in the garden.

My hanging banana storage in the garden.

Once the banana has plumped up nicely and doesn’t seem to be enlarging I have been whacking off three or four at a time and allowing them to ripen indoors. They will stay nicely on the plant until the weather turns cold. After that I will cut the entire stalk and hang it in the garage to ripen slowly.

Several ripe ones with the most recently cut.

Several ripe ones with the most recently cut.

.Indoor hanging storage

Indoor hanging storage

Gardening activities have included building up a raised bed by adding more compost and mounding it up for planting strawberries. The cucumbers are done but the dang asparagus keeps sending up new shoots, not many but enough to snack on while weeding. The Matt’s Wild Cherry tomato plant has begun producing again….they are small but tasty….pea sized to a little less than cherry sized. My Poblano pepper plant is churning out tons of dark green peppers.

The beginnings of my fall strawberry planting's. I will ad at least 50 more plants.

The beginnings of my fall strawberry planting’s. I will ad at least 50 more plants.

Teeny tiny Matt's Wild Cherry tomatoes.

Teeny tiny Matt’s Wild Cherry tomatoes.

Hmmm - the beginning of some green beans....they better hurry - the air is cooling.

Hmmm – the beginning of some green beans….they better hurry – the air is cooling.

My bees are now residing elsewhere but I am making more local contacts that are willing to host hives for me. I have a home for the top bar hives about 5 minutes from my house – Yee Haw. The productive Langstroth is too far away but it is in a good home. I am aiming for 10-12 hives next year and possibly 20 the year following. The new Texas regulations allow me to sell at Farmers Markets now….as long as I do not exceed 2500 pounds per year….that is a lot of honey!

This will give you an idea how big the slabs of comb are. This one had an ear on the left hand side broke off.

This will give you an idea how big the slabs of comb are. This one had an ear on the left hand side broke off.

Side note; I bottled the Honey Blonde Ale a   few nights ago…..made with MY honey. It will be awesome! The color was perfect, a hint of honey flavor but not too sweet.


TTFN

Bishop

Top Bar Bee Hive

1 Comment

I recently built two top bar hives to go along with my large Langstroth hive in my backyard.

On May 15th I drove  over to Navasota, TX, and picked up two packages of bees with health young queens . I installed them that same day and left them pretty much alone for 9 days or so. I inspected to ensure that they were building straight comb and in the orientation that I wanted. “Yessiree they were doing good.

Today, June 1st and I opened them up again to see how they were progressing. I am again impressed. They have built out to the 5th bar on both hives and appear to be happy. Below is a picture of bar 5 in my hand.

They are building comb on the wax base strip I added.

They are building comb on the wax base strip I added.

On most of  the top bars a routed a 3/8 inch wide slot about 16″ wide, centered in the 19″wide  top bar. On 6 bars for each hive I switched to a 1/4″ router bit and did the same. In the 1/4″  groove I used some beeswax cell material cut into a narrow strip and used hot beeswax to hold it in place. It appears that they are using it as a reference. I spaced out the bars with the base material alternating the standard bars with the 3/8″ grooved. On the3/8″ grooved bars I have a 3/8 X 3/4 spline glued into the groove and painted with melted beeswax. It appears to be working.

Top bar number 4 is really looking good! Sorry about the washed out photo….flash was a bit too bright.

Nearly full width and deep into the box.

Nearly full width and deep into the box. Sun was a little bright and the flash washed it out a little.

The second TBH was almost identically drawn out so I didn’t photograph any of the comb. The next photo shows the top of the hive with the corrugated plastic roof removed.

The bars fit flush across the top made of standard 1X2 lumber so replacement parts won't be a problem.

The bars fit flush across the top made of standard 1X2 lumber so replacement parts won’t be a problem.

The bees were gentle  and quiet. I did use my hood and a little smoke but no gloves. Soon…I will share a story of my stupidity and a veil filled with angry bees. Wonderful lesson learned.

Tomorrow is my planned day to open the Langstroth hive and extract honey. The two top medium supers are packed full and I should have a bountiful harvest.

Base entrance to the hive...very busy and they seem to be enjoying a sunny day without rain! Me too!

Base entrance to the hive…very busy and they seem to be enjoying a sunny day without rain! Me too!

TTFN

Bishop

Bee Keeping Class

3 Comments

I made use of the Christmas gift my daughter Lisa purchased for me. She gave me a three hour bee keeping class for two! Yesterday we took the short drive out of Kingwood to East Knox Drive about 10 minutes from my house. We were with a group of 12 or so other souls looking to learn a little bit about bees and bee keeping. The young man teaching the class under the umbrella of Round Rock Honey was top notch. He is a petroleum engineer cum bee keeper for a little over 2 years….being an engineer he has learned a lot by reading but it is backed up by his practical experience.

The best part….He lives in the Kingwood development where I live on probably a little smaller residential lot than I have…..along with more than a dozen hives in his backyard. We may be kindred spirits – he got permission from his wife for one hive….but as luck would have it his hive spun off some new queens and at the end of season “one” he had 4 more hives….My buddy John L will certainly see the connection!

The class was pretty interesting but there was a gentleman in attendance that must have been a “Geek” type engineer…. he had some close to on topic questions as well as TOO many off topic questions. We got into sugar molecule discussions, solar and electromagnetic disruptions to bee navigation and several other inane deeply trivial blather! He became fascinated with the frame base material, a thin plastic sheet imprinted with hexagonal patterns. The bees will build upon these sheets in the frames with beeswax and put to use as they see fit, pollen storage, honey storage, brood chambers of the various types. He spent a good chunk of time holding a sheet of the material up in front of sunlight and wondering out loud how he could add some LED lights for some cool light patterns! Hmmmmmm reminds me a little of my college days and altered states of consciousness…. I don’t think he emerged from those days fully intact. Our instructor is an engineer by education but seems to have his feet on the ground as a good ole Missouri boy graduating out of the University of Missouri Science and Technology in Rolla, MO! Very practical young man.

Daughter Lisa geared up and ready to play with the bees.

Daughter Lisa geared up and ready to play with the bees.

Honey....being added to a frame.

Honey….being added to a frame.

The Queen....her life is not as wonderful as we may have thought!

The Queen….her life is not as wonderful as we may have thought!

Standing in the way of the landing pattern. The returning bees were blocked on landed early on some class mates

Standing in the way of the landing pattern. The returning bees were blocked and landed early on some class mates

Drone Bee - the one with the big eyes!

Drone Bee – the one with the big eyes!

Pygmay goats in the feed store yard along with peacocks, pot belly pigs, miniature horses and burros....fun place to visit.

Pygmy goats in the feed store yard along with peacocks, pot belly pigs, miniature horses and burros….fun place to visit.


Wish me well folks as I go to the CFO for expenditure approval and the subsequent site request!


TTFN

Bishop


I Like Cobbler

2 Comments

This morning as I was catching up on some of my favorite reads in the blog world I found this – I Don’t Like Pie – by The Orange Bee – Linda – great recipes, great stories and quite a beekeeper. Thank you Linda for the inspiration.

http://theorangebee.wordpress.com/2012/08/17/i-dont-like-pie/

I like my grandmothers lattice topped cherry pie nut it has been 30 years since i last enjoyed one. I am a huge fan of Blackberries and cobbler – I think I shared this recipe a long time ago but it being summer and berry picking and consuming time I thought that I would share it again – It has been a prize winner for several folks that have provided it for local dessert contests.

Meme’s Blackberry Cobbler – it is so good!

The recipe again for those who have a deep 12″ cast iron skillet…

MEME’S BLACKBERRY COBBLER

I added an extra cup of blackberries to this recipe from Virginia Willis’ Bon Appétit, Y’all: Recipes and Stories From Three Generations of Southern Cooking (Ten Speed Press, $32.50).

  • 1/2 cup (1 stick) butter
  • 5 cups blackberries, fresh or frozen 6 is better in my opinion!
  • 1 cup sugar, plus more if desired for berries
  • 1 cup all-purpose flour
  • 2 teaspoons baking powder
  • Pinch salt
  • 1 cup whole milk
  • 1 teaspoon vanilla extract
  • Vanilla ice cream, to serve – it really needs to be Blue Bell

Preheat oven to 350 degrees. Place butter in a large iron skillet; place skillet in oven to melt butter.

Put blackberries in a large bowl. If they are frozen, let them soften a few minutes. Crush lightly with a potato masher. Sweeten with extra sugar if you like.

Whisk flour, baking powder, salt and 1 cup sugar in a medium bowl. In another bowl, combine milk and vanilla. Gradually pour wet ingredients into dry while whisking.

Remove skillet from oven. Add melted butter to batter. Stir to combine. Pour batter into hot skillet. With a spatula, scrape the berries into the center. Bake cobbler till it is golden brown and a cake tester inserted into the cake (not the berries) emerges clean, about 1 hour.

Serve warm with ice cream — and prepare for a walk down memory lane.

Makes 6 to 8 servings.

TTFN

Bishop