Home

Honey Fermented Garlic Cloves

Leave a comment

I do enjoy fermenting, primarily beer, a bit of wine and mead. I had never heard about fermenting garlic cloves. In fact, it wasn’t even my idea! My wife suggested it and didn’t even ask for my expertise! FYI, I have no expertise in the category of fermenting anything that doesn’t include an ABV % attached to it.

So why? I asked my wife why she decided to embark on this adventure and her immediate response was to receive the benefits of the “Immune-Boosting Effects”. Upon digging a little deeper there are other benefits that should “Reduce Blood Pressure” & Improves Cholesterol Levels, both LDL and total cholesterol.

“Studies have shown that the fermentation process increases the amount of nutrients in garlic and makes them easier to absorb by the body. The highest protein content was available after 60 days of fermentation while the highest fat and carbohydrate content was found after 90 days of fermentation.” From “ WebMD, September 29, 2020”

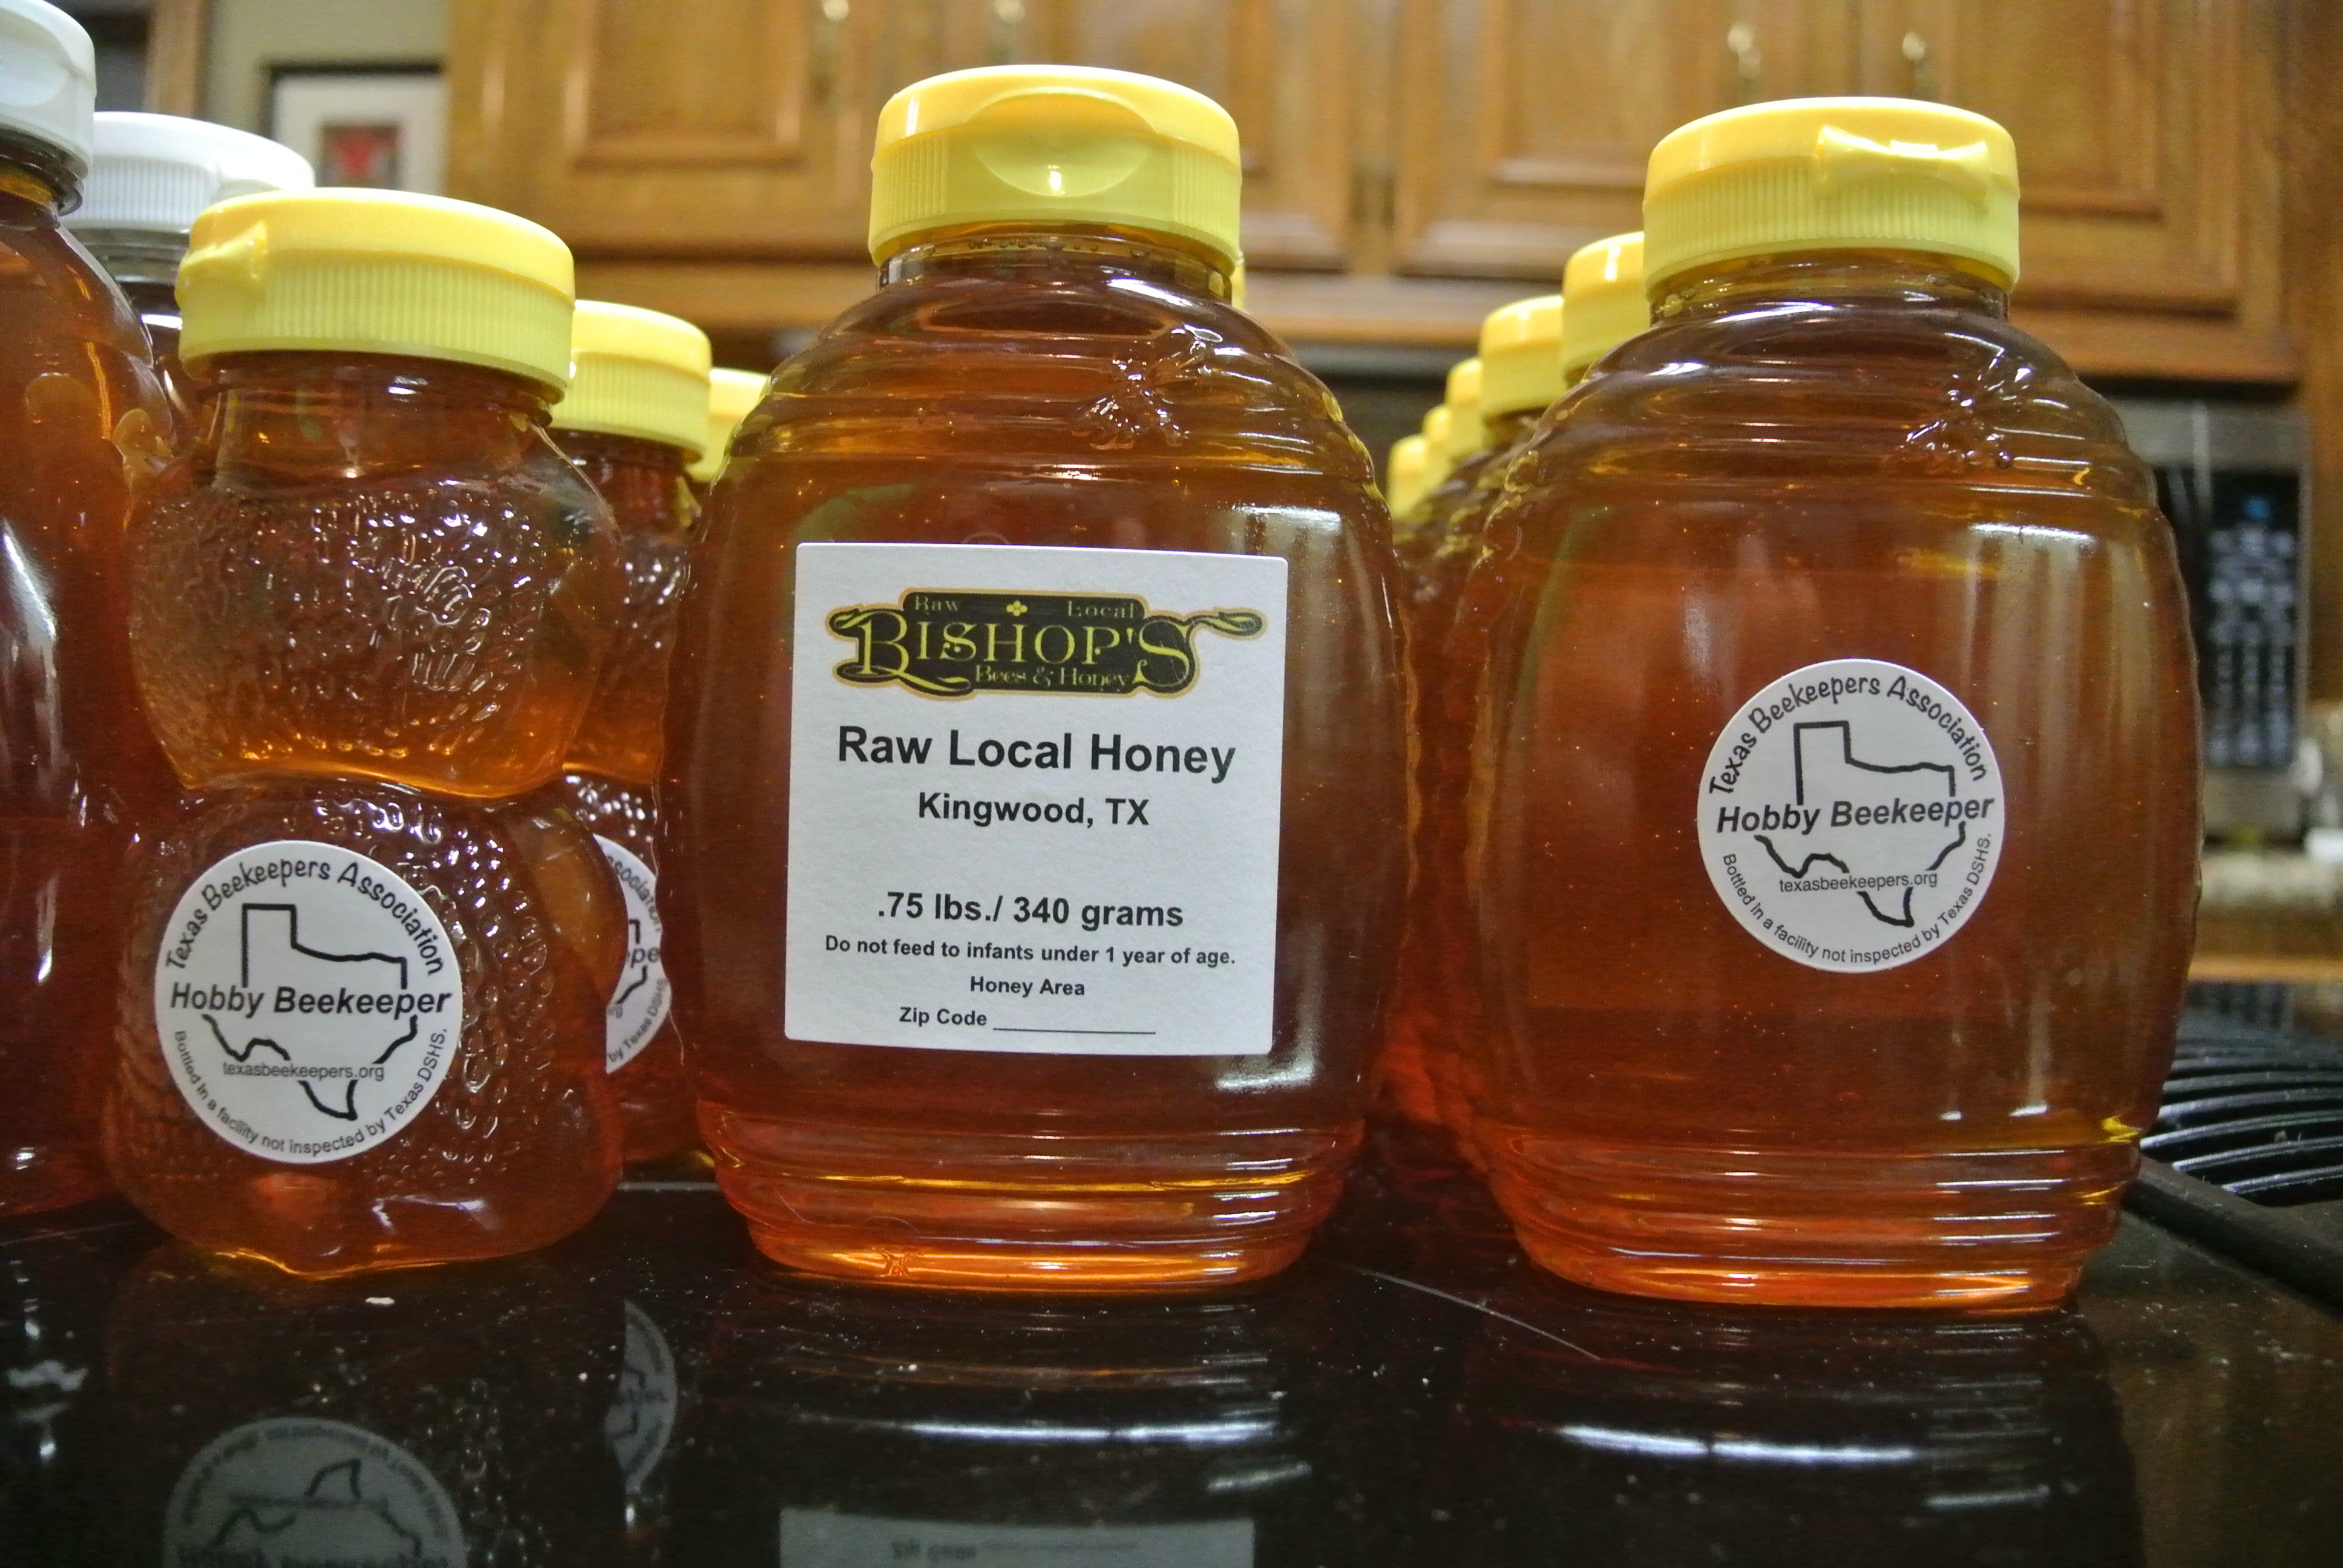
How to go about it? First prepare the garlic cloves by peeling the skin off by lightly crushing them or buy a big jar of already peeled garlic cloves. She opted for the latter. Next, she took a 1/2 gallon jar of raw honey and filled 3 one pound bottles leaving about 3 pounds, or around 8 cups of honey behind. She then loaded up the jar with a whole lot of garlic…..not a very quantitative measure but accurate. As the garlic settled she added more until the jar was chock full, again, not quantitative but the photo below will illustrate the quantity.

Chock full!

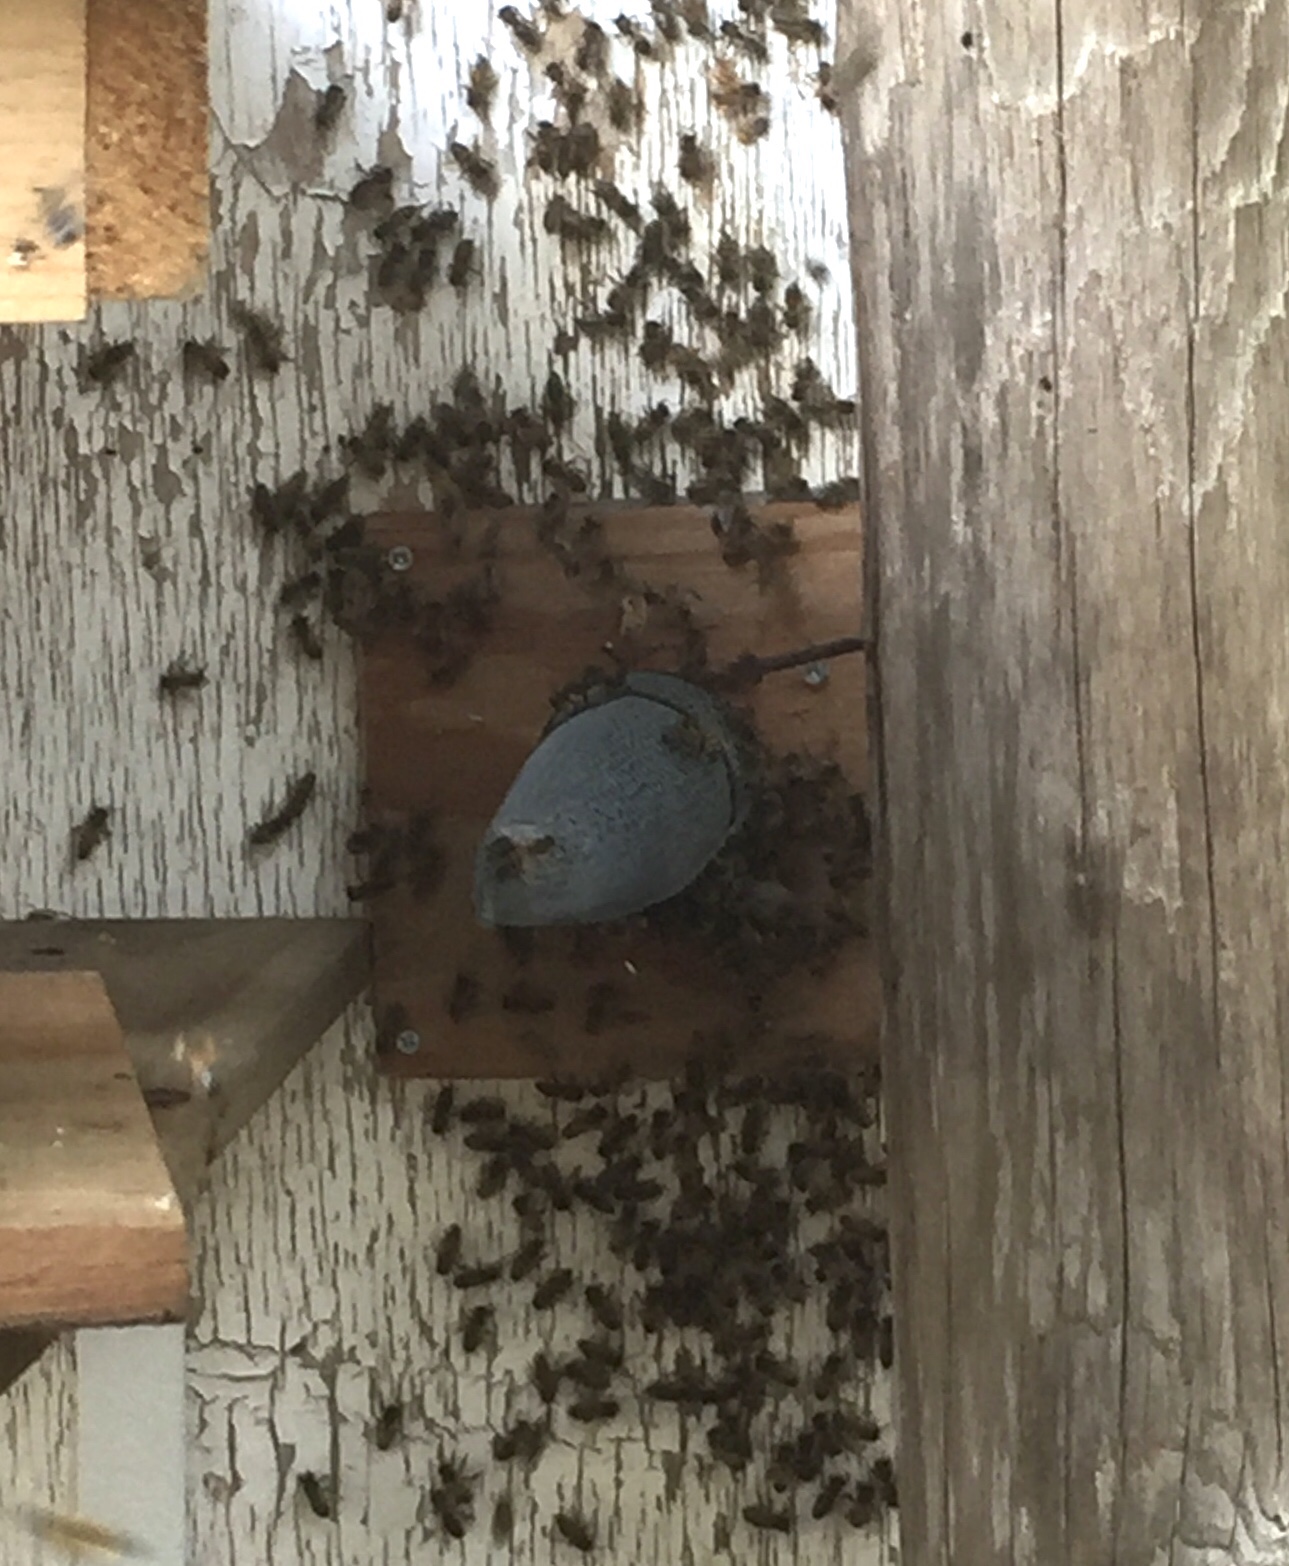
The honey that was used is raw honey…….so what exactly does that mean? Raw honey is best described as honey as it exists in the hive. Raw honey has not been filtered nor heated, has all of the pollen, natural wild yeasts and beneficial enzymes intact. The wild yeasts are the star of the process. As the garlic cloves release water into the honey it becomes wet enough to allow fermentation. Ideally honey is harvested with less than 18% water in order to prevent the yeast activity. In this case we want the % water to rise and allow fermentation.

After the fourth or fifth day of adding cloves up to the chock full point and also flipping the jar over several times daily keeping the cloves covered…..the bubbles were appearing…..fermentation was under way. Now the flipping process includes burping the gasses off……smells very garlicky ….. go figure. Kathy has selected a date about 3 months out for the first taste test, March 12, 2021 when some old guy she knows turns 70……wow! The jar will be stored in a dark cool place once the fermentation slows down. The honey fermented garlic can be safely stored out beyond a year or more according to the researched recipes.

How to use? Just pop a clove to boost immunity response during cold or flu season, this is Kathy’s primary reason for the effort. Cooking, use as a marinade or as a glaze for meats and vegetables. I will attach a link to foraging and fermenting website. Check it out, suggestions include honey fermented cranberries as well as elderberries. I think I will do the cranberries next year prior to Thanksgiving! https://www.growforagecookferment.com/fermented-honey-garlic/

TTFN

Bishop

Mmmmmmmm………..Meyer Lemons!

2 Comments

The Meyer Lemon is not really a lemon. Bottom line, Meyer Lemons are both sweeter and less acidic than a true lemon.

“Citrus × meyeri, the Meyer lemon, is a hybrid citrus fruit native to China. It is a cross between a citron and a mandarin/pomelo hybrid distinct from the common or bitter oranges.[1]

Mature trees are around 6 to 10 ft (2 to 3 m) tall with dark green shiny leaves. Flowers are white with a purple base and fragrant. The fruit is rounder than a true lemon, deep yellow with a slight orange tint when ripe, and has a sweeter, less acidic flavor.”

From Wikipedia.

My Meyer Lemon tree has finally become productive after the hard freeze of …. I think 2017! I thought it had killed my lime tree and it obviously heavily damaged the Meyer Lemon. I trimmed the Meyer Lemon back and ignored the lime tree. As spring arrived the Meyer Lemon was sprouting new growth but the lime was bare. As I ripped the lime out of the ground I saw new growth….. too late – the was likely below the graft. Task done!

Meyer Lemons make a lemon curd that is both heavenly and bursting at the seams with both flavor and calories. Today’s cooking adventure does not involve lemon curd – it involves a first for me…….lemon Jelly. This will be a variation of the Meyer Lemon Honey jam I have made in the past. I have to give credit for the inspiration to Max Moszkowicz….he makes “lime jelly” and I just thought….Why not Meyer Lemon Jelly!

The process creates a wonderful aroma throughout the house. The aromatic lemons were thickly sliced and left soaking overnight in the kitchen. Then the aroma really amps up as they boil for 2 hours!

You can almost smell the aromas emanating from the photo of the boiling pot!

I am posting the recipe which includes the jelly variation. A disclaimer……only the Meyer Lemons are organic in my version……I know that for a fact as I have 100% control over the lemon growing. The honey is also mine, not lemon blossom, but it is local and raw – I can’t guarantee that it is organic………I tell bees to stay away from non-organic sources but I am not sure they pay much attention to me.

Once the jelly is done and allowed to set for a few days I will post a taste test update.

Meyer Lemon Honey Jam

INGREDIENTS 

*3 lbs Lemons (Meyers, of course!) 

*6 cups filtered Water 

*5 cups Organic Cane Sugar 

*1/4 cup Organic Lemon Honey (or other delicately flavored honey like Orange or Clover) 

*6 drops pure Lemon Essential Oil (1 drop for each cup of juice) 


INSTRUCTIONS ~ WASH lemons. 

~ TRIM off ends. Cut into fat slices. REMOVE pits (if making Jelly) 

~ COVER with filtered water. Leave to soak overnight or 7-8hrs

~ BOIL for 2 hours covered. ~ Then STRAIN through a jelly bag. COMMENT: Don’t be tempted to squeeze the bag or your jelly won’t be clear! ———————- 

NOTE: If you want to make Lemon JAM, skip the straining & whir the hot lemons and water carefully with an immersion blender. You definitely wouldn’t want the pits in the mix for jam though! So pick them out.

~ MEASURE juice. ~ ADD 1 cup sugar per cup of juice. STIR to dissolve sugar over low heat. ~ BOIL again until set. (15-30 minutes) ~ FILL sterilized jars as usual. ~ STORE in a dark cool cupboard. Jelly will keep for 1-2 years, but the flavor & color tend to fade beyond that time. 

Recipe from – http://www.figswithbri.com/

One of the web sites suggested that a slice of lemon would enhance the beauty of the jelly in the jars. I thought it would look great too! I sliced up a lemon, filled the jars, placed the jars in the canning water bath, turned around and what did I discover? You guessed it.

They will pretty good on top of some grilled salmon filets! LOL.

Almost looks like a light spring honey as a finished product!

TTFN

Bishop

Additional trivia for those that are curious……

“The citron (Citrus medica) is a large fragrant citrus fruit with a thick rind. It is one of the original citrus fruits from which all other citrus types developed through natural hybrid speciation or artificial hybridization.”

“Mandarin – mandarin orange

Pomelo – “The pomelo is one of the original citrus species from which the rest of cultivated citrus have been hybridized. 

Bee Rescue – Giving Back

3 Comments

I am in the midst of a trap out for a woman that can’t afford to pay the usual $400.00 to do a cut out. My wife made the connection with the woman and I was reluctant because I don’t want any part of the work and effort to do a cut out. I hemmed and hawed for a week, then asked for a photo…….good news, the location seemed to lend itself to a simple trap out. My biggest concern is Fall……once out I will need to baby the bees for them to make it through the winter.

The location- in the wall of an out of service cold box with wood clad external sides. Apparently a knot in the wood rotted out and left a very nice 1 inch diameter hole. The flat surface of the cold box simplifies the process. First build the escape cone.

Start with 1/8 inch(#8 hardware cloth), create a cone with an exit hole a little larger than than a pencil thickness. I drilled a 2 5/8 inch hole in a thin piece of plywood, sized so 6 or 7 inches of the cone protruded through. Trimmed the fat end to create wings, covered the wings with duct tape and secured with staples.

The bees were foraging and calm when I installed the cone.

The wire cone and small escape hole is not well seen by the bees complex eyes.after escaping to forage they return and are locked out. They mill around, they smell their hive and scramble trying to find a way back in. Sometimes there are other access holes and they will find a way back in. Fortunately, I got lucky….just a single entry hole.

Now I need to make them comfortable. I have a short topbar box needing bees and it has 4 bars of drawn comb, some old heavily propolized bars and a packet of queen scent. Today was day three and the escapees have found a home. I just hope that the weather holds long enough to starve out the queen. Workers are bringing pollen in and I will add a feeder shortly.

Love watching the girls work and drawing in more recruits. If the weather was warmer I would be tempted to bring this box a bar of eggs and brood. I really need to get the queen to recognize that no resources are coming in and choose to leave. I will give her a little time and may poke another hole to pump some smoke into the cavity to encourage her to leave.

Update….. 8 days later and the bees have found some rotted out wood at the base of the old cold box back around the backside. I have sealed up the area but will have to wait for flying weather after our cold snap to gauge my success. Looking for something north of 50-55 degrees F to check it out.

TTFN

Bishop

Bees, Berries and Backyards

Leave a comment

Yesterday, Saturday the 7th of April, I drove over to Navasota to pick up 4 packages of bees from R Weaver Apiaries. Saturday was an unseasonably cool and misty day. Surprisingly it was 72 when I left the house in Kingwood and a brisk and damp 52 after the 75 mile drive through the oncoming cold front. I made a decision to wait and hive up the bees on Sunday.

Well, Sunday was a very brisk 44 and prospects for the high at 3:00 was only 55 or so. I waited until 1:30 in the afternoon and drove up to the berry farm. The process went very smooth.

I put the first package into one of the topbar hives. I decided to not shake out the bees and just allow them to migrate on their own.

The package box is leaning against the side with the queen attached to one of the bars. This is a bare hive box and the bees will set about drawing comb for the queen.

Here is her majesty in her cage. The bottom end of the cage has a candy plug. I poked a hole through it with a finishing nail. The girls should have it consumed and releasing the queen in about 3 days.

The second package went into a 10 frame Langstroth hive. Super smooth installation.

The package lying on its side, a can of sugar water is shipped with the package. Once they empty it in a couple of days then I’ll add a feeder. I’m lucky in that I have a full box of drawn comb and that will accelerate the growth of the colony.

The blueberries are plumping up out at Blakelock’s Berries. With our cool weather it may still be 10-14 days before they are ready to pick.

The clumps of berries look so good. If they ripen together it will be easy pickings. The adjacent blackberry patch is loaded with blossoms!

The berry farm was now complete and I headed off to hive a package in a big Kingwood backyard. This yard also holds a very strong Langstroth and a good topbar hive. The big Langstroth is booming, I had to add another super Friday and it was probably a week or more over due! Again, the process went smoothly.

Now over to Mike’s smaller backyard to fill his 8 frame Langstroth. My friend Mike, watched from a short distance away and I was a little distracted. Mike is a talker! I almost forgot to pull the cork and put a hole in the candy plug. Where was my Goo Friend John to keep me focused? Florida, hope you are having fun! FYI John – I was 4 for 4 but….it was close!

Now, Thursday, I pick up 6 NUC’s and will spend Thursday afternoon getting them situated. This could be a very sweet year!

TTFN

Bishop

Gardens, Bananas and Other Stuff

Leave a comment

The bees and some consulting work have occupied my time, keeping me from blogging about my sparse gardening activities. I am still getting dirt on my hands, planting a little for the fall winter garden as well as prepping the bees for winter.

The garden activities have also included photographing and marveling at the growth of my banana clusters. Three clusters of the Manzano and two of the Burro(chunky banana), both Mexican varieties. I suspect the weather will cooperate and allow them to mature before the threat of a freeze heads our way. They do tolerate some cold weather but the freeze this past January was both long enough and cold enough to damage the plants.

A project on my loooooooong hunny do list is/was to clean/organize my garage, a three car garage that does house a single vehicle. Lots of bicycles, hive bodies, beer making equipment, tools(multiples of the same type), camping gear and a bunch of miscellaneous stuff left behind when our children moved out. Why am I telling you this in a gardening blog? Well, I started the cleaning process and I am easily distracted, “Look a butterfly”,…..I found some dried bean pods gathered from several seasons back and rather than toss them I wandered out to the garden and planted them. Three days later they are sprouting! A check with google on the time to maturity for the Blue Lake pole bean variety, 60 days or so, and I might get lucky and have fresh green beans by Thanksgiving….

DSC_0838

Wow, in just three days this bean is leaping up. Looking around the base of the tepee towers, I see several others peeking through the leaf and compost mulch.

More gardening, I have several late summer plantings, a volunteer Matt’s Wild Cherry, a volunteer English cucumber in a pot(producing nicely and an heirloom Brandywine growing nicely. Beets and Swiss Chard are also in the ground hoping to get a good start before it does get cold. The asparagus ferns are starting to die back allowing me time to clear them off and add compost before next spring.

Our neighborhood is having its annual yard sale this coming weekend. I have been drafted to help! Yes Dear! I will help…..and have a table set up to sell my honey and jams. I have 40+ pounds of honey and about 40 jars of jams, strawberry, blueberry and blackberry, taking up shelf space. I will report out soon!

TTFN

Bishop

Cutting Squares – Cut Honeycomb

Leave a comment

My topbar hive was becoming loaded, so heavy, that my poorly constructed hive support legs  were breaking. I needed to both harvest and stabilize the hive. Stabilizing was quick and easy but- we nearly tipped the hive over as one of the existing legs nearly failed completely as I lifted it to supports in place.  Now on to the harvest. 

I built a set of racks, half sheet wire cake racks, to keep the slabs from breaking up into less than desirable pieces that wont make “pretty” squares. The set-up will hold 4 slabs, stacked and spaced so the slabs hold their shape…… in theory! My Goo friend John helped me out. 

It was more or less successful, albeit, a little awkward! I will need to prevent the slabs from sliding around on the parchment paper I placed under each slab to minimze damage to the slabs, i. e., wire rack embedding in the soft wax. 


A nice full slab, beautifully capped, thick and very yummy. 

I filled 14 boxes of 3.25 X 3.25 inch squares of honeycomb. The slab pictured above was thicker than some of the others. The old shaped pieces were squeezed for the honey. 


I was able to get 5 nice squares out of the beautiful slab above! Almost perfect! 


I dropped 3 odd shaped chunks of comb into a pint jar. About 1.5 pounds of honey and honeycomb goodness! 

Looks like I have about $ 150.00 of product at my retail prices. I may be able to pull a little more from this hive but I won’t get too greedy! This hive is so strong and full,  I will more than likely split it again this year. 

TTFN

Bishop

Bees Again

Leave a comment

During the month of April I added 6 new hives installed from the six – 3 pound packages I picked up in Navasota. They are doing very, very well. I was able to start 5 off in Langstroth boxes with already drawn frames. That allows the queen to start laying immediately.

 The sixth box was a Topbar hive. I had two pieces of comb to start them out and I added two fully drawn bars and a partially drawn bar today when I fed the bees. 


The bar above is very similar in size to the two I added today. Albeit, without bees and honey. This should provide a good template for them to draw straight comb and accelerate the queen’s laying. 

One of my strong hives is really flying, buzzing and working hard. Below is a slo-mo video, starts and ends full speed! Love that iPhone feature! 


I could spend hours just watching the girls coming and going. 

TTFN

Bishop 

Yummy Late Season Surprise

5 Comments

I went to check on of my 8 frame garden hives a few days ago and had a pleasant surprise. I had left a medium super on top the two brood boxes as this hive seemed to be a little slow this spring. Wow, I opened it up and it was wall to wall of beautiful capped honeycomb. The brood boxes were well filled out so I figured I should provide some room for the ladies! 
I pulled 4 frames of beautiful honeycomb. I replaced them with 4 four frames of drawn comb. It seems that this urban setting still has some nectar flow. I haven’t fed this hive at all this summer. I added a feeder just to help them out. I will cut 3.25X3.25 inch squares from 2 or 3 of the frames and squeeze the remainder. They look so nice. 


A garden update, bananas are still my proudest success but the Armenian cucumbers have grown beyond belief! They are essentially a melon, so even the large ones are edible. I am surprised that my relief gardener missed picking them at a more manageable size. 


Please, no rude comments! 

The Poblano and Serrano peppers are still thriving. I replanted some tomatoes for the fall and added some more pole beans. Would love to have some relief from the heat and humidity.  It was 78 F at 5:45 this morning and only 93% humidity! 
TTFN

Bishop

Bee Adventures

6 Comments

Yesterday morning, yes too early for the bees  (mistake one), I went to check on and maybe harvest some honey from my original top bar hive. It has been intolerably hot lately, hot enough to make the wax comb very soft. This topbar hive is my gentle hive. See photo below;


I normally just smoke them a little and wear my veil as seen in the photo! Today I decided to gear up and wear my white overalls, gloves and the above veil.

Mistake two; The bees were agitated from the “git go!” No problem, I had smoke and protective gear. It was 8:45 in the morning and the top bar hive was still in the shade. Probably a thousand or more clustered on the outside and little evidence of foraging…..

The veil has long strings and the trick is to make sure that my collar is flipped up and the veil secured without gaps. Mistake number three, I failed to check the collar and the fit. All of a sudden I feel air from beating wings on my face.

“John, are the bees inside my veil?”  I ask.

“Yes, quite a few”, he responds.

I start heading out of the area and I have company both inside and out. They seem to be pissed at me and ignoring John. I took 6-7 or more in the back of my head and a few more on my forehead.

I wander back to my Suburban, licking my wounds and suit up. John is putting the bars back in place and the top back on. I return to take a peek at the other topbar hive and the two Langstroth hives.

The 8 frame is healthy but growing slower than my other three 8-frame hives. The 10 frame hive is doing nicely with a queen hatched from my original top bar hive. FYI,  my top bars sized to fit in my Langstroth hives. The second top bar hive was also cloned from a queen cell and a few  bars of brood, pollen and honey from the original hive.

Ok, I have orders from the sales manager (my wife for some cut comb and I know where to go. I have two 8 frame hives nearby and I have been anxious to harvest them. I pulled 11 frames, 3 beautiful ones for cut comb and we extracted the others.


I wound up with 12 – eight ounce squares and I also boxed up all the trimmings. I let them drain a bit on the rack before boxing them up. I love cut comb! I also wound up with over 30 pounds of liquid honey. Two more hives to visit in the next day or two to  on the honey production.

TTFN

Bishop

Gathering the Honey

13 Comments

I have been less than diligent in keeping up with my blogging. This Back Yard Farming effort has 3 or 4 posts in draft form waiting for me to get off of my butt and finish. I have also given equal procrastination to my Beer Blogging – that’s only fair isn’t it? So to catch up I am going to go in a bit of a reverse order, subsequent posts may be older but I will feel better if I clean-up my backlog, regardless of how I approach it.

So let’s talk about honey. My first ever hive is located further from my house than I would like but in the process of managing it I have made great friends. In addition I have created at least one and maybe two new beekeepers. Here is the synopsis;

August of 2015 while on a work assignment in Richmond, California, my wife phoned and read a letter from our HOA. Essentially it said, an unnamed neighbor has complained about my hive (it had been in my yard for 18 months already with no issues). They were utilizing a “protective clause” in the HOA covenants gave me 7 days to remove it. I am 1800 miles away and already burning days and I won’t be home until the deadline comes and goes. I am in a quandary! Mark, one of the managing engineers for the client overheard my lament and bailed me out. Mark has a piece of property north of Kingwood on a ranch just outside of Franklin, TX. His neighbor, Johnnie, had expressed interest in keeping bees, with a mentor of course. He made a call to her and I committed to relocating my hive. I did call the HOA and unfortunately, it is an insidious form of government with unbridled power. I do believe that the HOA is comprised primarily of people who had been bypassed as “Hall Monitors” in grade school. Nuff said!

The hive has flourished in the northern location. My best friend has now become a beekeeping assistant of sorts, i.e., whenever he has free time that coincides with one of my bee adventures, he raises his hand. I think he really just enjoys road trips and biscuits at the breakfast stops on the way. Actually, it has become more than that! I am still a novice and do make a few mistakes but, my “Goo” friend John is an internet surfing fool. He has learned a lot about beekeeping that aids me in a number of ways. Thanks John.

Beekeeper number two is Johnnie, she hosts my hive on her property. Her enthusiasm is boundless. She has attended two beekeeping schools, the last one was this past April in Brenham, TX. We actually sat through a couple of presentations together. She now owns two hives and the bees in them. I will attempt very soon to split my original hive…..should have done it in March….still learning! Mark now has two hives across the road on his property, one of mine and one he owns. I have 5 and soon/maybe/possibly to be 6 hives to manage up near Franklin, TX.

Saturday May 7th John was free and we headed north. It was a multi-objective mission. First order of business was to check on the four NUCs installed at the end of April and add some sugar water to the frame feeders. Secondly we were going to check on my original hive and see how they had progressed in the super I added nearly 6 weeks ago. I had a good idea from the peek I took when I installed the NUCs at the end of April, but did not look at the super below it. Good news, 9 fully capped frames of honey on top and 4 very good looking ones below. The third order of business was to extract honey. I brought a three frame extractor up with me and we got busy…..busier than I have time to explain here….we will do better next time and I will leave it at that.

I left 2 quart jars, about 6 pounds, for Johnnie and Mark. I brought the bucket home with about 19 pounds of honey. I let it sit for a week to let the bubbles rise to the top and the micro pieces of capping wax that fits through the 400 micron filter to rise to the top. It is not harmful at all but for aesthetic purposes, I don’t want it in the final bottled product. That left a little over a pound in a quart jar for my use! 17 – .75 lbs. bottles, 4 – 1 lbs. bottles and 6 honey bear bottles with about 6.8 ounces of honey in each.

DSC_0151DSC_0149

The labels will also include the zip code of the location of the hives. This batch was 77856, Franklin, TX. I have had this idea  for quite some time to really zero in on the “Local Honey” aspect by zip code. At the bee school in April, I took a marketing class from a gal named Tara Chapman. She stresses LOCAL in her approach down to the neighborhood level in the Austin, TX area using the term – “hyper-local”. My aim is similar, I have hives in area code 77339 and 77345. Hopefully soon across the river to 77346.

Check out Tara at – https://twohiveshoney.com

Honey work for the next week or so? I have built 10 supers for my 8 frame hives, that means 80 – 6 5/8 frames with foundation must be built. Then I need to build at least 10 supers for my 10 frame hives…..another 100 – 6 5/8 frames needed. I suspect that after building that many frames I may be able build them in my sleep! Another trip up north to feed bees and check on their wellbeing.

TTFN

Bishop

Older Entries

%d bloggers like this: