I have been diligently making sourdough during our social distancing exercise and I am getting pretty good at it. Yes, I am patting myself on the back. I searched the web for a simple and straightforward sourdough recipe utilizing the spent grains………. I’m a simple guy and I got lucky – finding a simple recipe within my skill set! See below.
1 cup sourdough starter
3 1/2 cups all-purpose flour – I used 3 and it was just enough.
1 cup spent grain, still a bit wet
2 teaspoons salt
1 1/2 – 2 cups water – varies depending on how wet the spent grains are.
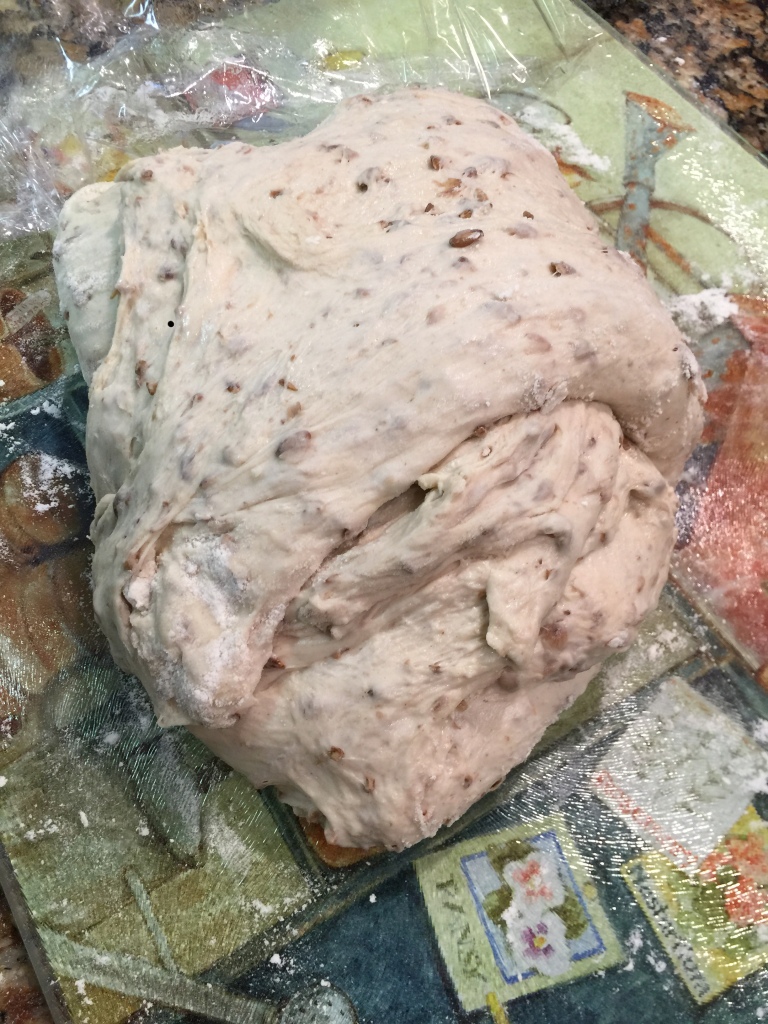
Combine the starter, 3 cups of the flour and enough water to allow the dough to just come together, in shaggy strands(I didn’t know what that meant so I googled for images). Knead about 5-6 minutes( I used dough hook) and let rest in a bowl, covered with a towel. Keep in a warm place and let sit for 1 hour. Fold in the mash with your hands and dust on the remaining flour as you combine it to help keep dough from being too sticky( I used my stand mixer and a dough hook). Form dough into a long, oblong loaf (or put it in a prepared loaf pan, I had a 5X9 loaf pan, sprayed a little Pam on the sides and coated the top of the dough with flour. I did a couple rounds of stretch and fold like do with my regular sourdough prior to the final rise. Let sit in a warm place covered with a towel for an 1 hour or so. Score deeply before placing the oven.
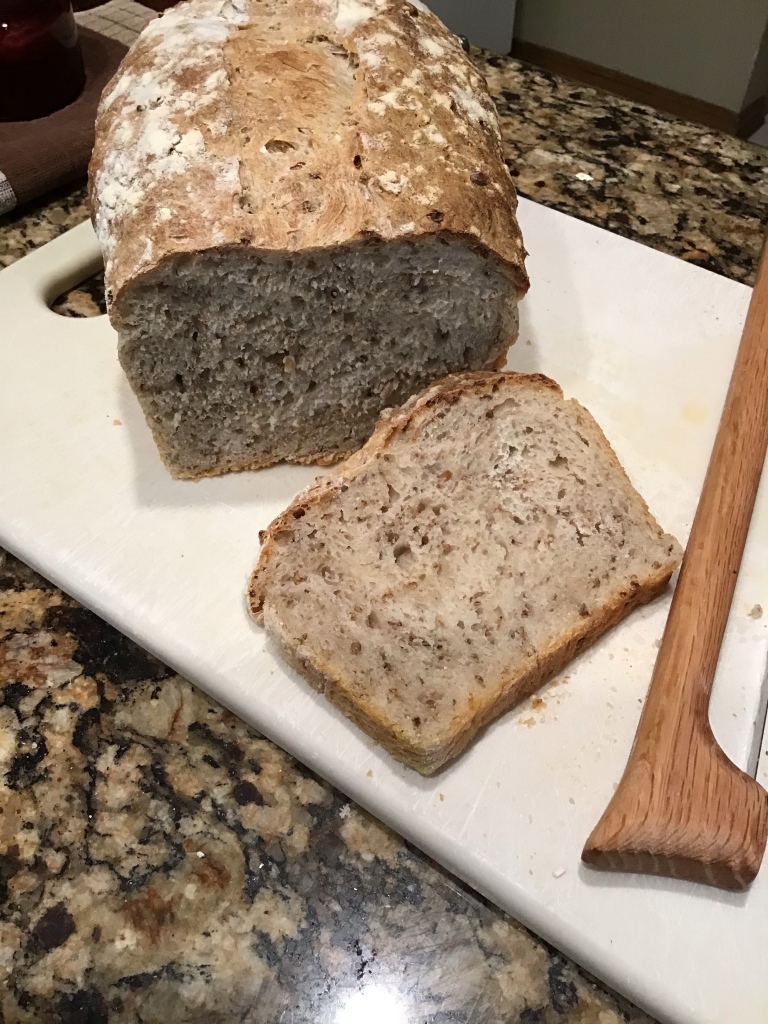
Preheat oven to 450 degrees. I used a big pizza stone that was also preheated. Bake for about 20 minutes, monitor, I used a thermometer to chick internal temperature. It took an additional 10 minutes to reach 200 F. Remove and let cool on a rack for 10 minutes before eating. My wife didn’t want to wait…… I held my ground and gave her the first warm slice with butter. She forgave me!
If you watched the national weather news for the week of April 29 – May 5, you may have heard bits and pieces about the flooding and storms in Kingwood, Texas. Lots of rain, both here in Kingwood and much more rain north of us into the West Fork of the San Jacinto River drainage and The East Fork of the San Jacinto River drainage. In essence flooding Kingwoods from 2 directions and 2 different watersheds.
The Northern portion of the lake is fed from the East fork of the San Jacinto River and from the west by the west fork of the San Jacinto River. Drainages for the rivers are from two distinctly different areas. The west fork feeds into Lake Conroe which does provide some retention but Conroe was full and the gates to the downstream portion of the river had to be opened…..causing a big rise. The east fork feeds unfettered by a dam directly into the lake.
Thursday May 2nd Kingwood received 7 inches of rain while the drainage feeding Conroe may have received 20 inches upstream and up on the East Fork, experts predicted that the river may crest at nearly 15 above normal. One potential victim of the high water may bee the apiary that I have up on the north side of the lake. The property owner sent me a video with the two hives with their entrance’s covered by a foot of water and more to come. ( post flood note, one survived the other did not.
Let’s talk about the storm that hit Kingwood. Thursday morning May 2nd it was a wild down pour. I know first hand as I went canoeing down Kingwood Drive to my morning urology appointment. Made even wilder by the fact that my truck was in the shop and I drove my daughter’s Kia Soul, not really a canoe. I was afraid it would float away as I navigated around multiple flooded out vehicles on my way. Poor decision on my part but……Her car did not drown, but it did get a soaking. While I drove, my daughter and her cats were house bound during the 7 inch down pour. Powerful lightning and thunder display all over Kingwood and right over out house. Around 9ish the house rattled and shook with a very, very close lightning strike……scared the cats as they scurried off upstairs and woke my wife from a dead sleep. But…….no one knew that our tree had been hit.
Now, 2 days later I am out in the backyard and I am seeing odd big strips of bark scattered across to yard and wondering where the Hell did they come from. That must have been an odd wind I though. I started gathering them up and it dawned on me what may have happened. In 1971 I was drafter into the Army….great lottery number for my year, the number was 28. So, February of 71 Uncle Sam owned my butt for at least 2 years. My secondary school was not chosen by me, it was just luck I guess. My drill sergeant encouraged my to pick something, but I just shrugged my shoulders. He told me I was 11 Bravo material, that is the military MOS designation for Infantry. He and I were both surprised when orders came in for me to report to Fort Lee Virginia as a trainee for 92 Charlie 20, Petroleum Products Analysis Technician. Oh well.
One afternoon on the bus out to the training lab we had an awesome thunderstorm, rattling the window of the bus. Rain coming down sideways at 50 mph and small hail bouncing off the glass and on the road. All of a sudden a blinding flash 30 feet off to the right and an immediate massive clap of thunder. I turned my head just in time to see the lightning hit the top of a tall tree and saw a 2 inch wide strip of bark being peeled of from the tip of the tallest branch all the way to the ground in a single piece. Now, the memory caused me to get the source of the bark strips scattered across the backyard. Looking up I saw a tall branch showing a long missing strip of bark. My eyes followed it down as it twisted to around the front side of the tree and terminated about 10 feet off the ground.
Gathered up a bunch of strips and shredded pieces. I scanned the yard and saw some larger pieces that had land 25-30 feet away at the base of our fence. Likely thrown hard against the fence and dropped there.The terminal end of the lightning ripped strip. I wish I could have been there to see it happen. It would have been an incredible sight. Albeit, maybe a little too thrilling to have been standing close when it happened.Some of the larger pieces that got thrown across the yard and up against our fence.
A couple of garden notes, tomatoes are big and ripening, sugar snap peas are shriveling and dying in the heat, cucumbers are climbing, potatoes are being dug up and beets, just a few, are ready to harvest. Two honeybee swarms captured in the backyard, the wet wet and humid weather has slowed the bees down drying the honey out so they can cap it. Mother Nature loves to throw curves.
March 27th 2021 I witnessed my first ever swarm arrival. I have been the recipient of swarms taking up residence in one of my boxes, whether is be an actual swarm trap, designed purposefully to capture swarms, an old hive body or a water meter box. On this day I heard and saw tens of thousands of bees in the air and descending onto and into my swarm trap trap box. It would be an understatement to say that I was in awe. With the volume turned up you may actually hear it in my voice.
During the swarm arriving event and throughout it’s duration the bees are non aggressive. They have gorged and loaded themselves up with honey before leaving the old hive with just one goal…….build a new home for the queen to lay eggs in and to grow the colony. Swarming is nature’s way of growing and spreading the colony’s genes. It is usually the old queen that leaves with approximately 50% of the workers. Left behind are the other half and most likely, a queen ready to emerge from a queen cell. There may be many queen cells but the first to emerge kills the others and then prepares to go on a few mating flights. If she is successful she will return mated and having stored the semen of 15 to 20 drones, male honeybees. The drone is a sacrificial portion of this life cycle event. Drones mate and die quickly in most cases. Mating is usually done in a drone congregation area at a distance that reduces the likelihood of the queen mating with a drone from her own colony, thus ensuring diversity and reducing the chance of inbreeding.
My first witnessed swarm arrival and luckily it was in my own backyard. I am standing in the middle of the swirling bodies, tens of thousands of them, T-shirt, shorts and Crocs with no socks…..another story or two there.
One of the amazing things to see after the swarm arrives is the collective action with the workers once the queen is inside the box. Here the queen’s pheromones are fanned by thousands of wings spreading itout across the yard like a sirens call. Once her pheromone is spread they come running……literally marching in to hive at what appears to be a dead run. The “march” is another spectacle that is truly amazing to witness.
Bees marching into the swarm capture box not long after arrival.
I will share more of my experiences with my bees with all y’all.
“Looks like bee season is starting early. Early bee season means unmanaged hives, both wild and commercial will cast off swarms. I am a beekeeper of wild/feral bees…….yes I may be a little bit wild, ……My bees are feral, bees with “unpapered” pedigree. They may have an abundance of European pedigree, Apis mellifera. Bees in the wild may have started of as Apis mellifera but as they became feral, the wild queens do not discriminate and will mate with any drone. In fact, on her several mating flights, she will find a drone congregation site filled with many thousands of drones of questionable ancestry. The benefit is diversity and the down side is, Texas in the south half of the state, has lots of drones with Africanized genes.
Why is that important? Africanized bees were developed in Africa…..go figure huh! They were a cross between Apis mellifera and the East African lowland honeybee. They were more productive…..yet more defensive. Brazil imported some and guess what? Twenty-six swarms escaped and began working their way North. California got a surprise dose of the Africanized bees in 1985 before Texas or any other location in the US due to a shipment of oilfield equipment holding an undetected colony of Africanized bees to my old stomping grounds near Bakersfield California. The Africanized bees arrived in Texas in 1990 and were detected around Tucson Arizona by 1994. Northern beekeepers should dodge a bullet as Africanized bees do not care for the cold weather.
I do have some spicy bees but, knock on wood, nothing so spicy that I can’t safely work them. Africanized bees tend to spin off swarms more often and will take up residence in smaller cavities, i.e., like water meter boxes. They can be very productive, so I just tend move carefully/slowly, well protected and respond at the first hint of the alarm pheromone…..My first year of beekeeping taught me a good lesson and was way to slow to respond. Nine years later I have not repeated that mistake.
Guesstimate 70-80 stings to head and face…….long story…….I will tell it one day.
My 73rd birthday was the 12th of March and a day later the swarm birthday gift arrived. They were unexpected, they chose an empty upside down box and yes, I was not quite ready to receive them……very quickly I rounded up gear, empty box and set the hive box up to receive the bees. I will tell you that swarms are very docile, very true……but, I am such a handsome lad with a long memory so I always wade in protected. Well almost totally protected……In the video link I am wearing Crocs with no socks. I did dance …..backwards, relatively quickly, at a couple of points….No stings…….so see what you think…..I may edit this in the future….
Don’t laugh too hard. The receiving hive body is in place now and I gather them up. My wife and young grandson were in the yard watching me unprotected and SAFE. My Daughter in Law and younger grandson were watching from inside.
This swarm was rehomed to my son’s good friend Clayton and his wife, Aurora. Clayton videoed the arrival unsuited and when I let the bees out they greeted Clayton rapidly.. No stings but they made it clear he needed to move away. I had a good laugh……..
Clayton is a big ole boy but still moves pretty damned quickly.
I hope to have a new swarm report and a garden update very soon……
I hope to get a jump start on prepping the garden for a productive spring season. My 2023 season was OK but I let the garden get away from me a bit and grow “kinda” wild. My efforts to grow cucumbers and green beans were a total bust but the early part of the growing season was good for tomatoes and beets but not much of anything else. I have the beets seeds in the ground and sugar snap peas are coming up nicely. So………I spent a little time today prepping some good, well rotted and beautiful compost to properly feed the green babies.
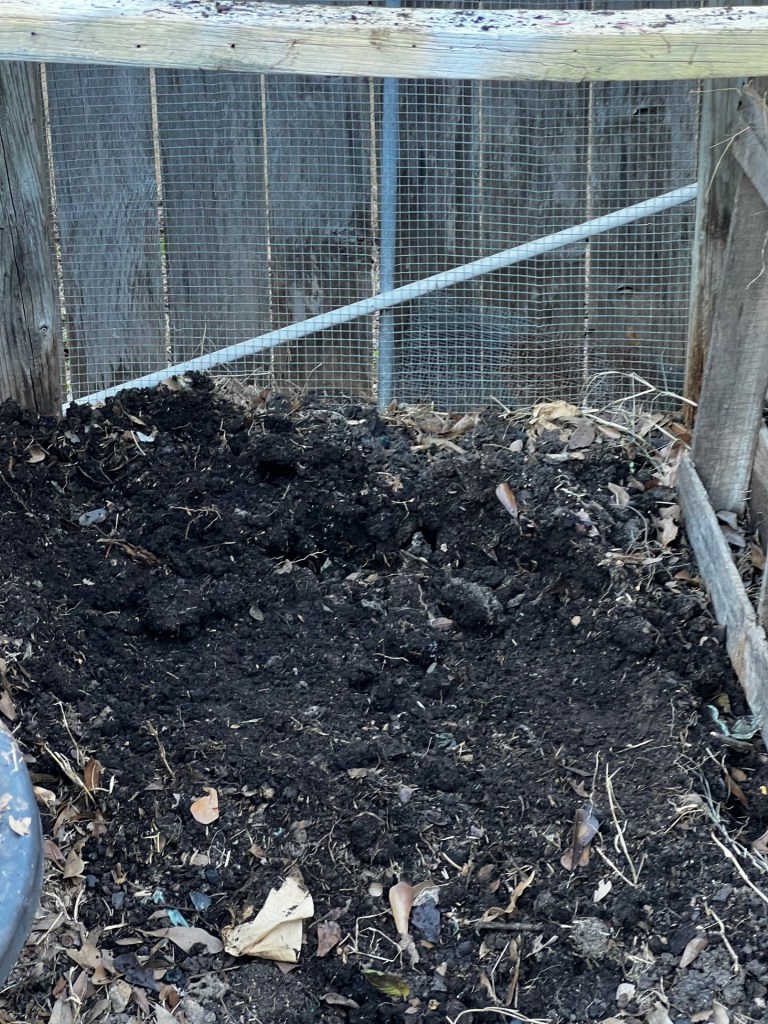
My two compartment compost bins are set up for a lazy man’s compost pile. Most of the wood used to build it came from mine and my neighbor’s fences having been blown down by Hurricane Ike in 2008. I have since added some pallets as dividers and as fronts to hold the compost materials in check. We were dead center in the path and eye of “Ike”…..and it was amazing, The eye was 60+ miles wide and since we were dead center…….it was eerily quiet for well over and hour before the back side of the storm hit….my wife kept asking if the storm was over……..no Hun…..just wait…….So the 100 mph pinecones hitting one side of the house in the beginning were now being launched at Major League fastball velocity to the opposite side!!!!!! I did step outside in the dark looking up and watching for awhile as the eye passed…..I can scratch that off my bucket list…..actually was never on my bucket list but I can lie a little …..LOLLazy man’s compost…….I had transferred the top layer from this bin, not much decomposition yet, over into the right hand bin/compartment until the dark and mature compost in the bottom was exposed. “Lazy” in that I don’t turn the pile except once per year…..and that time is now. I pull shovel loads of dark rich compost and dump them into a 1/4 inch screened box and shake, shake, shake, until it is all uniformly crumbled and ready to feed the babies I recently planted. The plants fed with good compost are really very happy and show great growth. The finely screened compost is shown here in my wheelbarrow. I will spend bits and pieces of time going forward shoveling and sifting until I get to the bottom of this compartment…….It won’t be one of those projects where I will bust my ass and do it all in one weekend……..Nope…..it will be spread out through the growing season. The right hand bin is 4 feet by 4 feet and almost 4 feet deep! Holding potentially 64 cubic feet…..more than two cubic yards of material…..
There is still potential for another freeze but I have my fingers crossed it won’t be a hard freeze with much, if any, duration. End of February is my target this year to get tomatoes into the grounds. Bold yes, but why not…….And dammit I want some cucumbers too. I am counting on my compost to provide the growth essences to create lush and satisfying plants.
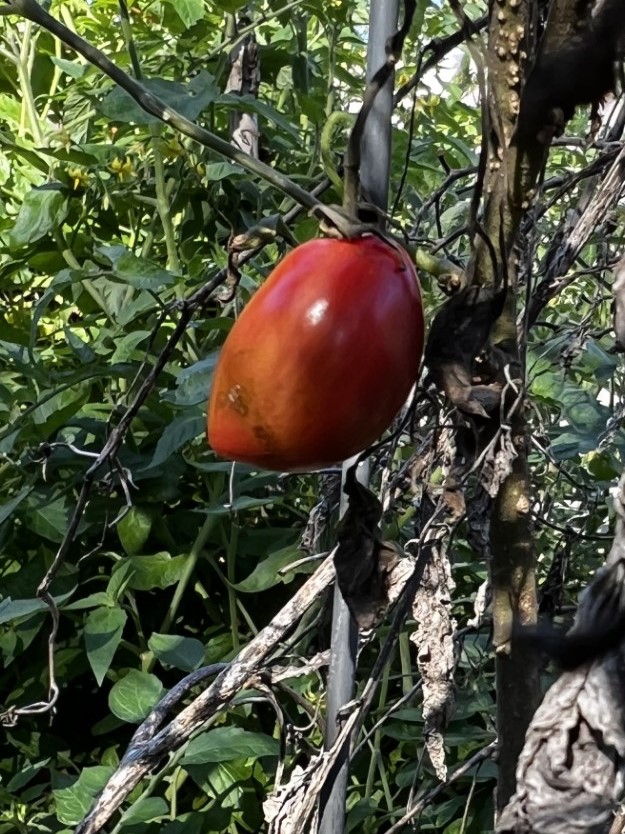
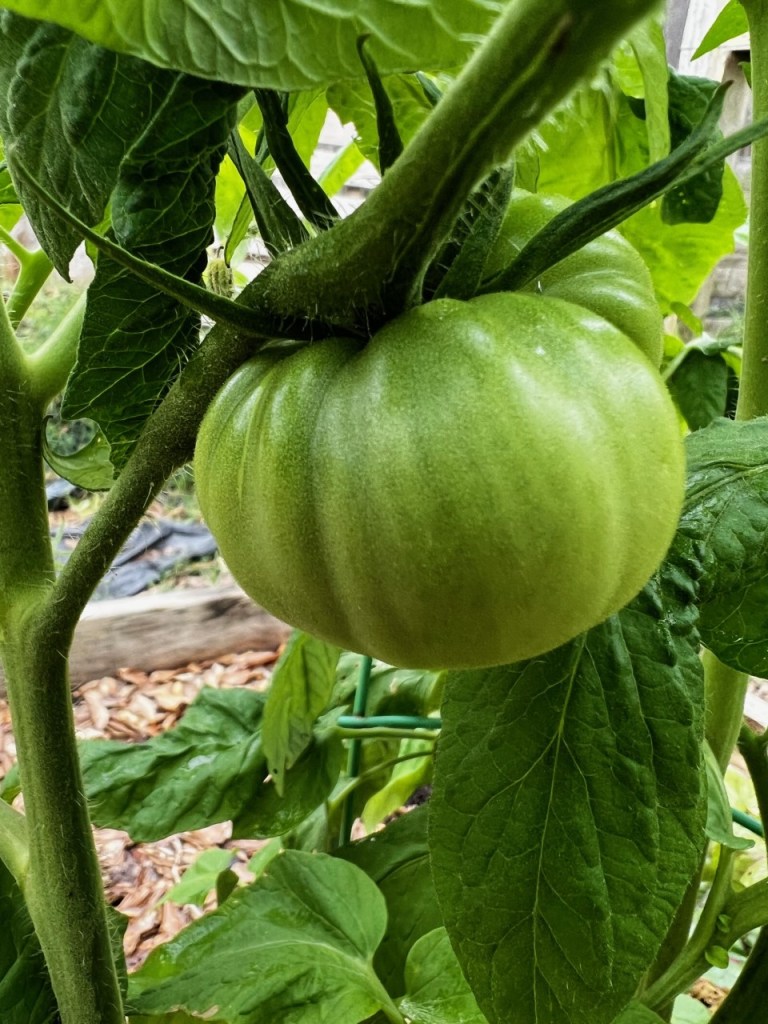
Quite a history here. I find it interesting that in the last 70 plus years the long duration between freeze dates is a year or longer, with 1932 being over a 2 year duration between freezes…..Hmmmmmm!!!!! Global what?????A green SweetieA red oneHopefully soo to ripenNot holding my breath to see these set and bare fruit!!!!!
It won’t be much of a harvest but it does make me smile a bit. My lemons are doing well, beets are coming up and I will be planting more of them. The bees are flying when the sun hits the hive and when above 50ish degrees F. I have feeders on the front of the boxes but it is too cool to feed syrup. I am using sugar blocks that I make, about 1 pound each, and place them on top of the frames in the top box. Recipe…..6.25 pounds of sugar, 1 cup apple cider vinegar and packed into a 9X13 jelly roll pan. About 3 pounds per pan. Dehydrated and when hard and firm they are ready to go. Typically they last about 1.5 weeks. I do grab the back side of my hives and heft them…..If I grunt a little bit as I lift I am happy with their weight and won’t worry about them starving…..yet…..
Pretty active…..and surprisingly they are still finding pollen but I missed the chance to photograph it coming in. Trust me……a nice yellow pollen…..no idea what flower though…..Some dandelions are in the area. This hive and the one adjacent to it will be bartered and delivered to a friend this week end….Bartered for a day or two guided fishing ……, Thanks Clayton and Aurora. Yee Haw, the Redfish are biting.
Actually, she did let me have a brief, early tomato season. Earlier in the season I had bragged on two varieties that usually do not let me down in the summer……Well, Mother nature had the last and heartiest of laughs. Prior to the weather becoming brutal, The Brandywine and Cherokee purple were early season winners, the Celebrity began to fade as June heat and drought pressed down. The Juliet and Sugary I had high hopes for but………… I should have suspected Mother Nature had other plans for our summer tomato consumption!
I also tried direct planting cucumber seeds, for which I have always been overwhelmed with fruit. This twisted and brutal summer failed to allow cucumber seeds to sprout. I went to plan C, and planted cucumber seeds in pots and in the shade on the patio, thinking I may have got lucky……..Ha, ha, ha she said!!! I did manage to get several transplanted to the garden and they appeared to thrive and climb the wire supports but then, the evil laugh kicked in…..Maybe a handful of female flowers began to develop fruit only to have them shrivel up and become compost material……Brown material and not green material. I tried to fight on but ran into questions from the CFO wondering if the high water usage would be offset by fruit and veggies….I hung my head and said no. As a gardener it hurts to see plants wilt and die….Wilted and dying plants are the norm this summer!!!!! Everywhere you look.
I bought my friend John a nice weather station a few years ago as a combination December Birthday and Christmas present. I am posting his monthly weather reports for June, July and August through the 30th. It is a grim reminder of how fickle she can be,,,,,,,you know who I am referring to!
Now to add to my pity party, my bees had a good spring and early summer season. I finished harvesting in mid July and I was calling Mother Nature a few unkind words as I was suited up and soaking wet. My challenge was and always is, staying hydrated. For 2023 we were blessed with around 500 pounds of sweet honey. So, a bit of, I won’t say revenge, but maybe some toleration of “HER”!
Fingers crossed for some rain, reduced water and electrical bills and a tempering of the heat. I do want to get something in the ground for the fall. Sugar snap peas, beets, carrots at a minimum. My Meyer Lemon tree is still holding onto fruit, but that could change.
When it comes to rescuing honeybees I have decided to leave that for the younger keepers and those more willing to work off ladders and willing to suffer the Texas heat. I am willing to go round up a swarm out of a bush or off the ground or, as in this post, a low to the ground trap out opportunities. In this case the only entrance was at the base of a tree and lent itself to a relatively straight forward trapout effort for me.
So, what is a trapout? I had to laugh at my research for this blog post. There was one site that referred to the process as “glacially” slow…..isn’t that the truth. Three to four weeks is a likely time frame. It requires that all entrances to the colony inside whatever it is are reduced to one single opening. I had one several years ago before I narrowed down my acceptance of such jobs, that went on almost 6 weeks and about $40.00 of caulking to seal the roof line access gaps. Yes, I got them out, but no, I did not capture them. Success too many times is minimal but here in the south, chances for success are much better.
How did I do on this effort? I was very pleased with my one-way escape plan. The cone was as perfect as I have ever built. The tree lent iself to the process with it’s low opening and broad trunk base making the escape truly one way. Using the 1/8 inch hardware cloth is sized so bees cannot squeeze back in and the cone long enough and tight enough at the escape point to prevent a return to the colony in the tree. Returning bees are guided primarily by scent and prior orientation flights for the tree’s access hole. The cone screen material actual makes it impossible for the retuning bees to see the 3/8 inch escape opening.
First things first. I brought out a 10 frame deep box with 4 or 5 frames of drawn comb and the rest were undrawn frames with foundation. In a classic trapout I could have opted to add a frame of brood and nurse bees along with a queen but chose not to….It was a long shot, but I hoped I could get returning foragers into my box, adding nectar and pollen while awaiting the queen and attendants to be starved into leaving and taking up residence in my box.
I measured the tree base and cut a screen big enough to more than cover the hole with plenty of lagniappe to adequately force the bees out through the cone.My damn near perfect cone – pat myself on the back!!!!!!Box set near the base of the tree and prior to adding the escape.All set and after an hour or two observing and 2 beers of some sort, I was pleased to see that bees could only escape through the cone and not find a way back into the tree.
Now, several week later I went out to observe. Clayton, the property owner, informed me that there has been no activity escaping through the cone for quite some time. I drove out to see what was going on. There were maybe a few hundred bees in the box, some the drawn comb was wet with nectar indicating that the escapees had been working but not any evidence that they had tried to set up housekeeping. Then I noticed some small hive beetle larvae slurping up nectar on some of the frames but not to the point of sliming and ruining the comb……Now scramble time for me. It became obvious that the colony did starve out and likely absconded. The few bees remaining were either stragglers or robbers. I did have a very nice swarm captured several weeks earlier and they seemed to be growing fast. I placed them into a 5 frame box and prepped them to travel and take up residence in the box at Clayton’s place. I should actually say, at Clayton and Aurora’s place.
The swarm capture from several weeks prior…..healthy size swarm.Feeder in place and entrance reduced to help the colony manage potential robbers.
I added the previously captured swarm and purged the few wet frames and those with small hive beetle larvae with good frames. Now time to seal the hole in the tree, otherwise the scent will be a magnet to any bees looking for a home. Success in some ways, maybe not so much for the colony that absconded, summer is not a good time for bees to swarm……summer in this part of the world may be short on the resources they need. I needed a home for the swarm I caught so that is a win here.
My small varieties of tomatoes are kicking in. The larger red ones are called Juliet and they do really well throughout the hot and humid Houston summers. The small ones are called Sugary and yes, they are sweeter. Hopefully they will do well through the summer. None of large varieties have started to show color yet but, thankfully, even with the abundant rains recently , they show no signs of cracking or splitting. The 25 cent piece in the photo is for reference on sizes.
Juliet and Sugary bunching type of tomatoes. Both are yummy. The Brandywine, Cherokee Purple and Celebrity will ripen in the next week or so. My cucumber support. I used 3 panels of 4″X7″ reinforcing wire used in pouring driveways. Cattle panels are used by some people but they are heavy and pricier. Market More variety planted here. The fourth panel I used to create an arch entering the garden. I have planted Blue Lake Pole beans here and they climb like crazy. Should also make it easier for me to harvest. I will promise to provide some follow up as the grow.
I added 3 mounds for some Early Yellow Crook Neck squash. I haven’t had much luck with summer squashes in the past here in Houston but have not tried this variety. Also planted Mammoth variety sun flowers and they truly are Mammoth. Sometimes rising more than 10 feet and the seed heads are maybe 15-18 inches across. The bees adore them and our local squirrels do too…..LOL
I do have potatoes to harvest in a couple of weeks. Red potatoes and some Yukon Gold. I will clean out the beets…..some of them have become huge. I will see if they are worth salvaging. The sugar snap peas are done…..hopefully I will do better with the Fall plantings of them. The Meyer Lemon tree has set a good number of fruits and another round of blossoms has just appeared….not sure about them but we will see. Honey harvest is still 2-3 weeks away. We have a very long waitlist and they are our faithful buyers, I hope I do not disappoint them this year.
My Muscadine grape vine looks really healthy this year and as the grapes begin to develop and mature I will post photos. At this point in time the blossom heads are tiny, tiny and just now starting to open up. My other challenge with the Muscadine Grapes will be fending off the robbing birds and I suspect some squirrels get tempted. My wife won’t let me pop the squirrels with the BB gun but I do have bird netting as an option….time will tell.
The small varieties are setting tons of tomatoes and today, May 4th was my first picking……not many but the gates are open. I guess Mother Nature whispered……”May the 4th be with you”……LOL. Yes, “kinda” corny, but I couldn’t resist. The surprise for me today, upon my return from babysitting grandsons in Denver, were the number of tomatoes set on my Brandywine vine…..I promise some photos later in a week…..maybe less.
Small and so very sweet.
I have quite a few beets that have blown up into to monstrous sizes in the past few weeks too. Hope they will still be edible. Sugar snap peas are almost done and now I need to get my Blue Lake Pole beans going. My two eggplants are blossoming but no fruit yet. The plants are robust looking so I think I may have some eggplant lasagna in the future. I was gone for 8 days up to Denver and the weeds have jumped ahead and will keep me busy for the next week or more.
Bees……next few days and into next week will find me evaluating the honey stores and looking to see if I can rob any to take care of my customers. wish me luck!!!!!!!!
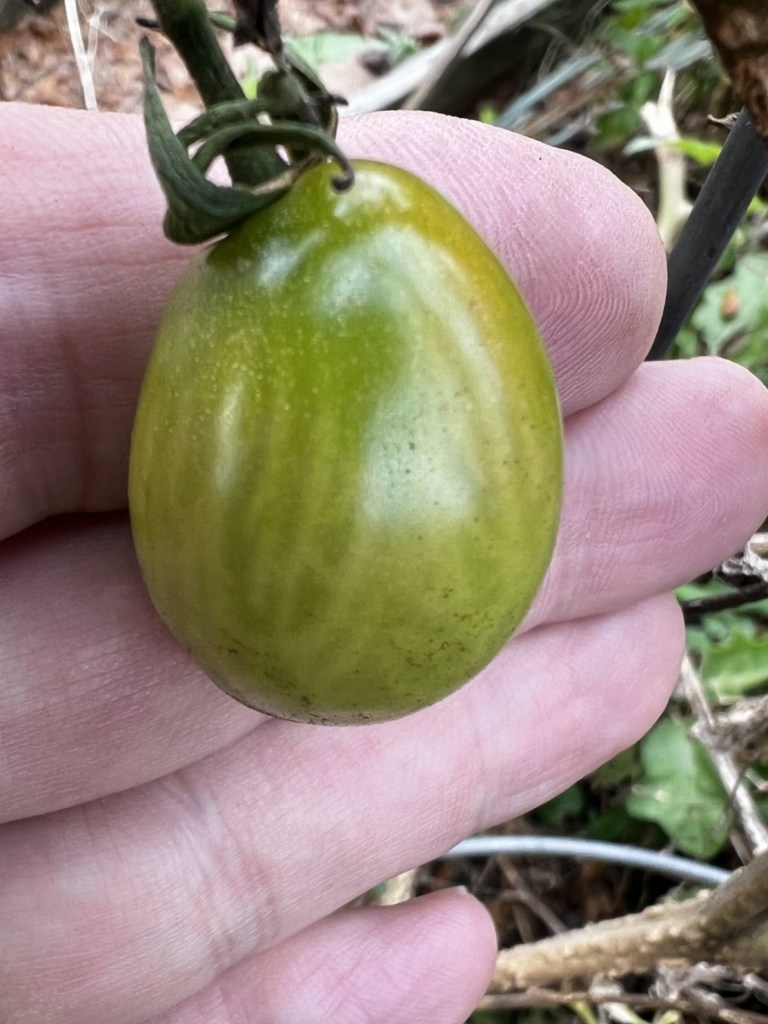
No, it is not an exponential equation but does reference that I have have only planted 5 tomato plants and each is a separate variety. Three of the 5 should be robust enough to produce well into the summer. The heirloom Brandywine will be coddled, buzz pollinated and well protected until the heat causes it to not set fruit. I have green ‘maters now so it won’t be long before they ripen. Images are from East to West in my garden.
East-most is a smaller fruited variety called Sugary. This should be one of the 3 to hold well into the summerNext is Juliett, a small roma shaped tomato that can overwhelm the garden. Slice it and it makes a nice caprese salad.Celebrity – A very good and prolific slicing tomato….not too big but very consistent into summerCherokee Purple…..I am anxious to try this one and know little about it other than seeing it at Farmers marketsBrandywine …..The flavor of this heirloom tomato is out of this world…..but….fruit sets with great difficulty. I have successfully been able to get fruit set by buzzing the flowers with an electric toothbrush, mine and god forbid I used my wife’s.
Beets are almost done and I am ready to add some Blue Lake pole beans. Bees, all 15 hives, are all busy and hopefully late May will be a good harvest. I have a couple of projects….rebuilding the compost bins…..a big project. Clear out all the junk lumber and wood that I have accumulated. Put up some trellis apparatus to help the cucumbers climb…..they grow so well here in Houston. Potatoes are also looking good this year….can’t wait to dig them up.