Home

Sourdough with Spent Brewing Grains.

9 Comments

I have been diligently making sourdough during our social distancing exercise and I am getting pretty good at it. Yes, I am patting myself on the back. I searched the web for a simple and straightforward sourdough recipe utilizing the spent grains………. I’m a simple guy and I got lucky – finding a simple recipe within my skill set! See below.

Sourdough & Spent Grain Bread – based on a recipe from this site….pretty much followed it but just a few tweaks. https://noteatingoutinny.com/2010/04/13/sourdough-spent-grain-rye-bread/

1 cup sourdough starter
3 1/2 cups all-purpose flour – I used 3 and it was just enough.
1 cup spent grain, still a bit wet
2 teaspoons salt
1 1/2 – 2 cups water – varies depending on how wet the spent grains are.

Combine the starter, 3 cups of the flour and enough water to allow the dough to just come together, in shaggy strands(I didn’t know what that meant so I googled for images). Knead about 5-6 minutes( I used dough hook) and let rest in a bowl, covered with a towel. Keep in a warm place and let sit for 1 hour. Fold in the mash with your hands and dust on the remaining flour as you combine it to help keep dough from being too sticky( I used my stand mixer and a dough hook). Form dough into a long, oblong loaf (or put it in a prepared loaf pan, I had a 5X9 loaf pan, sprayed a little Pam on the sides and coated the top of the dough with flour. I did a couple rounds of stretch and fold like do with my regular sourdough prior to the final rise. Let sit in a warm place covered with a towel for an 1 hour or so. Score deeply before placing the oven.

Preheat oven to 450 degrees. I used a big pizza stone that was also preheated. Bake for about 20 minutes, monitor, I used a thermometer to chick internal temperature. It took an additional 10 minutes to reach 200 F. Remove and let cool on a rack for 10 minutes before eating. My wife didn’t want to wait…… I held my ground and gave her the first warm slice with butter. She forgave me!

Drink Local and Drink Responsibly

Bishop


Sourdough For Janet

Leave a comment

I had posted on Facebook some tidbits about how I was keeping myself busy during our COVID-19 social isolation time. Baking bread is one of my loves and one of my downfall……you know what I mean. A number of my friends commented, including the younger sister of one of my best high school buddies. Her name is Janet and she loves to cook. She asked for details on my sourdough adventures, I promised Janet that I would share with her how I have been making my sourdough bread. I am not a purist by any means, because in addition to my sourdough starter, I do use a little yeast in the process.

The starter, and this is really the critical part, takes time and patience to get it the way you want. The link below will take you to the King Arthur page for the instructions on making the starter. I use King Arthur Bread flour when I make my sourdough, it is a little more expensive but it is worth it. Now, if you don’t have your starter you won’t be making bread this week. Follow the process and again, be patient.

https://www.kingarthurflour.com/blog/2012/04/05/creating-your-own-sourdough-starter-the-path-to-great-bread

Ok, it is a week later and you are ready to make the bread. I weigh my ingredients and find that I have more repeatable results when I do.

Ingredients;

227 grams of ripe well fed starter. That’s about 1 cup

340 grams of warm water, About 1.5 cups

1 or 2 teaspoons of yeast – 1 if starter is real healthy and 2 if not

2.5 Teaspoons of salt….I use Kosher salt – Kosher is additive free

602 grams of bread flour – about 5 cups

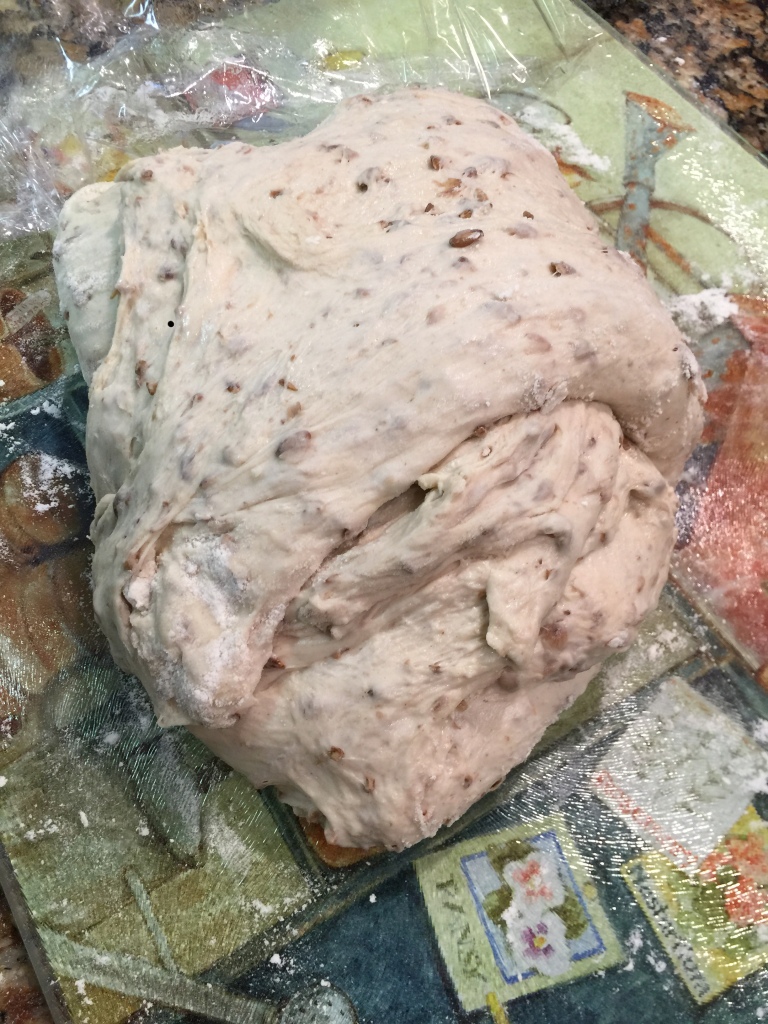
I use my bread machine on the dough cycle. I add the ingredients in the order listed above, right or wrong, it works for me. Watch the dough while it is being mixed. The dough should just be a little sticky but not clinging to the sides. Rarely do I have to add water, usually a few pinches of flour…..a little goes a long way. You will learn as you go.

At the end of the dough cycle turn the dough out onto a very minimally floured surface. I fold 4 corners, pulling and stretching them out, then folding into the center. I may do this every 30 minutes or so 3 or 4 times. You can also do it once, place in a greased bowl, seam side down and refrigerate overnight. It adds to the flavor. Then stretch and fold a couple of times before proceeding. Video of my hands doing the folding somewhere below.

If using a mixer with a dough hook, mix it to form a smooth dough, albeit just barely sticky, place in a greased bowl, cover and let rise. Then follow the steps outlined above to pull, fold the dough and shape it.

I almost always make a boule, french for ball. After the third or fourth folding I flip the boule over seam side down and shape it. I work it, pulling and working a little at a time under the boule, working around and around to create tension across the top of the boule. I place it seam side up into a lightly floured proofing basket/brotform. Let it rise for an hour or so. Good shaping illustration in the link below.

https://www.weekendbakery.com/posts/video-shaping-a-boule/

In the mean time place a lidded dutch oven into the oven and preheat to 425 F, 218 C…..make that 220 C. Make sure the oven has come up to a stable temperature. Now it is time to bake your bread. I lay a piece of parchment paper across the risen bread, gently turn it over while working it loose from the basket. Carefully now, open the oven, remove the lid, place the boule into the bottom( leave the parchment paper underneath if you like….I always do) of the dutch oven, add a couple of deep slashes across the top to allow it to expand. Replace the lid and close it all up. After 25 minutes, remove the top to allow the bread to brown up a little more.

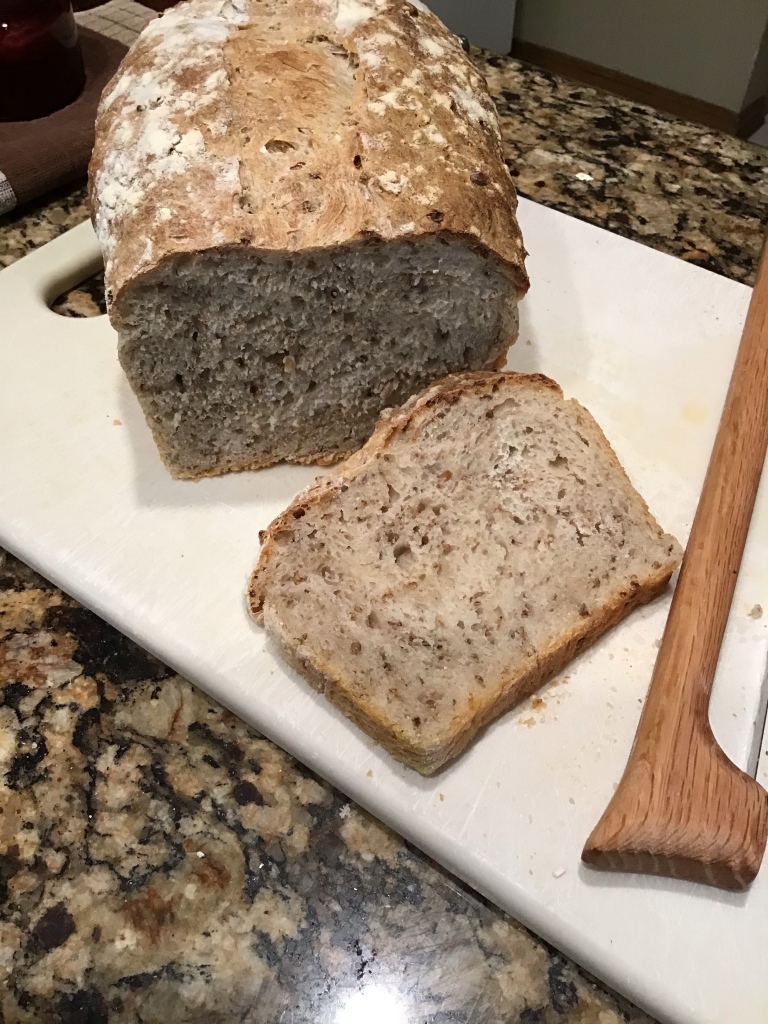
Bake for another 20 to 25 minutes then check the bread. If you thump it, it should sound hollow. I will also insert a digital thermometer into the middle of the loaf to ensure it is above 200 F, 93-94 C. Turn out onto a cooling rack and then challenge yourself to be patient.

Now lets back up a little, while making your starter you will be tossing out some yummy stuff. Not every time, but fairly often I will make sourdough pancakes with the excess. See recipe below.

Pancakes – Ingredients:

  • 2 cups fresh sourdough starter
  • 1 egg
  • 3 Tbsp. sugar
  • 2 Tbsp. oil
  • 1 tsp. baking soda
  • 2-4 Tbsp. milk, coconut milk, or water – just get the consistency right.
  • Butter or coconut oil for frying

They are really tasty!

Enjoy!!!!!

TTFN

Bishop

End of the Week

2 Comments

It has been a busy week. The bees have occupied some of my time, weeds too much of my time, lovely carrots so sweet when roasted, removing the fading sugar snap peas…..replaced with English Cukes & Straight 8 cucumbers, two loaves of sourdough bread just pulled from the oven moments ago…….fortunately we are  not web-camming as the drool drips from the corners of my mouth, trimming back banana plants to maximize production, making strawberry jam, yard cleaning/kitchen table office cleaning……sister-in-law arriving this evening…..I am already tired and ready for my nap.

The bees, the queen and brood going back into the original top-bar hive over the weekend seems to have gone very well. The companion Langstroth hive is filling with honey!!!!!! Yee Haw! I am also helping the property owner get his garden up and going, feeding his chickens, harvesting eggs and mowing his grass. The things a beekeeper will do to for the host!

The split in Splendora on the “Cowboy” hive failed…..I feel guilty, as it was my mismanagement that lead to the failure. The only saving grace is another lesson learned to add to my prior mistakes. The remaining hive out there is doing well but may have earned a re-queening this coming fall. They are a bit defensive…..yes another one popped me in the face….on the nose.

Strawberry Jam. My “Goo” friend John’s daughter gives me the ultimate compliment for my strawberry jam – when she runs out of mine she falls back to “Smuckers”, she says mine is sooooo much better than store bought…..According to Brittany. I am a fan of the low sugar recipe from Sure-Jell light. Seems to let the taste of the berries shine through. I use Sure- Jell light for all my berry jams!

IMG_3008

The jam, cooked, ready to skim the foam prior to canning. The foam does not go to waste, my wife uses it on her egg-white/oatmeal frittatas.

IMG_3009

Six half pint jars and 3 – 45 ml jars for fun and gifts.

I have to share more about my carrots. As I have mentioned before, my soil has lots of clay but the adding of compost for four years has improved the soil, somewhat. I plant varieties that are shorter, stockier and tolerate the heavy soil better. Well, either a seed mix up or a rogue carrot in my patch. This guy was pretty hefty!

IMG_3006

Frame of reference – I have to order XXL beekeeper gloves and would love to find some XXXL gloves.

Just had to add a bee picture.

16732107_1181493301919991_632665327_o

There she is….tucking some pollen away. The symmetry is almost mind-blowing! I just marvel at what nature can accomplish.

Now, butter, knife, warm bread and some strawberry jam. Next slice, butter, knife, warm bread and honey.  Next slice, butter, knife and warm bread! Why can’t I lose any weight??????

image1

Proofed for 28 hours…..the sourdough flavor is outstanding!

TTFN

Bishop


Winter Gardening Alternative

Leave a comment

My garden here in Houston has been pretty much saturated by the constant repetition of wet winter storms over the past several weeks. Last week had the additional challenge of a “hard” freeze. I happened to be out of town so my wife and youngest son covered the sensitive shrubs and trees. Thanks Hun!

I laughed a little when my wife said it was very cold! Why? I spent last week in North Dakota! According to the locals it wasn’t too bad. Several mornings up north it was only -18F and it never hit double digits on the plus side! For this Houston boy that is cold!

I went out to “wade” through the garden and found a few sections with standing water. The strawberries and sugar snap peas are doing well! I fed the bees- filled the feeder and ducked back inside. Inside I decided to learn more about my sourdough bread making.

The gardening alternative;

I made two loaves but went with the slower process of creating a sponge and letting it sit overnight. The sit and rise process for the loaves was another 3 plus hours. The results? Mixed! I cooked each loaf separately. The first loaf was pretty dark! Oops, the recipe called for 425, I read 475! That explains it! The second loaf looks great. Taste? More like sourdough. When I go with the quicker method and use yeast, the sourdough flavor just doesn’t come through as well.

The second loaf.

2015/01/img_2546.jpg

The first loaf still made some great French Toast!

2015/01/img_2548.jpg

On a grumpy note. My wife’s “pet” squirrels are eating my strawberries before they are fully ripened! Something bad needs to happen to those tree rats! My wife would prefer that our cats chase them out but I may need to employ alternate means.

TTFN
Bishop

Winter Chill

5 Comments

We have had a good stretch of what we call cold here in Houston. Lows in the mid 30’s F. The bees are staying warm in the hive and only venture out when the sun warms the hive. The damn weeds don’t seem mind the weather and even if I don’t want to, I know I have to keep the attack up!

Mornings are spent enjoying my coffee, watching the flames in the fireplace and experimenting with sourdough bread making. Today, at least from appearance sake, I have a success. Some of my less aesthetic looking loaves have tasted great! The sourdough aroma is awesome!

I use my bread machine for the heavy lifting. It seems to work well most of the time. The only variable is the dough consistency. I am learning to better gauge the liquids needed. The base recipe is close to the right volumes but if it errs, it is a bit dry! I have learned to resist the temptation of adding too much. I have learned to add just teaspoons of water and do it slowly!

Recipe
1/3 cup warm water
1 1/4 cup sourdough starter
3 cups of all purpose flour – sub a cup of whole wheat if you choose
1 tbsp sugar or honey
1 tsp salt
1 tbsp oil – I use butter cut into small chunks
2 tsp dry active yeast

Put machine on dough cycle. When complete dump out onto a greased smooth surface and stretch it out. I watched a few videos on how to fold and shape the dough – that is up to you. I made a nice elongated loaf. Let rise for an hour or so, score the loaf and bake 35 minutes or more at 400 degrees F until done. Thump it and if it sounds hollow you are there. I also put a pan of water in the oven for steam.

Before;

/home/wpcom/public_html/wp-content/blogs.dir/023/15668054/files/2014/12/img_2512.jpg

After;

/home/wpcom/public_html/wp-content/blogs.dir/023/15668054/files/2014/12/img_2514.jpg

The garden still calls to me! Lots and lots of strawberry blossoms and berries are developing. The 100 new strawberry plants are looking great, sending out new leaves and looking very healthy. Carrots are fattening up, beets are building roots and the snap peas are blossoming!

TTFN
Bishop

%d bloggers like this: