Home

Spring Preparation – The Compost Pile

2 Comments

I hope to get a jump start on prepping the garden for a productive spring season. My 2023 season was OK but I let the garden get away from me a bit and grow “kinda” wild. My efforts to grow cucumbers and green beans were a total bust but the early part of the growing season was good for tomatoes and beets but not much of anything else. I have the beets seeds in the ground and sugar snap peas are coming up nicely. So………I spent a little time today prepping some good, well rotted and beautiful compost to properly feed the green babies.

My two compartment compost bins are set up for a lazy man’s compost pile. Most of the wood used to build it came from mine and my neighbor’s fences having been blown down by Hurricane Ike in 2008. I have since added some pallets as dividers and as fronts to hold the compost materials in check. We were dead center in the path and eye of “Ike”…..and it was amazing, The eye was 60+ miles wide and since we were dead center…….it was eerily quiet for well over and hour before the back side of the storm hit….my wife kept asking if the storm was over……..no Hun…..just wait…….So the 100 mph pinecones hitting one side of the house in the beginning were now being launched at Major League fastball velocity to the opposite side!!!!!! I did step outside in the dark looking up and watching for awhile as the eye passed…..I can scratch that off my bucket list…..actually was never on my bucket list but I can lie a little …..LOL
Lazy man’s compost…….I had transferred the top layer from this bin, not much decomposition yet, over into the right hand bin/compartment until the dark and mature compost in the bottom was exposed. “Lazy” in that I don’t turn the pile except once per year…..and that time is now.
I pull shovel loads of dark rich compost and dump them into a 1/4 inch screened box and shake, shake, shake, until it is all uniformly crumbled and ready to feed the babies I recently planted. The plants fed with good compost are really very happy and show great growth.
The finely screened compost is shown here in my wheelbarrow. I will spend bits and pieces of time going forward shoveling and sifting until I get to the bottom of this compartment…….It won’t be one of those projects where I will bust my ass and do it all in one weekend……..Nope…..it will be spread out through the growing season. The right hand bin is 4 feet by 4 feet and almost 4 feet deep! Holding potentially 64 cubic feet…..more than two cubic yards of material…..

There is still potential for another freeze but I have my fingers crossed it won’t be a hard freeze with much, if any, duration. End of February is my target this year to get tomatoes into the grounds. Bold yes, but why not…….And dammit I want some cucumbers too. I am counting on my compost to provide the growth essences to create lush and satisfying plants.

TTFN

Bishop

December 27, 2023…..WTH?????

Leave a comment

Last freeze for my garden was December 25, 2022……WTH. I have blossoms on 4 of my tomato plants and one of the small one, Sweetie is setting fruit, albeit not many. Lo and behold, a few may even ripen. Freeze date records go back to 1889 here in Houston……..quite remarkable! Source – National Weather Service and https://spacecityweather.com/houstons-last-chance-at-a-freeze-in-2023-comes-later-this-week-and-its-a-slim-one/.

Quite a history here. I find it interesting that in the last 70 plus years the long duration between freeze dates is a year or longer, with 1932 being over a 2 year duration between freezes…..Hmmmmmm!!!!! Global what?????
A green Sweetie
A red one
Hopefully soo to ripen
Not holding my breath to see these set and bare fruit!!!!!

It won’t be much of a harvest but it does make me smile a bit. My lemons are doing well, beets are coming up and I will be planting more of them. The bees are flying when the sun hits the hive and when above 50ish degrees F. I have feeders on the front of the boxes but it is too cool to feed syrup. I am using sugar blocks that I make, about 1 pound each, and place them on top of the frames in the top box. Recipe…..6.25 pounds of sugar, 1 cup apple cider vinegar and packed into a 9X13 jelly roll pan. About 3 pounds per pan. Dehydrated and when hard and firm they are ready to go. Typically they last about 1.5 weeks. I do grab the back side of my hives and heft them…..If I grunt a little bit as I lift I am happy with their weight and won’t worry about them starving…..yet…..

Pretty active…..and surprisingly they are still finding pollen but I missed the chance to photograph it coming in. Trust me……a nice yellow pollen…..no idea what flower though…..Some dandelions are in the area. This hive and the one adjacent to it will be bartered and delivered to a friend this week end….Bartered for a day or two guided fishing ……, Thanks Clayton and Aurora. Yee Haw, the Redfish are biting.

TTFN

Bishop

Blueberry Pollinators

Leave a comment

“Surprise, surprise, surprise!”…… to quote Gomer Pyle USMC, and of course “Shazam!”. Yes honeybees are used but, they may not be the perfect choice! I am going to include a link to an article from North Carolina State University that will tell a very detailed tale of blueberry pollination in that state’s commercial blueberry fields and mirrors some of my lay observations on a local blueberry field where I kept some bees for a few years. The location was just a bit too far from home to effectively care for the hives. My observations got me thinking…..I had three strong hives on the property and when the flowers were blooming I saw more bumble bees visiting the flowers than honey bees……the honey bees seemed to be more active on the adjacent blackberry vines…..There had to be a reason of some sort!

“Numerous native bees (including bumble bees and solitary bees) are indigenous pollinators of blueberry plants in North America. In addition, honey bees are used extensively by growers to augment populations of native pollinators. Bees are attracted to the flowers by odors and sweet nectar that is produced by glands near the base of the stigma. Both pollen and nectar serve as food for the bees and their offspring. As insects visit blueberry flowers, pollen adheres to their bodies and is carried with them as they move from flower to flower. When bees probe for nectar inside a flower, they brush against the stigma and unwittingly leave behind some of the pollen they are carrying. Some species of bees vibrate each flower with their flight muscles as they collect pollen. This buzzing activity (known as sonication) shakes pollen from the anthers so it is easy to collect, and also tends to increase pollination” will occur.

Read more at: https://entomology.ces.ncsu.edu/small-fruit-insect-biology-management/blueberry-pollinators/

https://entomology.ces.ncsu.edu/small-fruit-insect-biology-management/blueberry-pollinators/#:~:text=Important%20blueberry%20pollinators,augment%20populations%20of%20native%20pollinators.

I wrote this several months ago and found it in my saved for future editing so I resurrected it just in time for Easter. I hope you like it.

Pay attention to the flower size compared to pollinator size……this is either a bumble bee or ? I don’t believe our area is native to the Southeastern Blueberry Bee! These big guys use a form of pollination called “buzz pollination”. Electric toothbrushes work well too……LOL

One of my honeybees I suspect from one of my hives nearby. Note the size difference to the other pollinator working the blueberries above.

Yessssss Buzz pollination is a thing and I have had success using it on heirloom tomatoes that do not set fruit when this Houston weather gets warm and sticky…..like way too often. I have used an electric toothbrush, sadly my wife won’t let me use hers so mine is the vibrating device that does the trick. I will be doing some of that today as my Brandywine Tomato is beginning to set display flowers. Check out one of my long, long time ago posts broaching the subject with an included video of the technique. It is very effective.

Enjoy looking back into my past.
One of my favorite bee photos converted to Black and White with an artistic treatment added.

TTFN

Bishop

Post Freeze Update

2 Comments

December 22-24 my garden experienced a danged good freeze…..well, the freeze is not really good for the garden, so a better term would be…….an extended period of freezing weather of hard freezing temperatures. What is considered a hard freeze in this area, Kingwood, TX just north of Houston? A hard freeze warning is issued when temperatures drop below 28° for 2 hours or longer. Well, we had about 36 hours and it required some effort to help our cold intolerant plants from dying……….some didn’t make it!!!!!

My wife had a good number of ornamental plants that we covered in an attempt to minimize the damage with some success. My biggest worry was my Meyer Lemon tree that was nearly destroyed in the 2021 major deep freeze……yes Texas made national news on that one. I managed to get some recovery of the tree after the 2021 freeze and was optimistic that I would finally get some fruit as it was beginning to blossom…….I was able to protect, marginally, about 1/3 of the tree. More on that later.

I had been attempting to get some succession plantings of beets, carrots and sugar snap peas started. We had run out of coverings for my veggies so it was plan L time. Plan L stands for leaves, lots of leaves and deeply piled leaves. I did have some success. One failure were the sugar snap peas that had climbed over 20 inches up the trellised string ladders. I will tell you that some of the peas had not yet started climbing and and they were lucky enough to be buried under a thick cover of leaves.

Carrots upon uncovering looked very, very healthy.
After uncovering the beets, lo and behold, one of two snap pea vines were discovered. I hope to get them trained up the trellis this week. I also added 15-20 snap pea seeds that had been soaked over night.
Soaked for 24 hours in order to imbibe and be ready for the garden. A tip, if the seeds float in the water rather than sink to the bottom of the cup they will not be viable.
Next round of carrots emerging and they will extend my harvest a bit longer.
Another discovery…..young beet sprout that lay dormant until I removed the insulating cover of the leaves….they should also help extend the beet harvest.
Sadly I will just have a handful of surviving blossoms this year on the Meyer Lemon tree. Although I did not shoot a photo of it, but some of the damaged and dormant branches are beginning to leaf out…..gives me reason for optimism.
Oh…..some radishes…..don’t even know why I toss out the radish seeds, they are rarely eaten, except by garden pests but, they do stroke my ego a little because they will sprout quickly and visitors will compliment me on my green thumb…….as my chest puffs out. If they only knew…….

Looking forward I will add in some more beets, most likely another round of carrots, trellis up the peas, no more radishes and begin composting an enormous supply of fallen leaves. Just an FYI, I no longer till my garden plots. For the last 4 or 5 years I have just piled on leaves and grass clipping to suppress the weeds and add to organic material to the soil. In my humble opinion…..the fertility of my beds has markedly improved and the weeds struggle, they don’t disappear but the become more manageable.

In March tomatoes and peppers will go in. Maybe a week or too before that a couple of mounds of Irish potatoes will be added. Then a couple of teepees of beans of several sorts. I will grow Blue Lake and Kentucky Wonder pole beans…..last year’s crimson variety grew huge……and only produce a few handfuls…..going back to the trusted varieties.

TTFN

Bishop

Second Start on my Fall Plantings

1 Comment

About 5 weeks ago I began to ready my garden for fall and put some cool weather veggies in. I planted seeds for beets and Sugar Snap peas. We had been in a long period of drought here in the Houston area and the prospects for rain were slim. My poor luck was made worse by an extended period of time spent out of town to help out with grandkids thus, the seeds failed to germinate. I should have drafted some help to water in my absence but did not. So, today I added carrot seeds and beet seeds. I know that beet seeds are not the typical looking seed that you would recognize.

Beet and chard seeds are multigerm seeds. (Quick botany lesson: The germ is the reproductive part of a seed — the embryo — that grows into a new plant.)

Multigerm seeds occur when flowers grow in clusters, fused together by the petals (such as the flowers on a beet plant), which then produce multigerm seed balls.

When the seed balls germinate, they may have two to five seedlings sprout all at once. https://www.gardenbetty.com/why-do-multiple-seedlings-sprout-from-a-beet-seed/

I intend to do my beets in a long row and do succession planting every few weeks. This phase 1a ….. as Phase 1 failed.
In this area I am doing carrots that I have broadcast in 4 wide bands and will thin once they begin to sprout. Two varieties, Red Rocket and Danvers. They both seem to do well in our dense soil here in the Houston area.

I have challenged myself to do a better job keeping the seeds wetted this go around. Our weather is chilly for the next few days or two but next week we are back up into mid 80’s and mid 60’s at night. Perfect temperatures for the seeds and “multigerm seeds” to germinate. Insert smiley face here…..

Sugar Snap Peas are soaking tonight and will go into the ground tomorrow. I always let them soak over night and imbibe enough water to fill out the wrinkles…….Hmmmm maybe I need to imbibe a little more and see if my wrinkles will fill out! I wonder if beer would have the same affect on me. Maybe a winter time experiment.

Shifting gears. I have two large 4X4X4 compost bins and I am pretty consistent hauling kitchen scraps, egg shells and coffee grounds out to the bins. All of my grass clippings and leaves wind up either in the bins or as mulch helping to smother the weeds. (a never ending challenge). I am a bit proud of the fact that I have not sent any grass clippings nor any of my Fall leaves to the landfill in over 10 years. About 5 years ago I gave up on turning and tilling my beds and they seem to be as productive as ever. I have hired several thousand earth worms to till for me and because of their anatomy I have not paid one back injury claim, even though I employ thousands. (tongue in cheek)

I know that my egg shells take forever to break down so I have started drying them and pulverizing them in my coffee grinder. I do grind coffee every couple of days and I decided to tolerate and residual calcium dust in my grinder as a bit of dietary calcium. so far no ill effects …….. fingers crossed. The article I read suggested using a mixer, coffee grinder or a mortar and pestle to reduce them. My mixer wouldn’t be very efficient, mortar and pestle sounds like work and my arthritic hands would protest, so…….the coffee grinder is my choice.

Dried and ready grind up into some dust.
I probably could have spun these in the grinder a little longer. I am bagging them now and in the spring I will add them into the planting holes for tomatoes, reduces blossom end rot and for my peppers.

Plants like tomatoes, peppers and eggplants in particular will benefit from shell fertilizer. The extra calcium will help prevent blossom-end rot. Broccoli, cauliflower, Swiss chard, spinach and amaranth are also calcium-packed and could use extra from eggshells. So there you go…..waste not want not. Just in case you were curious about he origin……and I was….I assumed it was from Benjamin Franklin but was proved wrong

Waste not, want not – Grey Bears

https://greybears.org › waste-not-want-not

“We’ve all heard the proverb, “Waste not, want not.” This old saw has its origins from 1576 in, The Paradise of Dainty Devices by Richard Edwardes, a distinguished lyricist and playwright who was rumored to be an illegitimate son of Henry VIII. On page 88 the proverb was written as: “For want is nexte to waste, and shame doeth synne ensue.”

In 1721 the saying was recorded in an easier to understand version: “Willful waste makes woeful want.” Then, on August 10, 1772 in a letter to Alexander Clark, John Wesley wrote the saying in the more familiar: “He will waste nothing; but he must want nothing.”

All of the various forms of this proverb get at the idea of how we can always have just what we need. The less we waste (or acquire), the more resources we save and the less we’ll want for anything later. Waste not, want not reduces the risk of poverty and need. Put another way, many of us are saving money for something we’ll need or can afford in the future (savings). We will opt to not have what we may want/desire now in order to preserve what we need/want in the future.”

Maybe it will come up one day in trivial pursuit or on Jeopardy and you will be well armed.

TTFN

Bishop

What is in Season Now?

Leave a comment

Well, let’s fast forward past all the plants that have come into season, been harvested, been converted to compost or have graced my table……….March 8th 2022 was about Celery growing time LOL. Today’s topic class, will be about Muscadine grapes and the missed opportunity with the local close cousin, Mustang Grapes, that grow wild along waterways here in the Houston, area.

Vitis mustangensisn – A common and easily recognized grape with a white, velvety surface on the lower side of the leaves. A vine climbing over shrubs and into trees and often shading their leaves. Leaves in two forms: one form unlobed or shallowly lobed, and the other form deeply lobed, with the latter less common and on rapidly growing shoots. The lower surface of the unlobed leaves often concave. Grapes up to 3/4 inch in diameter, few to the bunch, ripening in August and September to dark purple, and usually bitter, even irritating, but popular with makers of homemade wine. Note; I will disagree a bit with ripening dates……here in Houston area it typically the last week of June and first week of July…….except, as always exceptions, this drought driven year, 2022, it was early June.

Distribution; – USA: AL , AR , LA , OK , TX
Native Habitat: Woodlands’ edge, Opening, Thickets, Stream, river bank, Fence rows. What is really crazy about the growth habitat it that the vines seem to grow wildly heaven bound……70, 80 and my guess is even 100 feet tall before making the turn and heading the other direction. It can be a challenge to harvest with out long reach pruning tools.

Today’s class though is for, Muscadine grapes (Vitis rotundifolia), which are native to East Texas. They thrive in slightly acid soils and have good disease resistance which makes them particularly suited to the humid climates of East Texas. My harvest is a mix of the native Muscadine grapes and a commercial variety that I have trellised along my back fence and over the entry into my garden. They can be grown commercially here it Texas, actually East Texas, but it is difficult.

At the entrance to my garden

As you can see they don’t grow in bunches like most grapes we are all familiar with. 2022 looks to be a great year for this variety that I planted 3+ years ago. That said, I am in direct competition with the local squirrels as they ripen…..a real challenge. Every day I make a pass along the vine looking for the hidden ripe ones before the squirrels indiscriminate approach…….Yes they knock an awful lot of green & unripened ones to the ground……unforfunately the green ones do not continue to ripen……dang squirrels – If my wife didn’t think they were so cute I would ……….. well, strongly encourage them to go elsewhere.

I do believe I will retrieve enough to make some outstanding jelly. I missed harvesting the Mustang grape which makes a to die for jelly…….there is always next year.

Cucumbers…..can’t ignore this year’s natures bounty…….It is nearly as bad as the gardening neighbor that looks to give away the their abundance of zucchinis! I always wondered why they planted so many….LOL…..Kinda like me and my cucumbers this year……neighbors lock their doors when the see me coming now……I guess I should make some cucumber Gazpacho…..hope it freezes well and I don’t run out of freezer space……

TTFN

Bishop

Snow? It Snowed In Houston

3 Comments

Crazy as it sounds, a big blast of Canadian icy air made it as far south as Houston. For Houstonians it was brutally cold this morning, 16 degrees according to my backyard thermometer. It looks like it won’t warm much for a few days. Obviously my vegetable garden will nor fare well. I covered a new bed of carrots with fingers crossed that they will make it. I covered my strawberries with a couple of inches of leaves and I suspect they will survive. The Romaine lettuce had already started to bolt, so no loss there. My biggest concern was for my Meyer Lemon tree. I have it tented and a small light bulb included under the tent to keep it, hopefully, warm enough.

Lettuce is biting the dust. Upper left is a section of carrots that are covered and fingers crossed they survive. Top right is my topbar bee hive and I believe the colony is strong enough to survive.
I have put a bar in front of the opening to the hive and completely closed off the similar opening on the back side of the box.
There were a couple of bees slowly moving around near the entrance so I do have faith that most are clustered up tightly and keeping the central portion warm.
Swiss Chard standing defiantly against the freezing weather…..at least for today.

Roads are icy and I don’t have any place to go so, sit tight and hope the power stays on! A couple of my pineapple plants are in the garage and hopefully warm enough. If we do lose power at least my home brewed beer will stay cold…..always a silver lining. I was proactive enough to pull a good portion of my beets yesterday and ready to be roasted today!

TTFN

Bishop

Catching Up…..Spring is on the Way

2 Comments

The quiet time of winter is over here in my backyard just north of Houston. I have been eating beets from the garden as well as some carrots. In fact, last night I grilled a spatchcock chicken along with a handful of freshly pulled carrots…….FYI, I should have pulled up a few more carrots!

I love this water color app called Waterlogue…..orange and a couple of yellow carrots freshly pulled.
Obviously not enough carrots. Olive oil, a little sea salt and rosemary. 8-10 minutes over direct heat and about 15 minutes over indirect heat with the foil sealed shut. FYI, this is a good size of carrot to cook through and not be crunchy in the center.

I have both red and gold variety beets growing along with Romaine lettuce, about 50 new Chandler strawberries. The radishes are done and I could probably plant more but I’m the only one that eats them! Sugar snap peas have been planted, along with some turnips and another round of beets.

Bees are doing well and the early spring bodes well if the weather stays wet enough for the early spring nectar flowers. For you folks in Texas here is a very good list, link attached. Late winter does include my Meyer Lemon tree as a good nectar source….. looks like it will bloom very soon. https://aggie-horticulture.tamu.edu/travis/wp-content/uploads/2016/04/EAGF-2017-Central-Texas-Bee-Friendly-plants.pdf

My backyard topbar hive. Bees are storing honey…..this comb is a little wonky so I will pull it and maybe two other misshapen bars to crush and squeeze in a few weeks once I see more nectar flowers blooming.
Suited up but not for the backyard bees….my backyard bees are pretty sweet, no gloves or suit needed but I do always wear my veil. I was suited up here because I was cutting weeds and brush around some of my friskier bees!
Bonus image from our recent trip up to North Dakota. These two whitetail boys were sparring a bit, not real energetically but grunting a little.

More spring stuff in the works.

TTFN

Bishop

My Strawberry Jam

4 Comments

I am about to give away the secret to making my very well received and highly praised, Strawberry Jam. A quote from one of my regular customers, “How can you go back to “Smucker’s” after tasting Bishop’s jam?”

Side Note – I have labeled it preserves in the past but a little research shows that I make jams!

Summary:

1.The differences between jam and preserves are:

2.Jam is made from chopped or crushed fruit.

3.Preserves are made from whole chunks of fruit.

4.Jam contains sugar, pectin, and lemon juice.

5.Preserves are only boiled in sugar.

6.Jam is allowed to jell.

7.Preserves are not jelled in the process of manufacturing.

http://www.differencebetween.net/object/comparisons-of-food-items/difference-between-jam-and-preserves/

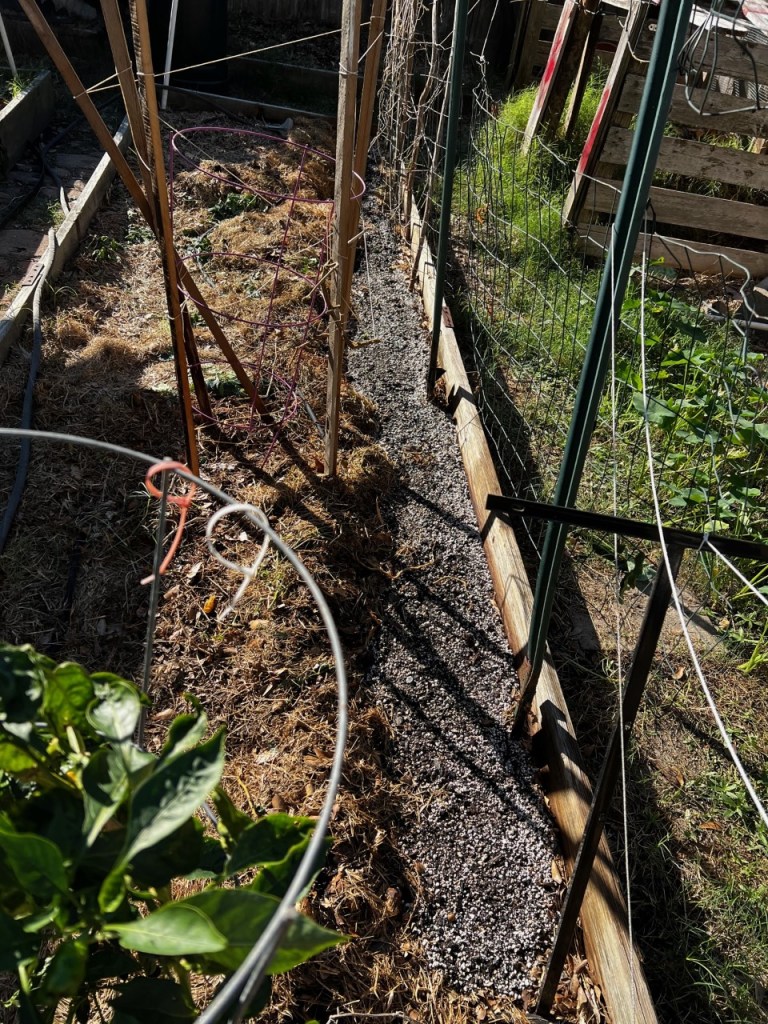
It’s not that I do anything out of the ordinary to make my “jams”, other than the fact that every berry in the process is/was hand selected by me! In fact, 75% of the strawberries originate in my garden although I do supplement with strawberries picked, again, by me, at “Wood Duck Farm”, about 25 minutes north of Kingwood. They are grown, as are mine, with no chemicals of any sort.

Laying out some of the tools of the trade. Four cups of sugar minus 1/4 cup mixed with the pectin prior to cooking. I use the Sure Jell pectin for my jams, they are made with 1/3 less sugar than with regular pectin. A spoon to skim the foam and yes I rinse it off after every lick. Green handle magnet to save my pinkies. An 8 ounce ladle…It does help when filling 8 ounce jars. Jar tongs….indispensable for fishing jars out from the boiling hot water just prior to filling. Last but not least, my trusty old, at least 35 years old, canning funnel.

The start of the process; 1/4 cup sugar mixed with pectin and the measured volume of crushed strawberries, just a note here, follow the recipe very darned close!!!!! Too much of the fruit mixture or too little will impact the final results. I use a potato masher to, yes, mash up the fruit, so there are some nice chunks of berry in every jar, a dab of butter to help reduce the foaming. FYI – Not sure if it helps all that much but I can’t argue with the success of the final product.

Follow the recipe; bring the mixture to a full rolling boil, i.e., cannot be stirred down. Note the light pinkish foam around the edges.  Then add remaining sugar – 3 and 3/4 cups, return to full rolling boil for one minute….I just slowly count to 75 and it seems to work for me.

Skim the foam but don’t discard. You have several choices, place in a bowl, refrigerate and use as you would any jam or preserve, or, as my wife does, spread across an egg white & oatmeal frittata, or dig in with a spoon and place directly into your mouth…..my personal favorite!

Ready to can, foam has been skimmed, jars are in a boiling water bath for sanitation purposes, ladle and funnel are ready, magnetic stick finger saver, spoon (recently licked and rinsed properly)….use however you want and the jar lids in a bowl of very hot water to soften the seals.

Grab a hot jar, drain and fill to about 1/4 inch of the topic the jar with the strawberry jam mixture. FYI, there is a tool made to gauge that space but I rarely use it, wipe any excess Jam from rim of the jar, place the lid on and screw the metal band on snuggly.

Once all the jars are filled and sealed, return to the hot water bath, submerge the jars with at least one inch of water covering the jars. Bring to a boil for 10 minutes, remove and allow to cool. If you have done a good job you will hear the lids pop down as the jars cool, indicating s good seal.

Next step, distribute and bring smiles to the faces of the recipients!

TTFN

Bishop

Compost Pile Moving Day

2 Comments

Well, it just turned out to be one half of the move. Several soaked T-shirts later, I decided to spread the move out into the next day or two or three. It is 93 degrees F and feels like 106 degrees with the lovely Houston humidity…..keeps my skin from ever drying out and fills in the wrinkles….LOL. (34 C feels like 41 C) Lovely temperatures regardless of the scale!(July 25, 2017)

First part of the move was to finish emptying the left bin and spreading the compost/mulch where needed. I love to smother the weeds in layer upon layer of mulching materials and then let the worms takeover working it into the soil. I am essentially a “no till” guy now.  Besides, the thick layers make any successful weed long and leggy and very easy to pull.

DSC_0695

The left side was full at the end of the Fall leaf season and was slowly pulled out, layered between grass clippings on the right and spread throughout the spring and early summer as mulch. The right side has been gathering all my grass clippings, banana stems & stalks, coffee grounds and whatever else my composting worms don’t get.

I spread several trash “barrelfuls” of the good stuff around my sad looking lime tree, I thought it succumbed to hard freeze in January, and the recovering dwarf Meyer Lemon. The lime tree sent several new limbs up from above the graft post freeze so, I selected a stout one to someday become the trunk of the little tree.

DSC_0694

In my last post I talked about planting more beans, pole beans to add some detail. The previously planted beans were not pole beans…..I guess I should have read the package a little more closely. I try to minimize bending over to pick stuff….strawberries are an exception, oh, and carrots and beets get a pass too. I grow mostly stuff that I can pick in a mostly upright position.

DSC_0693

Bees, bananas and some clutter in the background. I smothered most of the existing bush beans, watered in the compost readying the ground for the pole beans. I grow them tepee style.

I also do a “minimal labor” style of managing my composting. The bin of the right will be “moved”, probably over the course of several hot, humid, yucky, disgustingly sticky days. No hurry, I just need it emptied before the fall. The last 18 inches or so will be some well aged compost begging to be spread, hopefully around the mounds of potato plants soon to emerge. The title is just a bit misleading….

Update, as of July 27th, 2/3 of the right been has been moved to the left bin. The bottom third is looking a lot like finished compost….Yee Haw!

TTFN

Bishop

Older Entries