Home

The Sweetest of Times………….

Leave a comment

Valentines Day is approaching but that’s not what I am referring to!

This is what I am talking about. This my first berry of the season being grown in a 6” diameter, 5 foot tall strawberry tower.

My strawberries are just now setting fruit but nearby area farms have some organic pick-your-own offerings. While out exploring in the Conroe area a couple of weeks ago, I decided to visit a farm boasting ripe berries. I managed to pick about 7 pounds, even though pickings were slim. I was out the day after the MLK holiday and the out of school kids and families had descended on the strawberry patch nearly wiping out the ripe ones.

I arrived home with enough for two batches of jam. I cleaned them up and bagged them for the freezer. Pulled one bag out yesterday, let it defrost and started cooking the jam. I love the smell, or should I say, the aroma of the cooking berries.

Bringing the batch up to a boil. Mmmmmm good!
Ready to skim the foam off before filling the jars. The foam……never wasted…..trust me!

Seven more half pints of “sweetness” for the pantry. I am watching the weather and postings to drag me out on another picking adventure.

TTFN

Bishop

Mmmmmmmm………..Meyer Lemons!

2 Comments

The Meyer Lemon is not really a lemon. Bottom line, Meyer Lemons are both sweeter and less acidic than a true lemon.

“Citrus × meyeri, the Meyer lemon, is a hybrid citrus fruit native to China. It is a cross between a citron and a mandarin/pomelo hybrid distinct from the common or bitter oranges.[1]

Mature trees are around 6 to 10 ft (2 to 3 m) tall with dark green shiny leaves. Flowers are white with a purple base and fragrant. The fruit is rounder than a true lemon, deep yellow with a slight orange tint when ripe, and has a sweeter, less acidic flavor.”

From Wikipedia.

My Meyer Lemon tree has finally become productive after the hard freeze of …. I think 2017! I thought it had killed my lime tree and it obviously heavily damaged the Meyer Lemon. I trimmed the Meyer Lemon back and ignored the lime tree. As spring arrived the Meyer Lemon was sprouting new growth but the lime was bare. As I ripped the lime out of the ground I saw new growth….. too late – the was likely below the graft. Task done!

Meyer Lemons make a lemon curd that is both heavenly and bursting at the seams with both flavor and calories. Today’s cooking adventure does not involve lemon curd – it involves a first for me…….lemon Jelly. This will be a variation of the Meyer Lemon Honey jam I have made in the past. I have to give credit for the inspiration to Max Moszkowicz….he makes “lime jelly” and I just thought….Why not Meyer Lemon Jelly!

The process creates a wonderful aroma throughout the house. The aromatic lemons were thickly sliced and left soaking overnight in the kitchen. Then the aroma really amps up as they boil for 2 hours!

You can almost smell the aromas emanating from the photo of the boiling pot!

I am posting the recipe which includes the jelly variation. A disclaimer……only the Meyer Lemons are organic in my version……I know that for a fact as I have 100% control over the lemon growing. The honey is also mine, not lemon blossom, but it is local and raw – I can’t guarantee that it is organic………I tell bees to stay away from non-organic sources but I am not sure they pay much attention to me.

Once the jelly is done and allowed to set for a few days I will post a taste test update.

Meyer Lemon Honey Jam

INGREDIENTS 

*3 lbs Lemons (Meyers, of course!) 

*6 cups filtered Water 

*5 cups Organic Cane Sugar 

*1/4 cup Organic Lemon Honey (or other delicately flavored honey like Orange or Clover) 

*6 drops pure Lemon Essential Oil (1 drop for each cup of juice) 


INSTRUCTIONS ~ WASH lemons. 

~ TRIM off ends. Cut into fat slices. REMOVE pits (if making Jelly) 

~ COVER with filtered water. Leave to soak overnight or 7-8hrs

~ BOIL for 2 hours covered. ~ Then STRAIN through a jelly bag. COMMENT: Don’t be tempted to squeeze the bag or your jelly won’t be clear! ———————- 

NOTE: If you want to make Lemon JAM, skip the straining & whir the hot lemons and water carefully with an immersion blender. You definitely wouldn’t want the pits in the mix for jam though! So pick them out.

~ MEASURE juice. ~ ADD 1 cup sugar per cup of juice. STIR to dissolve sugar over low heat. ~ BOIL again until set. (15-30 minutes) ~ FILL sterilized jars as usual. ~ STORE in a dark cool cupboard. Jelly will keep for 1-2 years, but the flavor & color tend to fade beyond that time. 

Recipe from – http://www.figswithbri.com/

One of the web sites suggested that a slice of lemon would enhance the beauty of the jelly in the jars. I thought it would look great too! I sliced up a lemon, filled the jars, placed the jars in the canning water bath, turned around and what did I discover? You guessed it.

They will pretty good on top of some grilled salmon filets! LOL.

Almost looks like a light spring honey as a finished product!

TTFN

Bishop

Additional trivia for those that are curious……

“The citron (Citrus medica) is a large fragrant citrus fruit with a thick rind. It is one of the original citrus fruits from which all other citrus types developed through natural hybrid speciation or artificial hybridization.”

“Mandarin – mandarin orange

Pomelo – “The pomelo is one of the original citrus species from which the rest of cultivated citrus have been hybridized. 

Wild Mustang Grape Jelly Revisited

8 Comments

I am sad to report that my “secret spot”for picking the Mustang Grapes was cut back by the City of Houston this spring so I was forced to find another source. I was able to forage a little over 3 gallons of grapes. It is a hot sweaty endeavor to gather up the grapes as they ripen at the beginning of July. It was 95 degrees F and 80+% humidity when I was picking. I was thoroughly soaked when finished.

Many times I can find nice clusters like this but most of the time I’m not so lucky. Photo from the attached article- I can’t take credit for it.

Preparation of the grapes takes some time. I spend the time to de-stem all of the grapes but have discovered that the time consuming effort may be a bit of overkill. I am attaching a link to a recipe that simplifies the process and leaves the stems on. Just a note, I do not wear gloves when I pick and then de-stem the grapes. My hands have experienced a mild but persistent itching sensation for a day plus after handling the grapes. I will use glove next time both while picking and then skip the de-stemming step.

My recipe calls for 5 cups of strained juice….. I don’t force it through the cheesecloth as I like clear jelly. The jelly is a very sweet yet tart jelly with 7 cups of sugar. I use Sure Jell pectin and a tablespoon of butter. I find that I need to boil it at a full rolling boil for almost 6 minutes before it reaches the jelling point I like. The boiling process foams up very high so a deep pot is a necessity. I find that once removed from the heat the foam falls quickly and leaves little if any foam to skim off before ladling into the jars. I process for 10 minutes in a boiling water bath.

The photos don’t quite do it justice. The color of this jelly is amazing! I made 6 sample/gift size jars with this batch. I will make a couple more batches for a total of 30+/- half pint jars. And yes, I will part with a half pint jar for $6.00 or an appropriate barter!

The attached article has a recipe that differs very little from mine but does include a 1/4 cup of lemon juice to aid in the setting of the jelly and a 1/4 cup less grape juice. A word of advice, unless you have large sized equipment, do single batches and always measure everything meticulously. Test your jelly to ensure it has boiled long enough. The attached article as a great explanation and photos illustrating how to check your jelly.

https://jennifercooks.com/how-to-make-wild-mustang-grape-jelly/

TTFN

Bishop

Muscadines…or is it Mustang Grapes…..Both are a Southern Thing

5 Comments

A note about the delay posting this addition. I am confident that the Mustang grape vs. the Muscadine confusion has been resolved. I have been picking Mustang grapes. The Foraging Texas website has definitive descriptions. So, read on…….

It seems that the longer that I am living in Texas, the more I learn about the “life in the background”. Even though I am living at the edge of a huge city. Houston proper is home to about 2.3 million people, while the Metropolitan Statistical Area is nearly 6.5 million people. Crazy, I was just commenting to to my “Goo” friend John the other day that I never pictured myself living in a big city! Strange as it may seem, in the midst of this 6.5 million people, there is a good sized chunk of southern rural life.

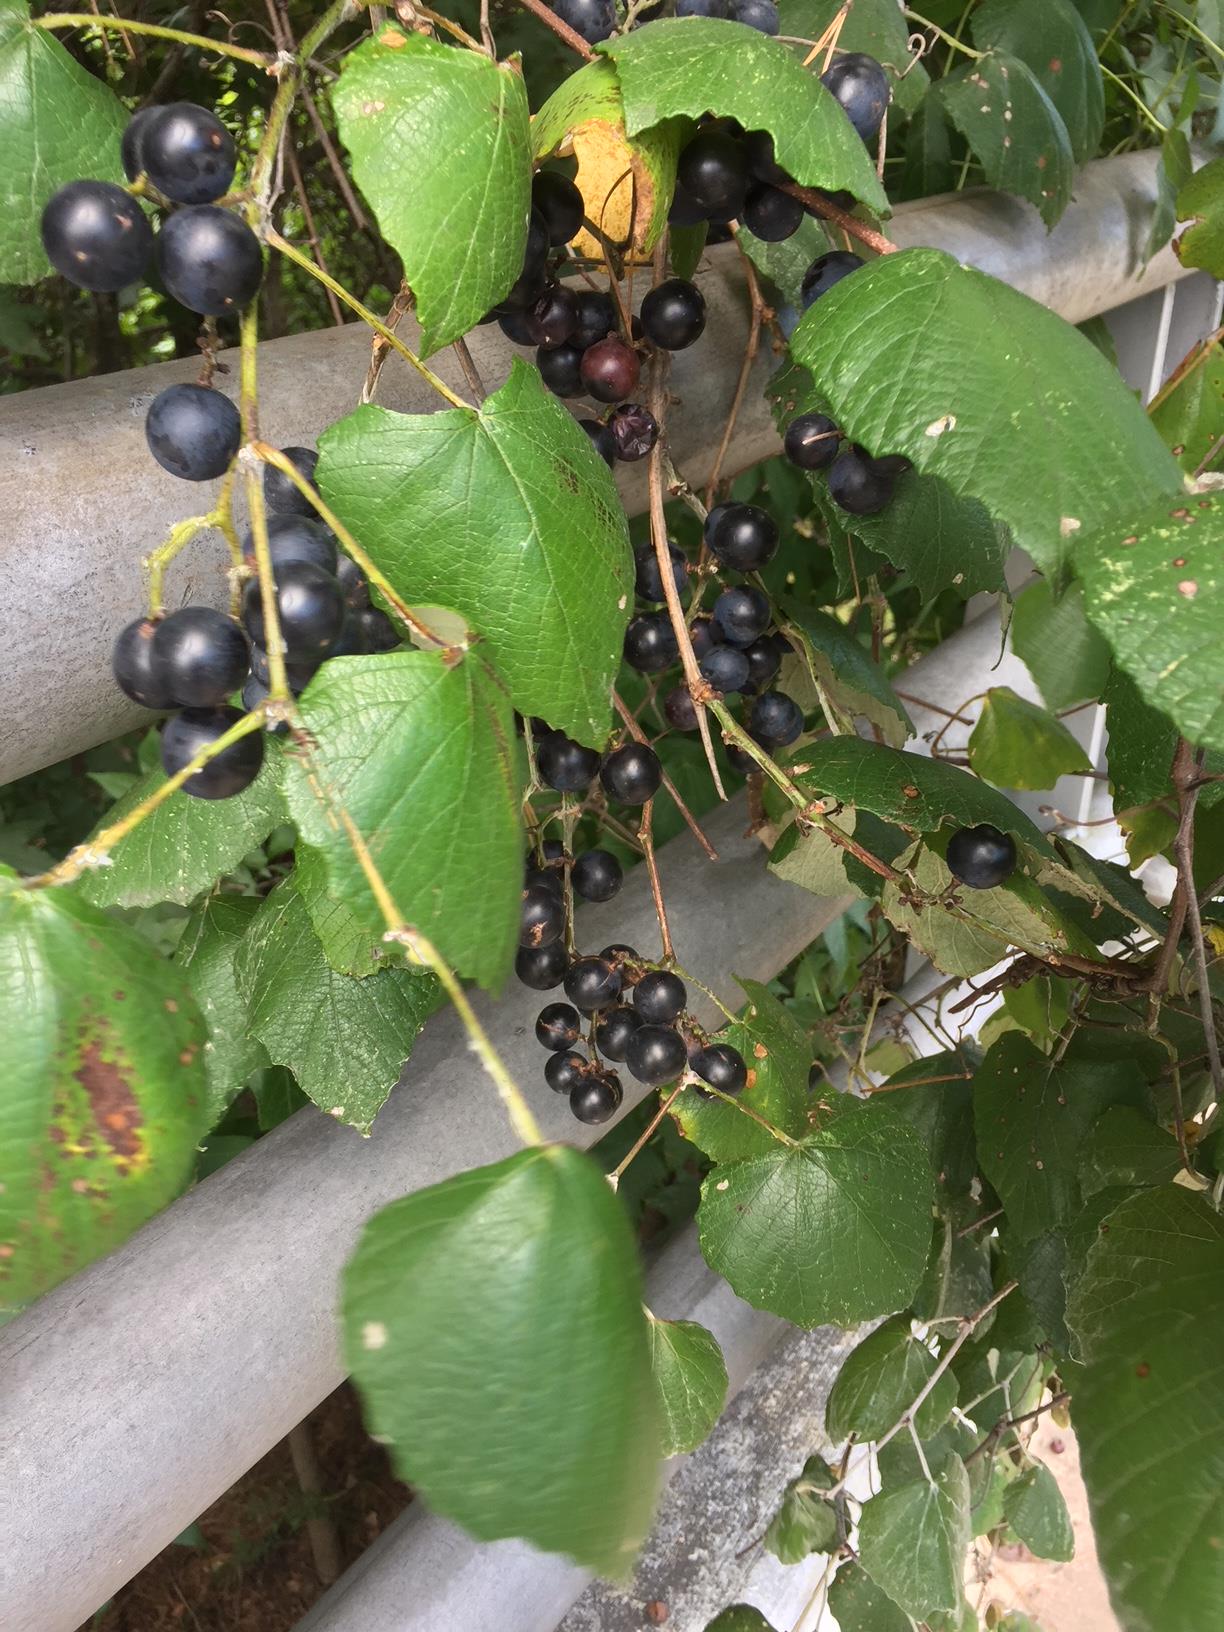
Out for a bike ride the other day in my rural/urban setting of Kingwood, I spot purple spots on the bike path. I stop and look up……Hmmmmm, looks like Muscadine wild grapes. (not!!!!! see lead in note)

Vitis mustangensis, commonly known as the mustang grape, is a species of grape that is native to the southern United States

This woody species produces small clusters of hard green fruit that ripen into soft 34-inch (2 cm) dark purple berries in August–September.

They have a thick outer layer of flesh and on average contain four seeds. This variety of grape is recognized by the white velvet-like underside of the leaves, and often covers small trees, shrubs, fences and other objects that it grows near.[3]

At the beginning of the article I thought I was picking muscadines…so I wrote….

“Muscadine (Vitis rotundifolia) is a member of the grape family. It is native to much of North America and grows wild in roadsides and forests.

It has been extensively cultivated since the 16th century. Its natural range is recognized in the following states of the US: Alabama, Arkansas, the Carolinas, Delaware, Florida, Georgia, Kentucky, Louisiana, Maryland, Missouri, Mississippi, Oklahoma, Tennessee, Texas, Virginia, and West Virginia. They are well adapted to their native warm and humid climate; they need fewer chilling hours than better known varieties and they thrive on summer heat.”

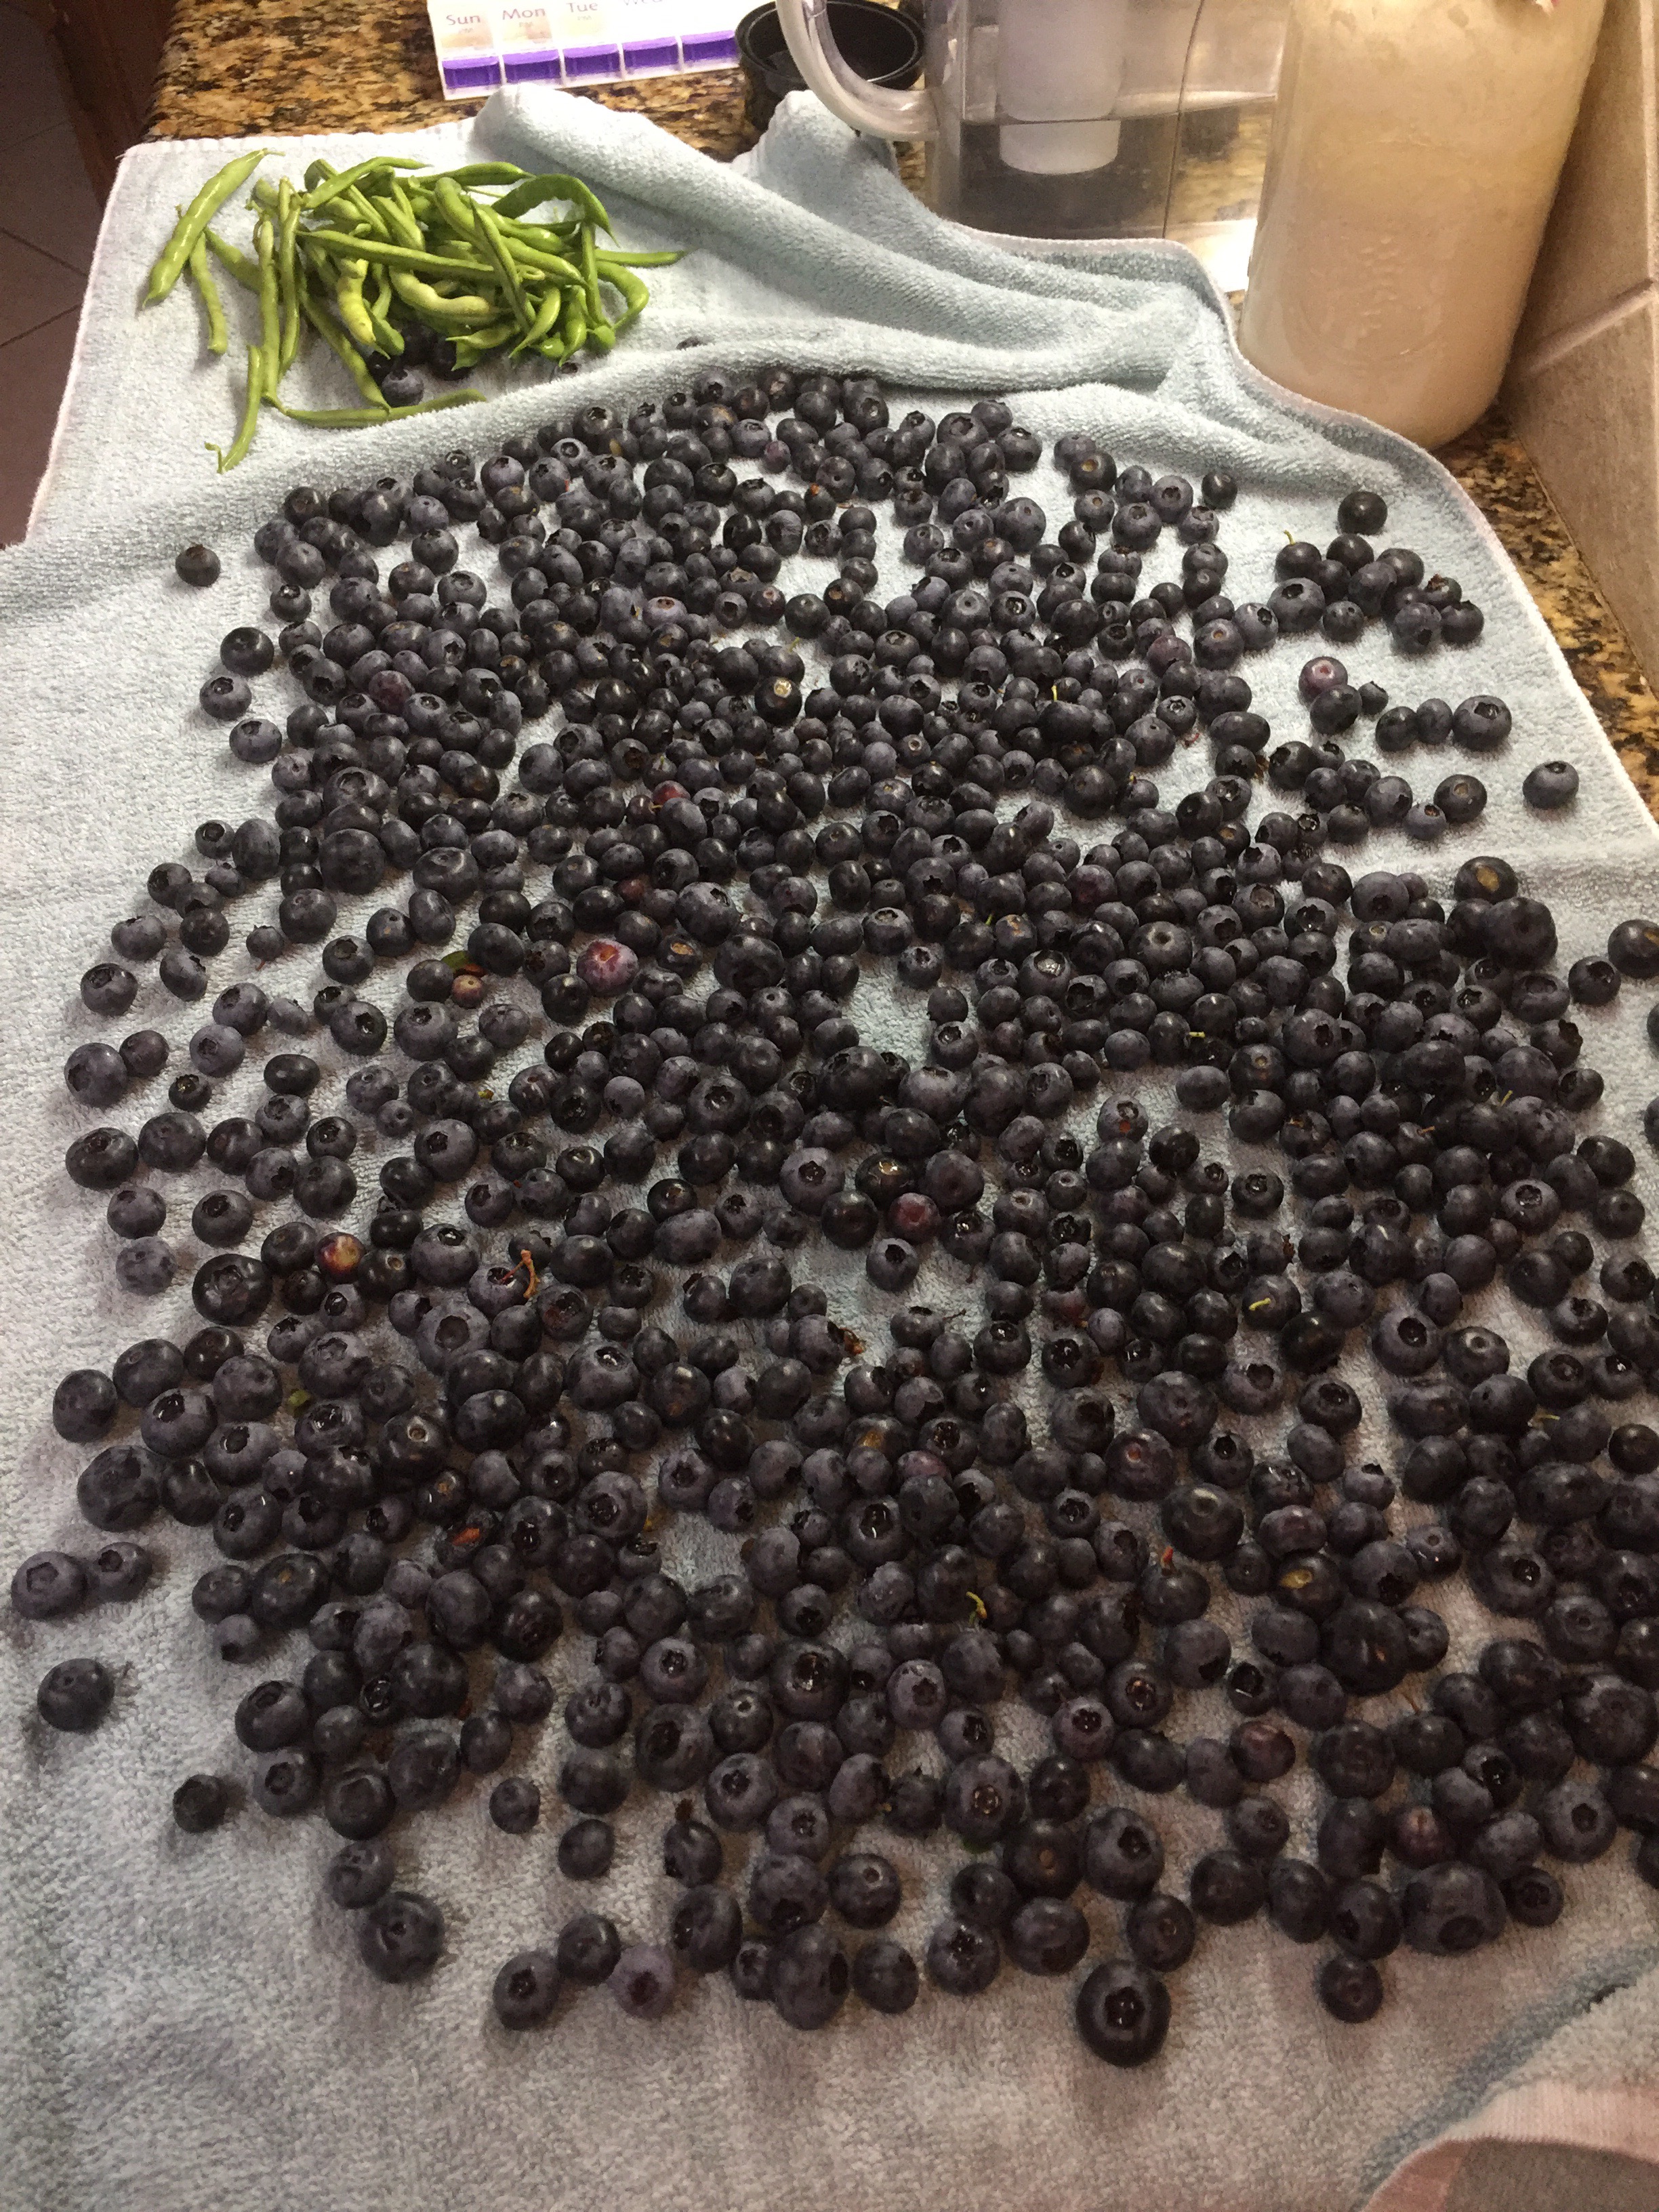
I rode home and grabbed my bucket, put it into the saddle bagss on my bicycle and headed out. FYI, be prepared to drip sweat when picking Muscadines (and Mustang grapes)…..even early in the morning…80 degrees F and north of 70% humidity…..perfect for these grapes.

IMG_5239

I am I little taller than the average guy. I saw purple spots on the bike path on the West Lake Houston bridge and looked up. Within my grasp was a vine….a good firm pull and it was down at picking height.

IMG_5245

Lots of big and very ripe Muscadine (Mustang) grapes. I returned home with almost 8 pounds and – completely sweat drenched….90+ degrees and very humid.

It was obvious that the bridge had been picked pretty hard. I had spotted some vines nearby, the spot is my secret, and rode the over to investigate more closely.


IMG_5243

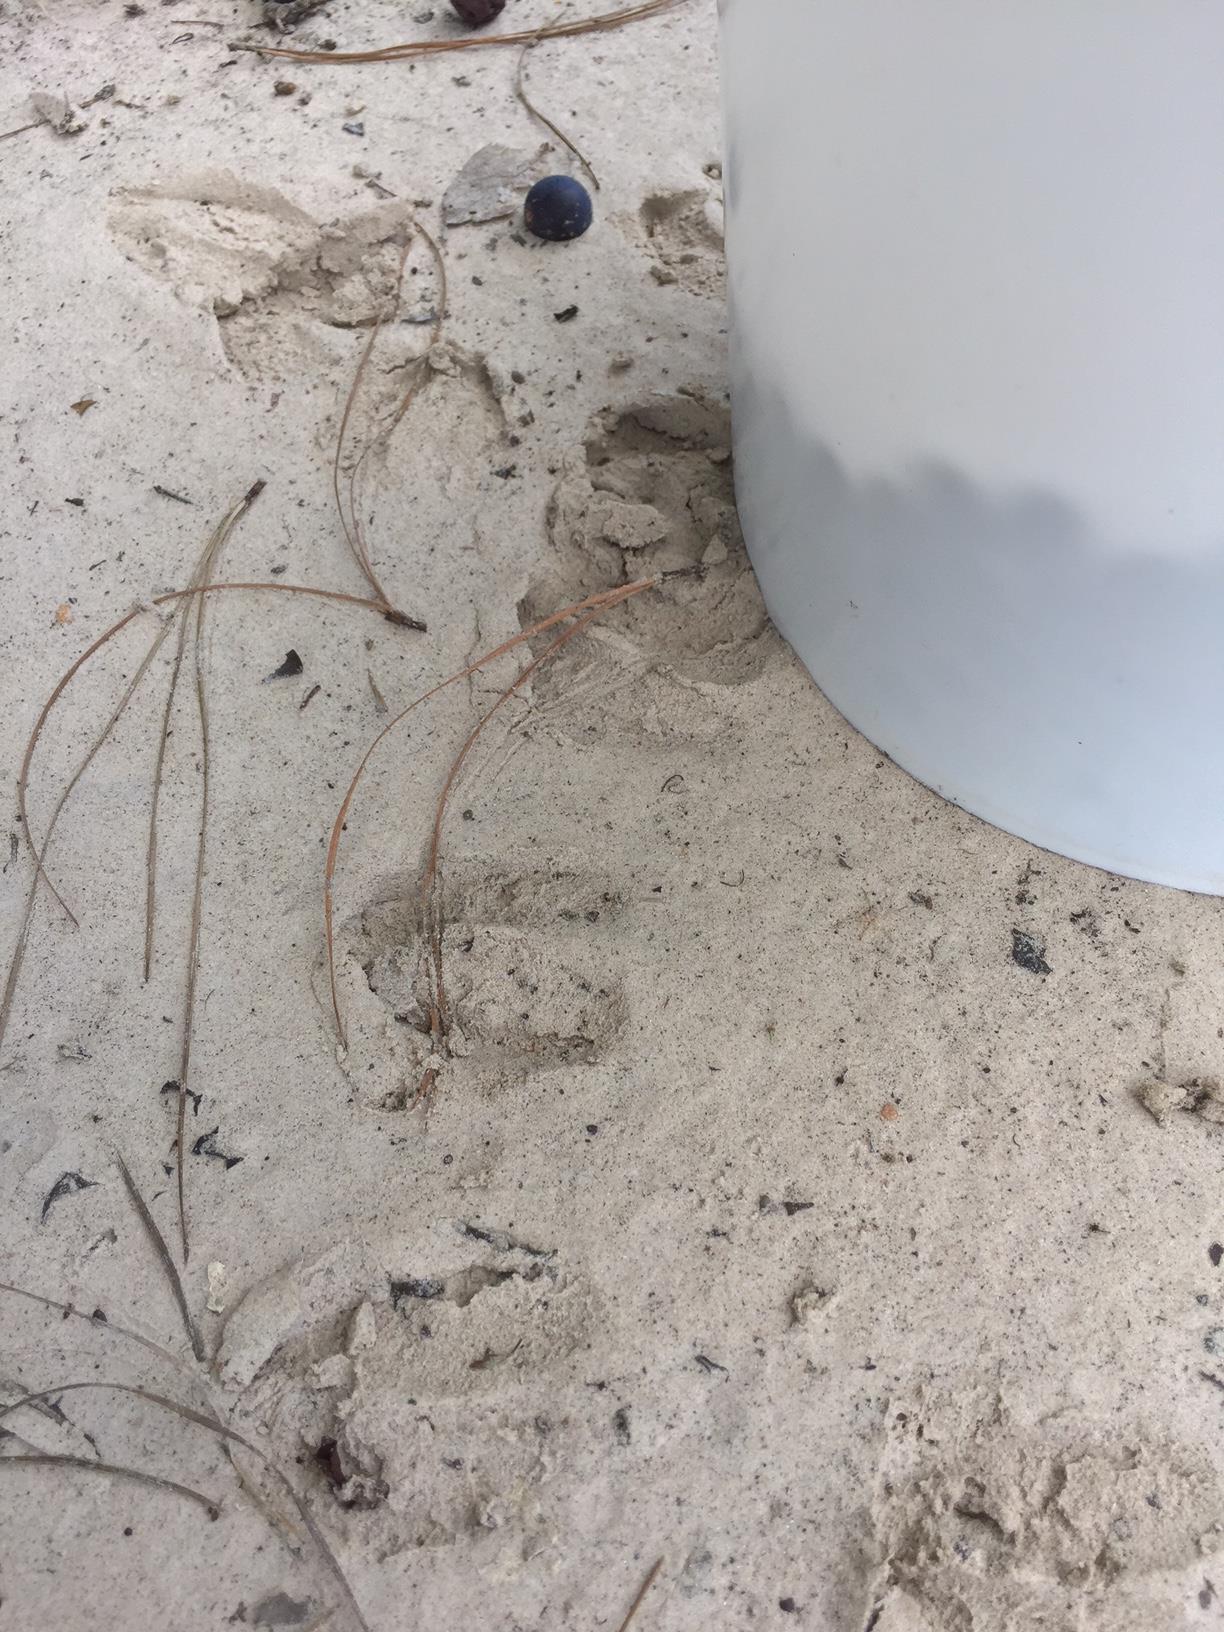
I have competition. In the shadow of the big city and adjacent to a busy 4 lane highway is a patch of grapes tempting the local deer. Look closely at the tracks in the sand. I probably picked 4 pounds from this location where the deer were browsing.

Several days prior to this adventure in picking/foraging, I picked about 3 gallons of ripe Muscadines (Mustang grapes) and processed them into juice for the first of several batches of jelly. I first washed then froze the grapes to burst the skins. I put them into a deep pot and covered them with water, just barely covering them. Cranked up the stove and mashed the heck out of them as they boiled. I boiled them for about 25 minutes while mashing and stirring.

You get the idea….a bit of work but well worth it. next, gotta strain off the juice through a double layer of cheesecloth.

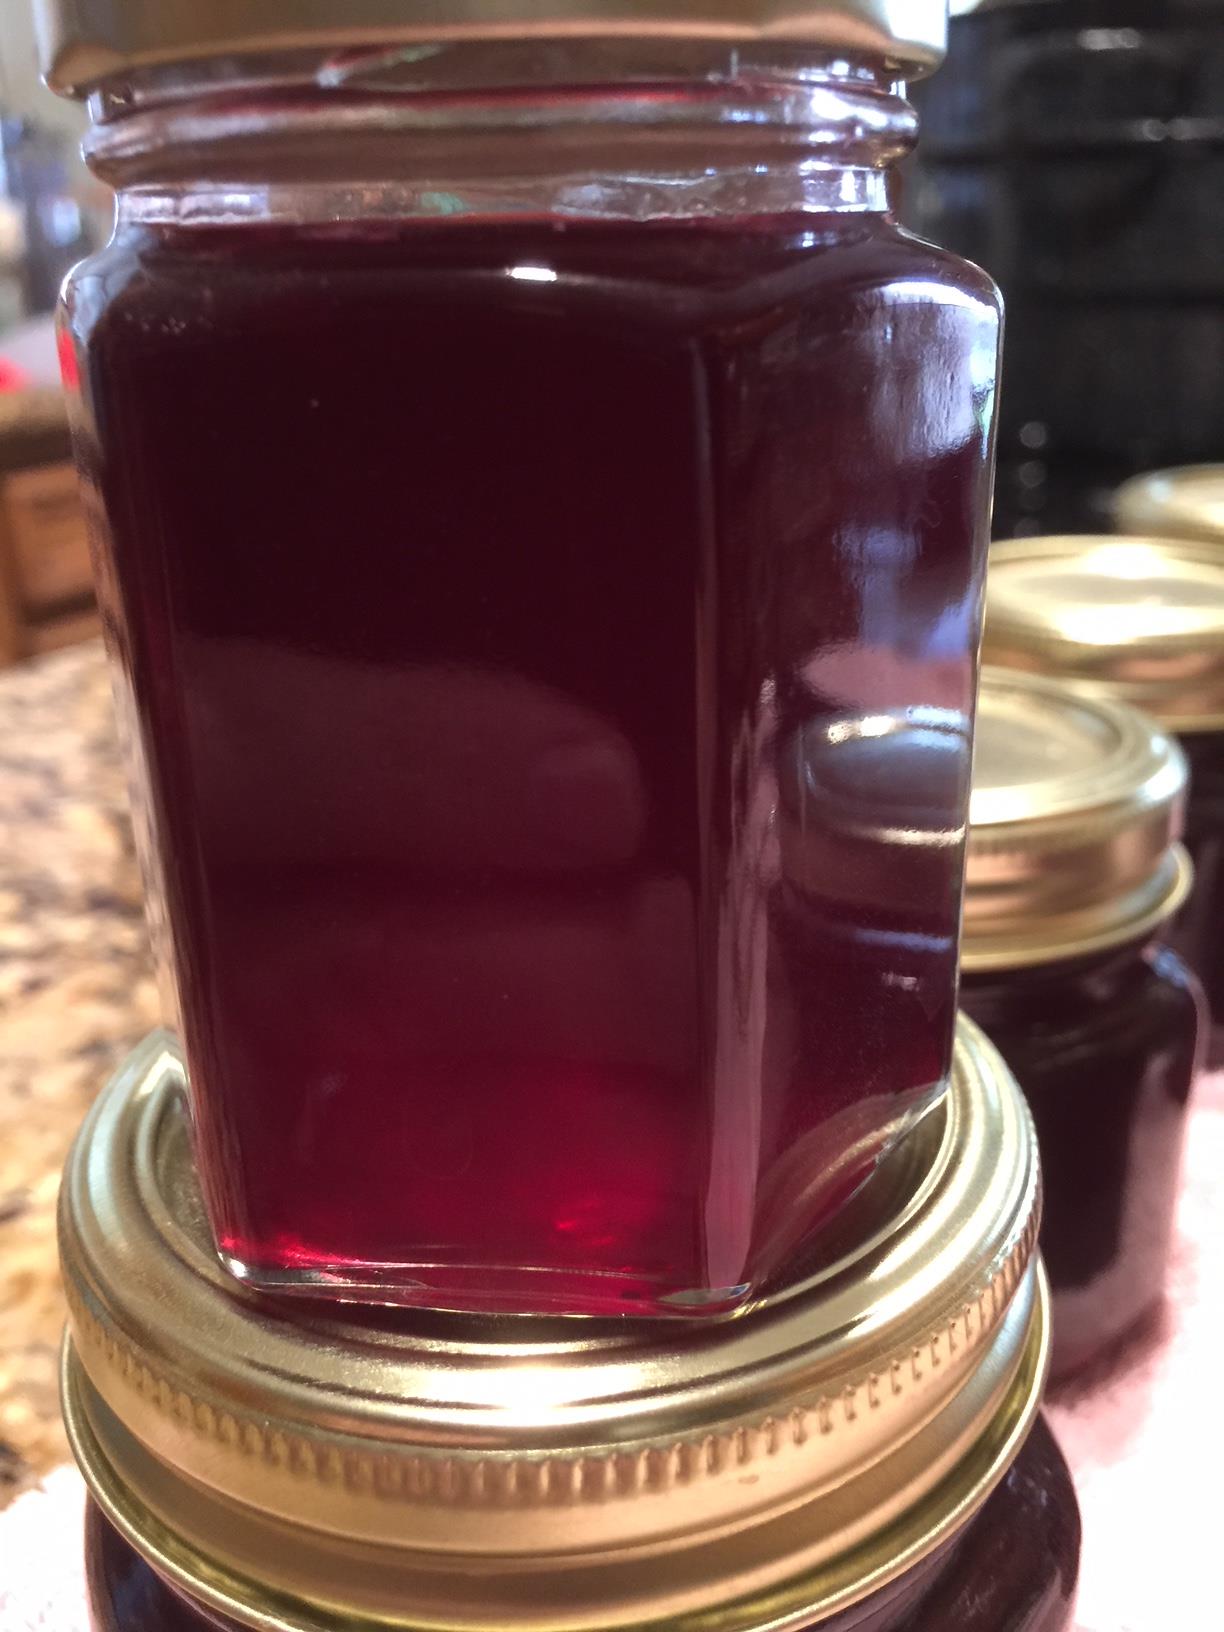
The result of my efforts…..I filled a 1/2 gallon jar and about 1/2 quart of a dark rich Juice.

IMG_5231

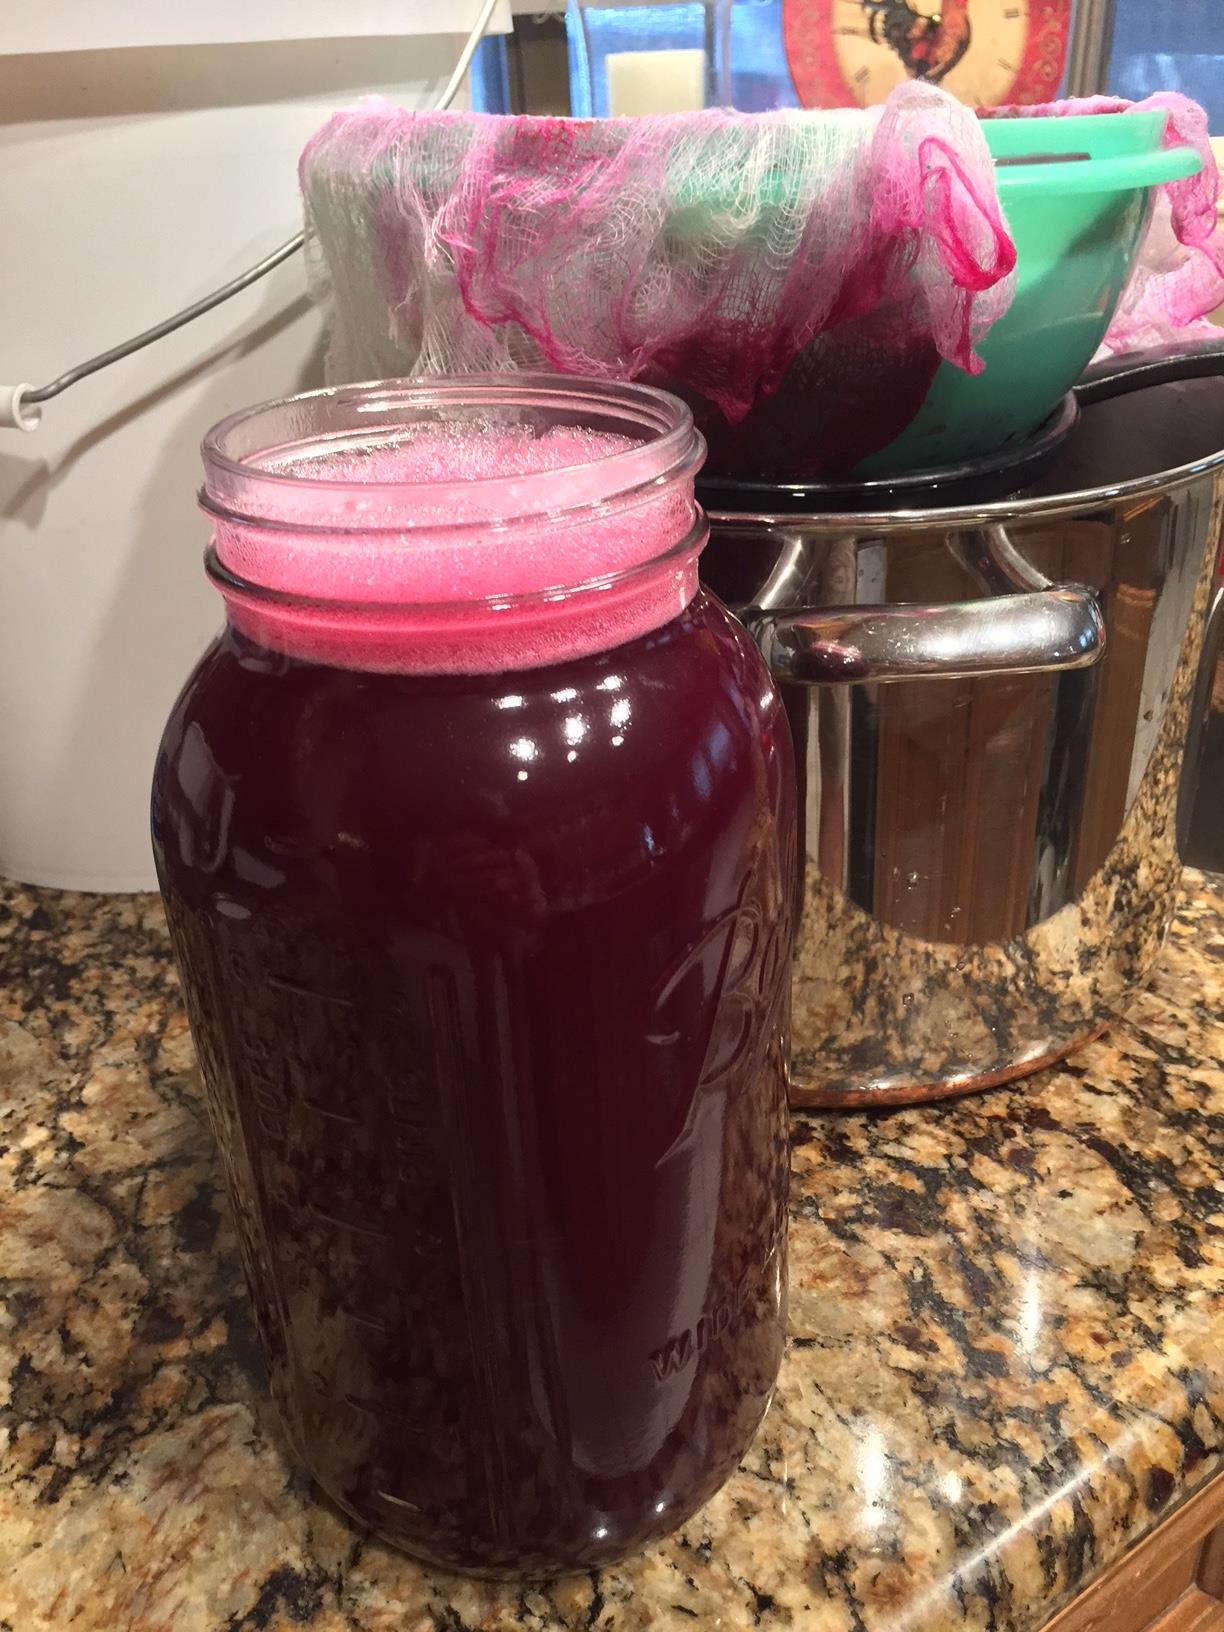
A good start on the jelly making. Just a note; if you want clear jelly, do not squeeze the pulp, let mother nature and gravity do the work.

Muscadine Jelly – FYI….it was Mustang grapes so the final product more like “tart sweet”.

4 cups of juice

3 cups of sugar

1 package of Sure Jell premium (yellow box) pectin

1 tsp butter to reduce foam

Add pectin to juice and stir well. Bring the mixture up to a full rolling boil then add sugar all at once. Stir vigorously to dissolve the sugar. Bring to a full rolling boil again and count of 60 seconds at full boil. Skim foam and fill your hot sterilized jars. Process in a boiling water bath for 10 minutes. Remove and let he jars sit undisturbed for a couple of days so the jelly sets up properly. Should make 5 half pints plus a little more.

Mustang Grape Jelly 

Same process to obtain juice.

5 cup of juice

1 pkg Sure Jell Premium (yellow box) mixed with juice.

Bring to a full boil and add 7 cups of sugar…that’s right, 7 cups.

Bring to a full boil for 3-5 minutes, the two batches I made took the full 5 minutes to get to the proper jelling point. Test drops on a cold plate until satisfied if it is ready….a bit subjective but it works. Skim the foam, fill sterilized jars and process in boiling water bath for 10 minutes. Let sit undisturbed for a couple of days…..I think I read that somewhere else…..Hmmmm.

55164038525__5A638659-9F5A-4D17-ACD4-99887D674333

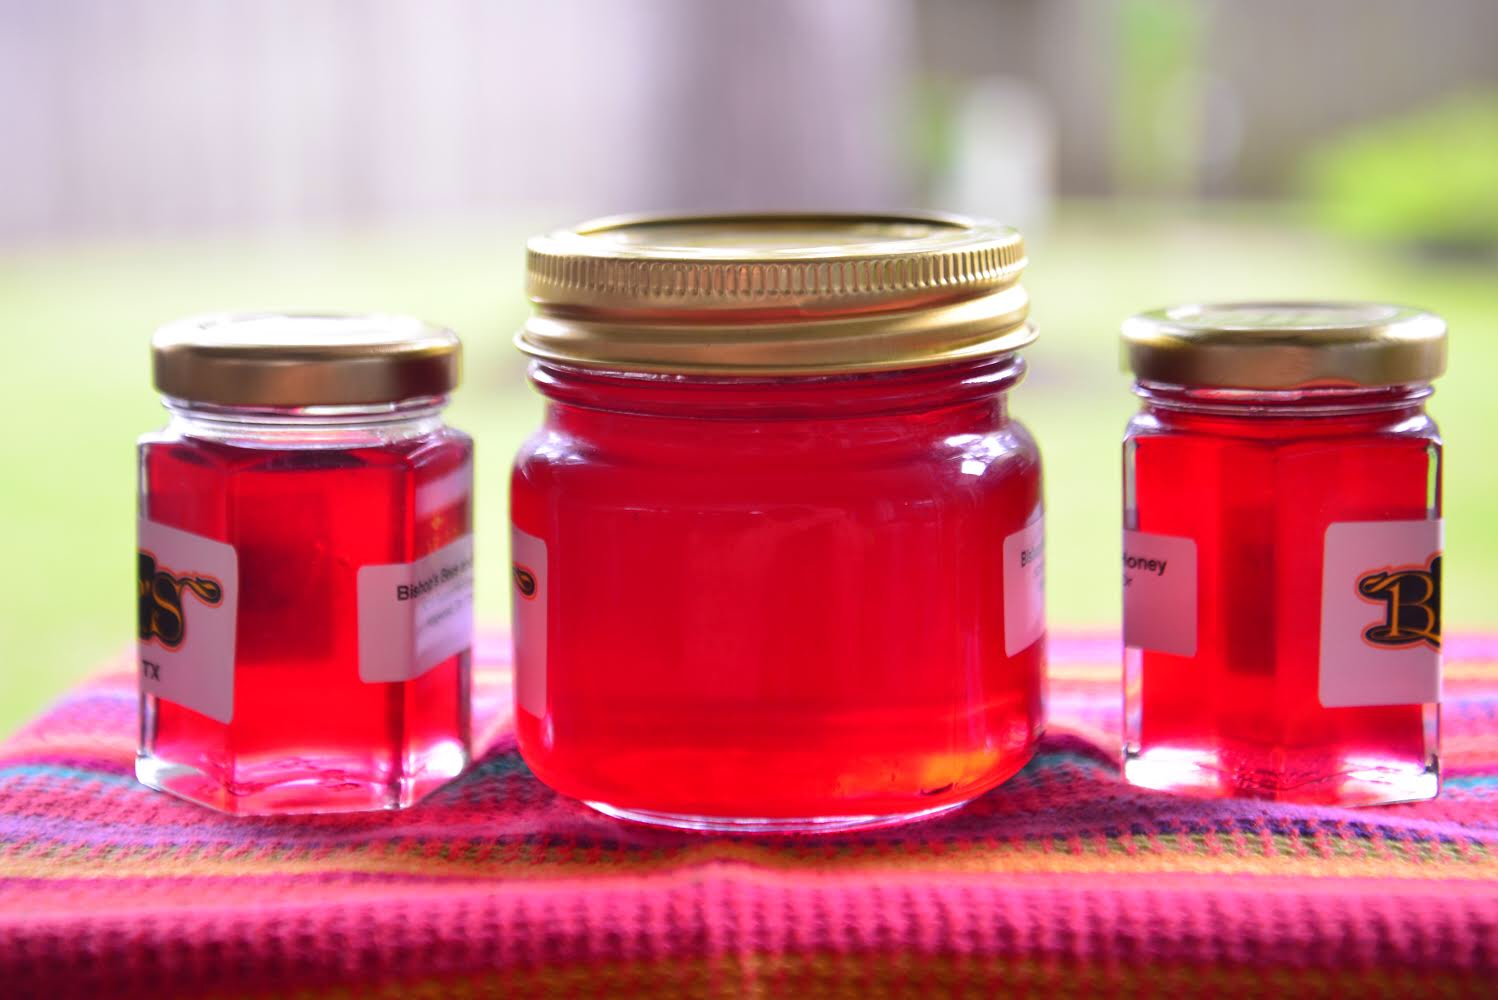
One of several gift jars I made with the batch. I will make another two batches later this week. Love the beautiful color.

For the total “Southern” experience, I am in the process of making Muscadine (Mustang grape) wine with the 8 pounds I picked yesterday. I had a great visit with the owner of the The Grain Cellar down in Humble, TX. besides being a home brewer, he is a knowledgeable wine maker and a knowledgeable resource on yeasts. He loves to share his knowledge with customers….as well as sample of his wine making as well as his beer brewing….I will attempt to make about 4 gallons of wine!!!!!

Now….from this evening….Preston at he Grain Cellar insisted that I did not pick Muscadines so he started me on the research journey….. Preston, you were correct. The definitive plant description is found by examining the leaves. Mustang grapes have a “white” lighter color on the underside of the leaves. Muscadines are green, top and bottom. Now I know.

The Mustang Grape “must” in the wine making bucket has a great aroma. I am looking forward to finishing the process. I will post the wine making adventure later.

Three batches of jelly are in the jars, the last two made properly…heh, heh. Not sure if I will go out and sweat again to pick any more….and the season for the Mustang grapes is beginning to close….to hot! and too little rain!


TTFN

Bishop


Two More Batches of Jam

Leave a comment

Yesterday was a busy day in the kitchen. I had planned on making a batch of both strawberry and blueberry jams. My wife had decided to do some full week meal prep the same day. Communication on each of our endeavors was, how should I say it, absent. We did manage to get our respective tasks done but I was crowding my timeline to get off to my evening workout at the gym! We were both successful!

Not an advertisement but a graphic visual of the low sugar pectin I have had so much luck and success with.

Error
This video doesn’t exist

A short clip at an awkward angle of what a “full rolling boil that cannot be stirred down” looks like! It is a common question of novice Jam/Jelly makers.

The delicious foam scraped off of the jam after removing from the heat. I wonder if there is market for such a thing!

Finished product cooling and waiting for labels. I know, the pink towel really doesn’t lend itself to a quality “Good Housekeeping” type of food photo. I need to brush up on the technique.

I have at least two more batches of Strawberry Jam to make and blackberry season starts this week at Blakelock’s Berries out in Grangerland at my apiary location!

FYI, I inspected the bees out there yesterday and saw the most beautiful and large blackberries! Yes, just to ensure they were ripe, I sampled a couple before the birds had a chance!

TTFN

Bishop

My Strawberry Jam

4 Comments

I am about to give away the secret to making my very well received and highly praised, Strawberry Jam. A quote from one of my regular customers, “How can you go back to “Smucker’s” after tasting Bishop’s jam?”

Side Note – I have labeled it preserves in the past but a little research shows that I make jams!

Summary:

1.The differences between jam and preserves are:

2.Jam is made from chopped or crushed fruit.

3.Preserves are made from whole chunks of fruit.

4.Jam contains sugar, pectin, and lemon juice.

5.Preserves are only boiled in sugar.

6.Jam is allowed to jell.

7.Preserves are not jelled in the process of manufacturing.

http://www.differencebetween.net/object/comparisons-of-food-items/difference-between-jam-and-preserves/

It’s not that I do anything out of the ordinary to make my “jams”, other than the fact that every berry in the process is/was hand selected by me! In fact, 75% of the strawberries originate in my garden although I do supplement with strawberries picked, again, by me, at “Wood Duck Farm”, about 25 minutes north of Kingwood. They are grown, as are mine, with no chemicals of any sort.

Laying out some of the tools of the trade. Four cups of sugar minus 1/4 cup mixed with the pectin prior to cooking. I use the Sure Jell pectin for my jams, they are made with 1/3 less sugar than with regular pectin. A spoon to skim the foam and yes I rinse it off after every lick. Green handle magnet to save my pinkies. An 8 ounce ladle…It does help when filling 8 ounce jars. Jar tongs….indispensable for fishing jars out from the boiling hot water just prior to filling. Last but not least, my trusty old, at least 35 years old, canning funnel.

The start of the process; 1/4 cup sugar mixed with pectin and the measured volume of crushed strawberries, just a note here, follow the recipe very darned close!!!!! Too much of the fruit mixture or too little will impact the final results. I use a potato masher to, yes, mash up the fruit, so there are some nice chunks of berry in every jar, a dab of butter to help reduce the foaming. FYI – Not sure if it helps all that much but I can’t argue with the success of the final product.

Follow the recipe; bring the mixture to a full rolling boil, i.e., cannot be stirred down. Note the light pinkish foam around the edges.  Then add remaining sugar – 3 and 3/4 cups, return to full rolling boil for one minute….I just slowly count to 75 and it seems to work for me.

Skim the foam but don’t discard. You have several choices, place in a bowl, refrigerate and use as you would any jam or preserve, or, as my wife does, spread across an egg white & oatmeal frittata, or dig in with a spoon and place directly into your mouth…..my personal favorite!

Ready to can, foam has been skimmed, jars are in a boiling water bath for sanitation purposes, ladle and funnel are ready, magnetic stick finger saver, spoon (recently licked and rinsed properly)….use however you want and the jar lids in a bowl of very hot water to soften the seals.

Grab a hot jar, drain and fill to about 1/4 inch of the topic the jar with the strawberry jam mixture. FYI, there is a tool made to gauge that space but I rarely use it, wipe any excess Jam from rim of the jar, place the lid on and screw the metal band on snuggly.

Once all the jars are filled and sealed, return to the hot water bath, submerge the jars with at least one inch of water covering the jars. Bring to a boil for 10 minutes, remove and allow to cool. If you have done a good job you will hear the lids pop down as the jars cool, indicating s good seal.

Next step, distribute and bring smiles to the faces of the recipients!

TTFN

Bishop

Pomegranate Jelly

Leave a comment

I am very sure it won’t be as good as the Pomegranate Jelly that my Aunt Josie made – my first memories of her jelly are from Christmas time nearly 60 years ago. Just saying that phrase – “60 years ago” begins to make me feel a little old! My Uncle Jim was a Foreman for Western Water Works in Taft, CA. -( I think it is called West Kern Water District now….) Back to the pomegranate…..the main yard in Taft was surrounded by a hedge of pomegranate bushes. They seemed to ripen in the late fall which probably coincided with my Christmas season memories of Aunt Josie’s pomegranate jelly.

60 years ago I didn’t know much more about her jelly other than how wonderful it was on my toast! My forays into making jams and jellies is relatively recent, in the past 10-25 years or so. Key differences from those long ago times, Aunt Josie sealed hers with a cap of melted paraffin. I remember seeing a row of 6 or 7 jars on a table in the dining room adjacent to the kitchen. Almost every jar has a little dollop of jelly that had oozed through the wax somehow and …… if no one was looking I wiped my finger through it and into my mouth……probably considered unsanitary by today’s standards but I don’t believe anyone ever became ill.

Now, comparing my jelly to Aunt Josie’s. Several years ago I did make a batch from scratch – a lot of work to extract the seeds and squeeze and make jelly…..Today I took a shortcut. I bought some organic, unsweetened pomegranate juice. My batch from scratch was very much like my Aunt’s, both in color and flavor. My store bought juice resulted in a much darker jelly. My Aunt’s jelly was translucent, like rose pink tinted lens. My offering is dark crimson and only allows a hint of light to pass through the jars.

I terms of flavor….I would say my offering is a more robust and has a hearty pomegranate flavor – still, very pleasant. I made two batches, both resulted in approximately 6 – 8 oz. jars. Batch one was straight up pomegranate.

  • 3 1/2 cups juice
  • 5 cups sugar
  • 1 packet of Sure Jell brand low/no sugar pectin….pink package
  • 1 smidge of butter to reduce foaming.

I followed the Kraft website’s directions for pomegranate jelly. Jelled up very nicely.

Batch two. – I added two cinnamon sticks and steeped them in the pomegranate juice for about 15 minutes on very low heat. I left the sticks in as I added the Sure Jell pectin and brought the mix up to a full rolling boil. I removed the sticks and added the sugar and followed to recipe as written.

Both batches were processed in a boiling water bath for 10 minutes.

In the photos shown below;

The single jar is a small 110 ml jar. In bright sunlight there is just a hint of light passing through. Dark and yummy.

The two batches shown side by side; on the right the Pomegranate Jelly and the left Pomegranate with Cinnamon.

Bee News;

Yesterday I drove out to Blakelock’s Berries out in Grangerland, 23 miles out from the house, to add a honey super to the hive out at the farm.

28378808_1797846036913301_4150785973977378071_n

Added the medium super yesterday on top of the two deep brood boxes. The girls are bringing in lots of pollen and upon close inspection those without pollen appear to have a bit of a swell to the abdomen. Hmmmmm, could it be Blueberry nectar or some other source? Note: Bumble bee hovering around the entrance before the girls chased it away.


TTFN

Bishop


Blakelock’s Berries

1 Comment

http://blakelocksberries.com/

I went to visit Paul at Blakelock’s for a private blueberry picking session. In about 25 minutes , on very young plants, +\- 3 years old, I was able to gather about 9 1/2 pounds of the sweetest blueberries. My dilemma now is – I want to make some jam and Kathy wants them all frozen in small bags for snacking. There should be some middle ground don’t you think? 

Blakelock’s is primarily a blackberry u-pick farm. They should be open by mid May. I picked at his place last year and I got a ton of great blackberries. 


I love how the blueberries cluster up. Makes for easy picking. 


The blackberries are blossoming and forming good looking fruit right now! 

I have committed to placing 3 hives at Blakelock’s early next spring. Should be a win/win. Paul gets the benefit of improved pollination and I get some berry good honey! 


This is one 4.5 plus bucket of berries drying out before packaging for my lovely and loving wife! PS- can I now make some jam Hun? FYI- a handful of green beans in the background along with my sourdough starter jar! 

Check out Paul’s website;

http://blakelocksberries.com/
TTFN

Bishop

Pepper Jellies

Leave a comment

I am doing some Fall clean up in the garden, pulling up the pepper plants, cucumber vines and pulling more of the ever present weeds.

I grew three types of pepper plants this summer. The most prolific of the trio was the Poblano pepper. The Serrano came in second and the Red Bell pepper was a very distant third. An outcome of the clean-up was a large number of peppers to be used/consumed. In the past I have used the poblanos as trading material at the local farmer’s market as well as trading for a dinner at one of the local Mexican restaurants. I need to qualify the comment about the Serrano pepper plant – three weeks ago it was loaded and I failed to harvest. The result today was barely enough to make a batch of Serrano Pepper Jelly. Poblanos to the rescue!

jbd_9951

Poblano on the right and Serrano the left.

First up this morning was the Serrano Pepper Jelly. It so tasty when completed. We mix it with soft cream cheese as a spicy dip. The use of store bought Red Bell Peppers creates a nice red hue and the bits of finely chopped pepper pieces creates a “confetti” look in the finished product. I don’t usually use liquid pectin when making jams and jellies but past pepper jelly efforts have made a less than firm set. No troubles with this recipe.

Serrano Pepper Jelly

Yields 7 8-oz jars or 14 4-oz jars

Ingredients 

§  1 cup chopped red bell pepper

§  1/2 cup chopped green Serrano peppers/Poblano peppers

§  5 cups white sugar

§  1 1/2 cups apple cider vinegar

§  1 (6 fluid ounce) container liquid pectin ( like to use Certo brand)


Directions 

Step 1: Sterilze jars, lids and rings according to manufacturer’s instructions.  Heat water in a Large pot or water canner.

Step 2: Remove stems, veins and most of the seeds of the bell and serrano peppers. Mince peppers in a food processor.

Step 3:  In a 5-quart pot over high heat, combine bell peppers, jalapenos, sugar and vinegar. Bring to a rolling boil; boil for 3 minutes. Remove from heat and cool for 5 minutes.  Skim off any foam.

Step 4:  Stirring constantly, add the pectin and let mixture continue to cool for 3 minutes more.

Step 5: Pour into hot, sterilized jars and top with sterilized lids. Secure lids with bands and put back in pot hot water and boil for 5 mins.  Remove from water and allow jars to cool slowly, creating a vacuum seal.  Jars may make a popping noise as they cool.

 Tip: let cool, gently remove the rim and dry the lid and rings (do this very carefully) so that you do not get rusty lids.  Place rings back on but be sure not to screw too tightly then set overnight. Sometimes it has taken 2 weeks for this jelly to set so be patient.

This recipe makes 14 4-oz jars.  I like to put them in small jars because at this size they are a perfect addition to a cheese and cracker plate.  Isn’t the coloring gorgeous?  The flecks of peppers look like confetti.

http://www.marinhomestead.com/recipes/dessert/serrano-pepper-jelly/

I guarantee that it won’t take two weeks for this jelly to set. I had to use a spatula to get the jelly out of the pot when filling the last two jars from each batch. My yield was a little lower than the recipe – 11, 4 oz. jars. In the future I will smoke some of the Poblano peppers and make a “smoked” Poblano pepper jelly. I plan on using pecan wood…..a nice mellow wood. I have read that some that make Chipolte, smoked Jalapeno peppers, use mesquite for a stronger flavor. Maybe next time I’ll use the mesquite.

jbd_9952

Yummy Stuff.


TTFN

Bishop

Fall Tomatoes and Other Notes

Leave a comment

The Juliet tomato is a prolific tomato in the Houston growing environment. Here it is, November 6, 2016, and I still have ripening tomatoes on the plant as well as blossoms! The tomato is sweet but does have a bit of a tough skin. Doesn’t bother me but some may notice. They look like a miniature Roma and make great sauce. The plants are indeterminate and again, to repeat myself, prolific. Two plants can overwhelm a family.

Stovetop Juliet Tomato Sauce

By Analiese Paik

Ingredients: (double or triple as necessary)

  • 1 pound of Juliet tomatoes, preferably organic.
  • 2 cloves garlic, finely chopped
  • 2-3 T olive oil
  • fresh basil, oregano or parsley (optional)

Method:

  1. Rinse tomatoes and set aside. Chop garlic while heating a pot large enough to fit the tomatoes on the stove. Add olive oil to the pot and when it shimmers, add the garlic and stir until fragrant over medium heat, a minute or 2.
  2. Add tomatoes to the pot along with 1/4 cup of water so the garlic doesn’t burn. The tomatoes will take at least 5-10 minutes to soften up and begin releasing their juices. I like to put a lid on the pot to speed this up.
  3. Once the tomatoes begin to release their juices and the skins start to burst, remove the lid and simmer for another 10 minutes or so until the tomatoes have all lost their skins or are quite soft
  4. Use an immersion blender to puree the sauce right in the pot. Add salt to taste and a chopped herb if you’d like. The flavor of the sauce, with the garlic alone, is rich and complex.
  5. Strain the sauce through a large strainer or food mill heavy enough to hold the seeds and skins. Be sure to push down on the solids to release all the sauce. Cool the sauce and store in the refrigerator in glass containers. When making large quantities, be sure to chill in the refrigerator before freezing.

http://fairfieldgreenfoodguide.com/2013/09/11/juliet-tomato-sauce/


img_2257

Bright Red Juliet tomato and more ripening

img_2258

More and more and hint at how they grow in clusters.

fullsizerender2

A good number of the 100 Chandler strawberries in the ground planted through a weed barrier. Hope to keep the berries cleaner.

fullsizerender

The banana flowers begin to turn upward as they mature. The flower hangs down and the bunch develops and points skyward now.

Other Notes

The Burro banana plant has put on a nice bunch going into, what Houston calls , winter. As I have noted before, last winter I had a bunch survive and ripen even though the plant lost all of the leaves. I left the bunch on and I was rewarded with 40 plus Burro bananas. Fingers crossed I have the same luck.

The Burro and Manzano plants are trying to get ahead of me by sending up shoots. I dug up and potted one of each for a member of the Facebook page, “Texas Small Farming and Homesteading” group. Kim and Jeff live nearby and I delivered the potted plants to them yesterday. Surprise, surprise….they are also beekeepers! Smaller world than we’ll ever know. I guaranteed more if these two died.

I recently put Chandler Strawberry plants out into the garden. I am looking forward to spring and hopefully an epic strawberry jam making explosion. Today will be another round of adding beet, turnip and lettuce seeds. I soaked some snap peas and hopefully they will take off. The previous planting went into the ground without presoaking and sure enough….nothing germinated. I have some accidental pole beans growing from volunteers. Enough for a couple of handfuls for dinner.

Bee stuff……during the next two weeks I should finish prepping all the hives for winter and then make plans for 2017. Hopefully my strongest hives will be ready to split in the spring. I will also build a few more swarm traps…..no luck with the three I set out this year. I made about 8 pounds of “creamed cinnamon honey” this past week. Inventories are getting low…..can’t wait for spring!

Bonus; I am passing along my recipe for cinnamon creamed honey. Not sure I should do this but…..if you really wanted to make it you could do a search and find it just the same….

http://www.tc.umn.edu/~reute001/htm-files/Creamed%20honey%20recipe.html


Ok…..enough for today.

TTFN

Bishop

Older Entries

%d bloggers like this: