Home

Banana Bonanza

9 Comments

2016 – the banana plants have been going bananas! Literally. Yes Plants not trees. The past two winters here in Houston have been mild resulting in the banana bonanza. I pulled up some info from the Texas A&M Horticulture website;

http://aggie-horticulture.tamu.edu/fruit-nut/fact-sheets/banana/

Here is the intro to growing the bananas;

“Banana

Julian W. Sauls Extension Horticulturist

Broad, long, graceful leaves and rapid growth-commonly reaching full size in just a few weeks-make banana a favorite plant for providing a tropical look to pool and patio areas. The development of bananas following a frost-free winter is a source of both pride and amazement to those unfamiliar with banana culture.

Banana is a tropical herbaceous plant consisting of an underground corm and a trunk (pseudostem) comprised of concentric layers of leaf sheaths. At 10 to 15 months after the emergence of a new plant, its true stem rapidly grows up through the center and emerges as a terminal inflorescence which bears fruit.

The flowers appear in groups (hands) along the stem and are covered by purplish bracts which roll back and shed as the fruit stem develops. The first hands to appear contain female flowers which will develop into bananas (usually seedless in edible types). The number of hands of female flowers varies from a few to more than 10, after which numerous hands of sterile flowers appear and shed in succession, followed by numerous hands of male flowers which also shed. Generally, a bract rolls up and sheds to expose a new hand of flowers almost daily.”

Ok – enough of the technical talk. The bonanza is a bit like your neighbor that is overwhelmed with zucchini – you hide when you see them coming. Yes, I gave away a lot of bananas. Once you cut the stalk off the ripening process speeds up. They are great in smoothies but one smoothie a day doesn’t take much of a bite out of the bounty. Eating fresh is a good idea too, but………you get the idea. The freezer is well stocked with both the Burro and Manzano bananas so now what?

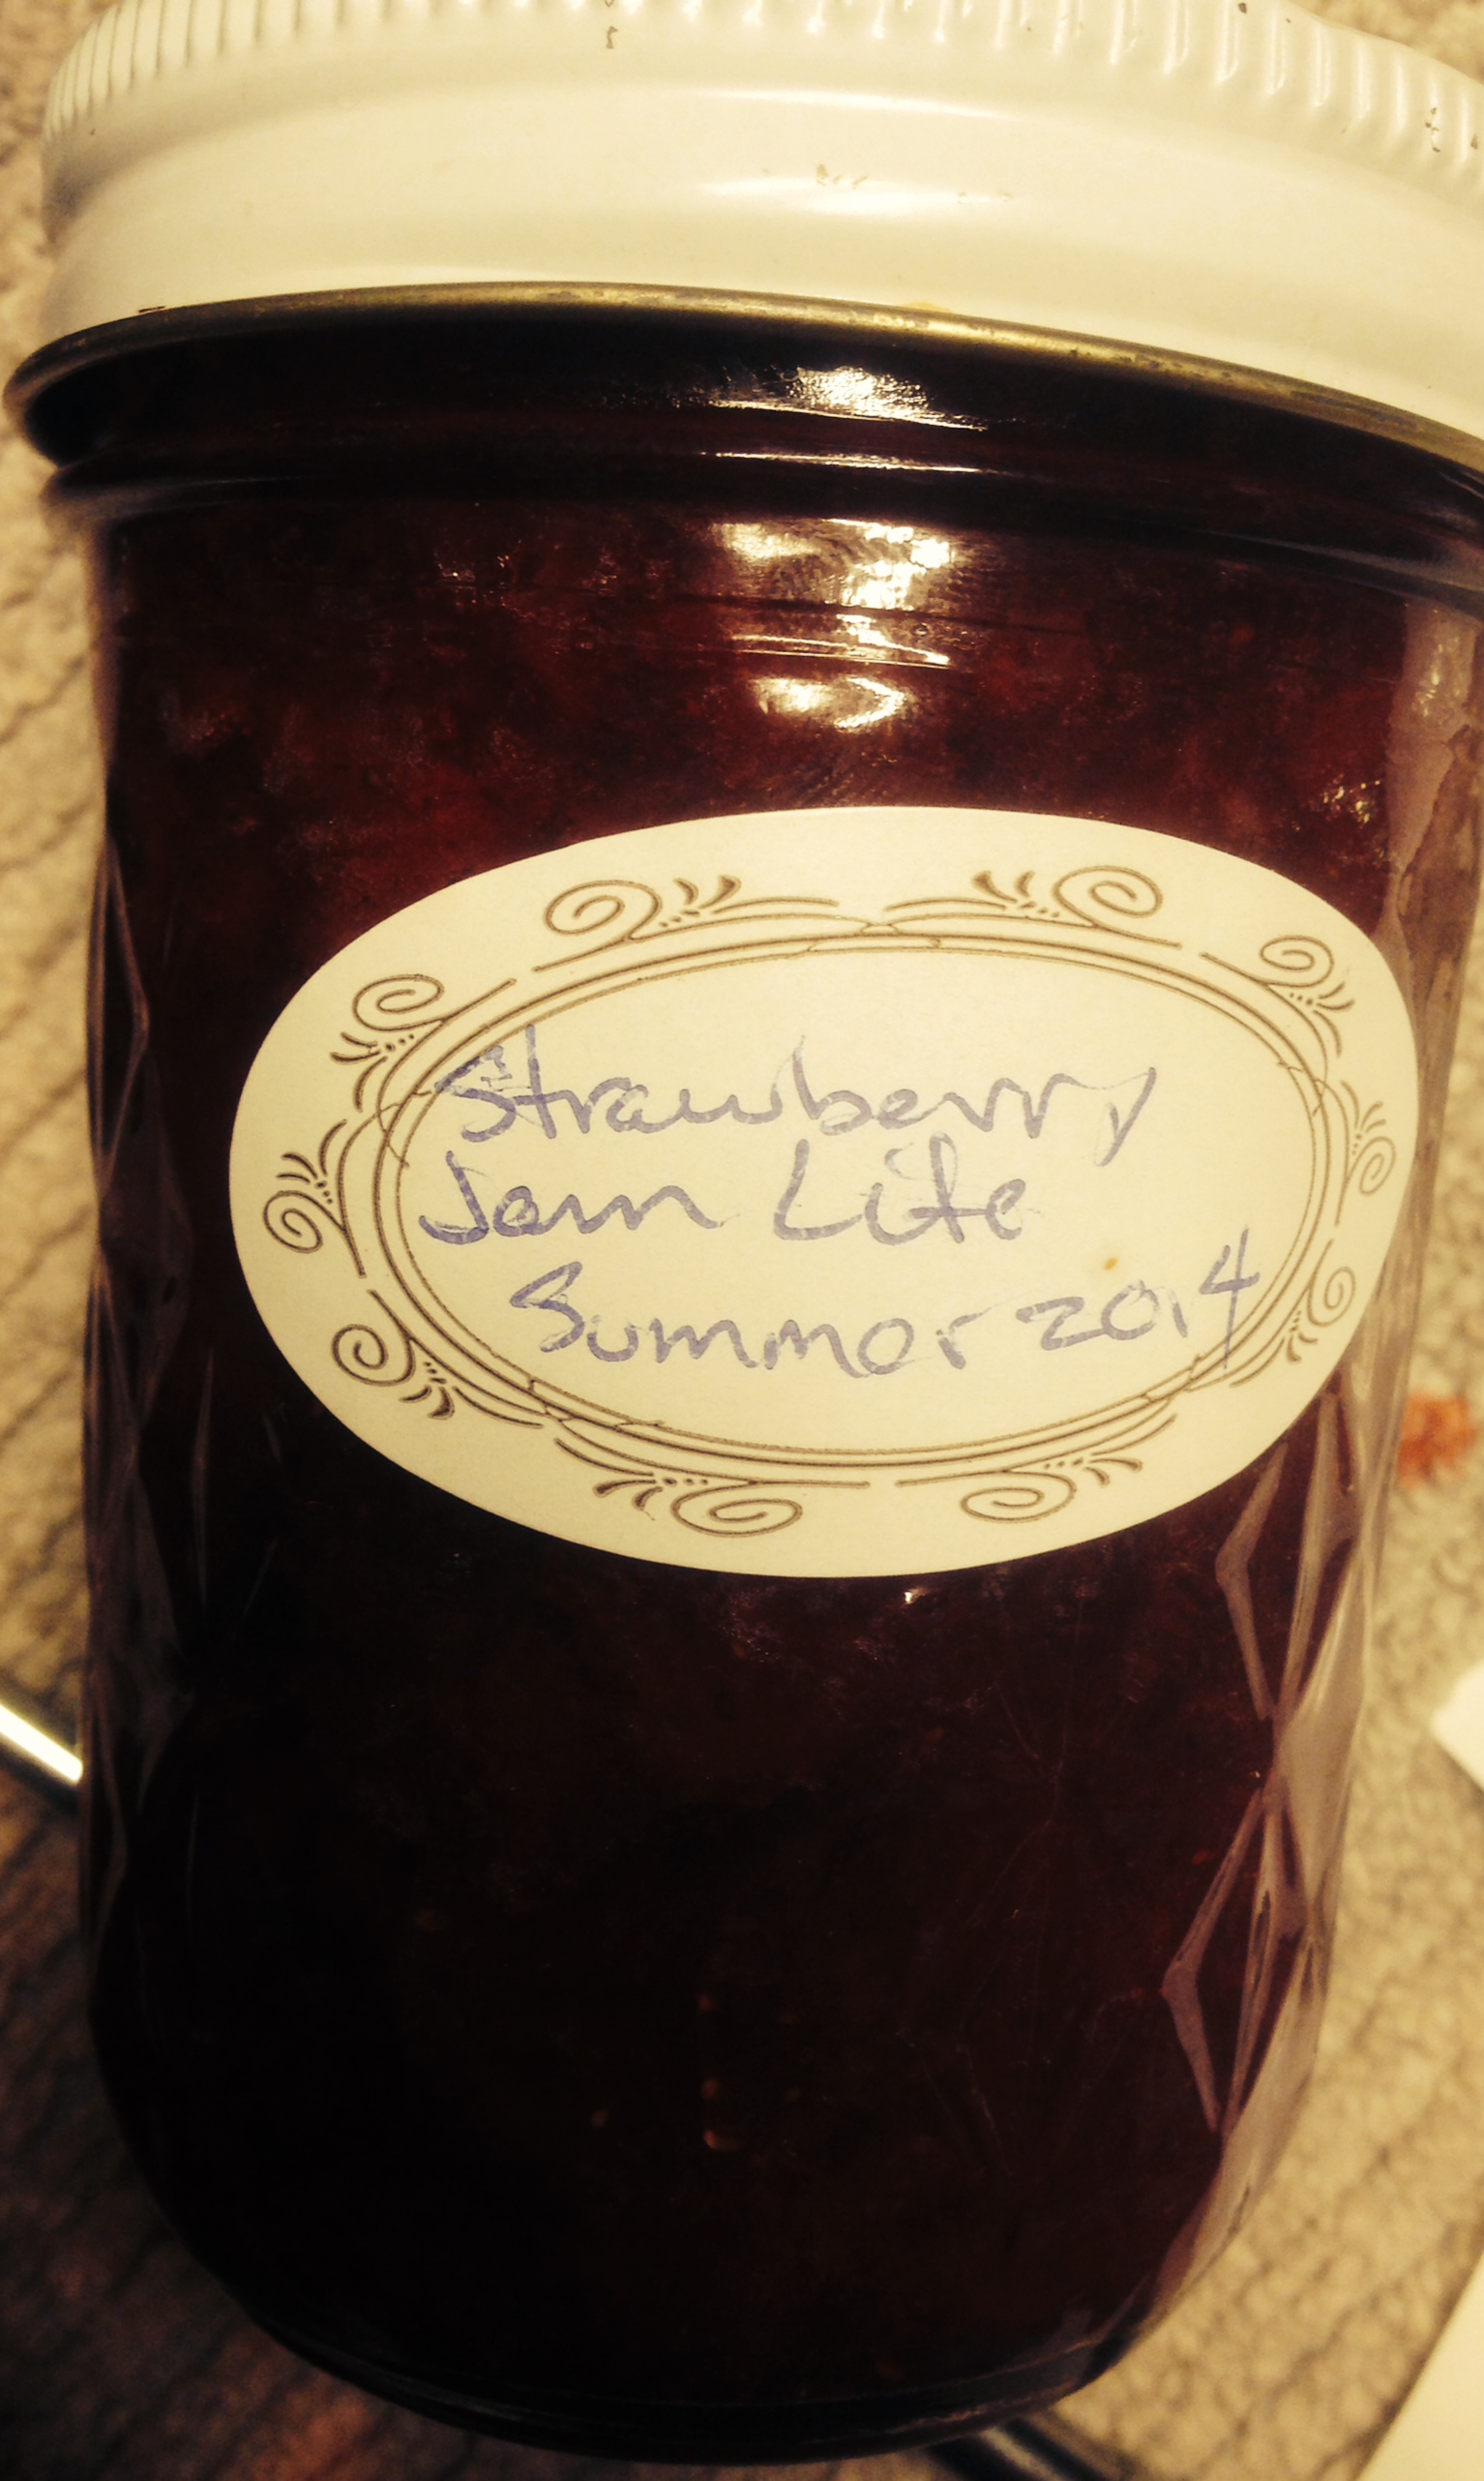
Jam, yeah jam! Never heard of banana jam…..Google it! Yes Virginia, people do make banana jam!

Food.com, Yee Haw!

Banana  Jam by Chef GreanEyes on April 2nd 2009

4 cups of ripe bananas……no problem here!

6 ½ tbsp.  of lemon juice

6 cups of sugar – again no problem, I buy 25 pound bags to feed to the bees during lean times

3 ounces of pectin –

¾ cup of unsalted butter – I cut that back to a little less than ½ cup

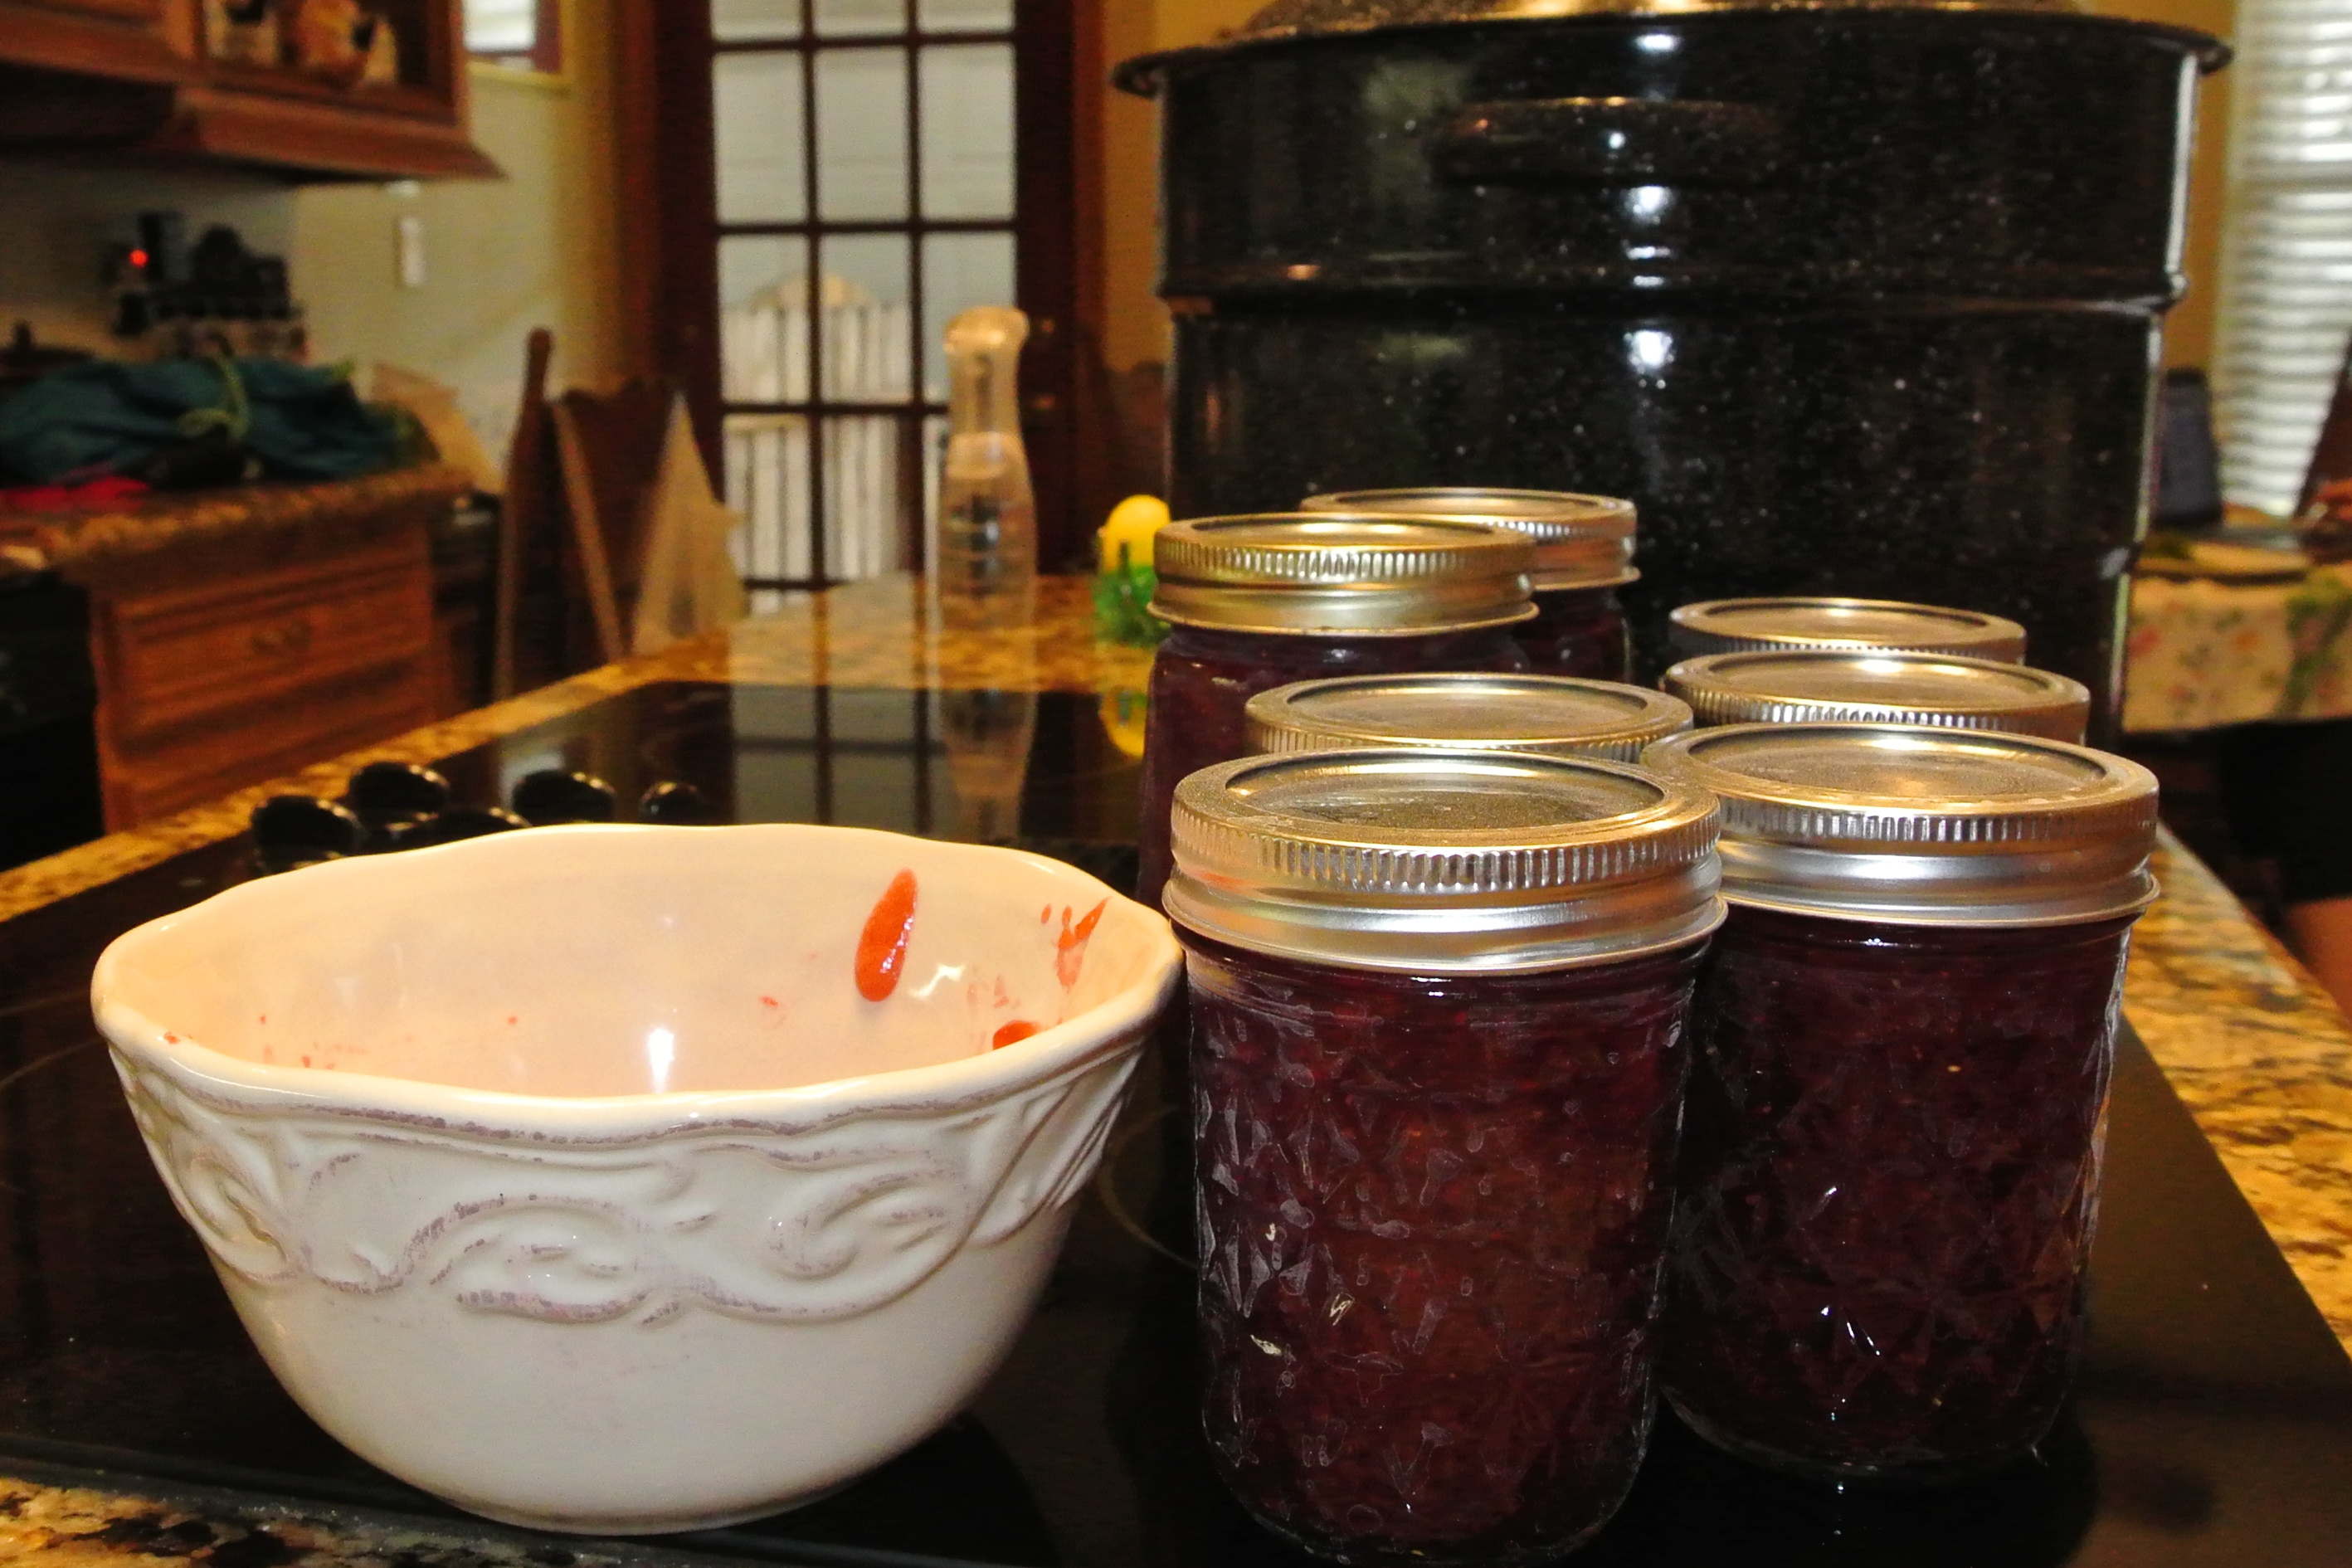
Now the tough part…..it takes time and multiple steps to make the jam.

  1. Combine bananas, 3 cups sugar, lemon juice and let stand for an hour
  2. Add remaining sugar and cook over medium-high heat until sugar is dissolved
  3. Bring to a boil for two minutes
  4. Remove from heat and skim foam
  5. Bring back to a boil – boil 1 minute
  6. Remove from heat and skim foam, yes, again
  7. Add butter and bring to boil AGAIN
  8. Add pectin and stir constantly
  9. Boil for  1 minute
  10. Remove from heat and skim once again.
  11. Allow to cool for 7 minutes
  12. Add to sterilized canning jars
  13. Process in boiling water bath for 10 minutes
  14. Let sit for 24 hours

Then enjoy!

IMG_1826

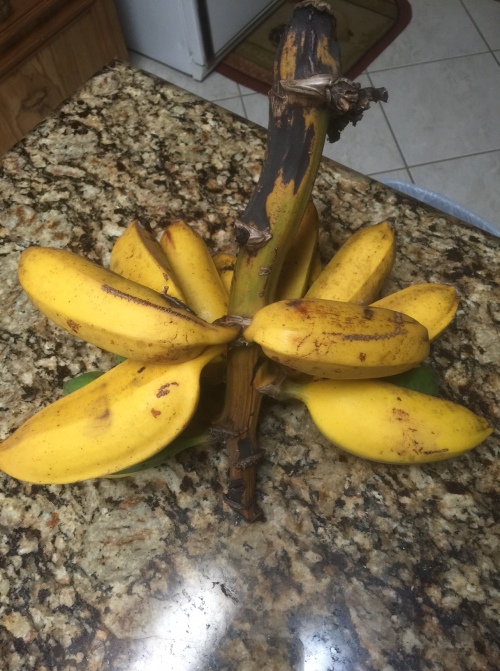
On the stalk and very ripe.

IMG_1828

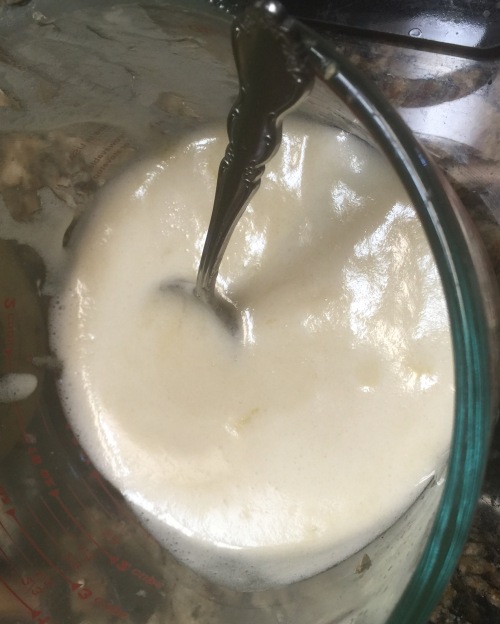
Boil and skim 1, 2 or 3…..

FullSizeRender3

Some of the skimmed foam, no, it didn’t go to waste.


Based on what is on the “plant” in my garden, I have more neighbors to overwhelm, more freezer space to occupy and maybe a few more batches of this jam. The first batch was with the Burro bananas, the next will be with the Manazano…..taste test comparisons sometime soon!


TTFN

Bishop

Honey Sweetened Meyer Lemon Jam – A Sensuous Kitchen Experience

Leave a comment

The title….The title is an apt description of the jam making experience but I will keep the blog descriptors “G” rated. What was actually going through my mind – is open for interpretation. I found this recipe in the same place I found the Meyer Lemon Curd recipe in the “Food in Jars” blog I mentioned in the post published on December 27th…..wait, wasn’t that yesterday? Life has given me lemons, more correctly, Meyer Lemons, and lemonade is not high on my list. Three alternatives made to date; 1. Limoncello – still a few weeks from completion, 2. Meyer Lemon Curd – a double batch, and now 3. Honey Sweetened Meyer Lemon Jam. Three decadent treats and the decadence is not restricted to flavors.

I will attempt to recreate the “cooking” experience as safely as I can. It has been a nasty, drizzly and cool day here in the Houston area. I stepped outside into the drizzle and hand selected 5, plump Meyer Lemons for the primary ingredient! Don’t try to read my mind, I will tell you that Led Zeppelin lyrics did not pop into my head until just a moment ago, so lets put that one to rest. I also used local honey…not mine but very similar in flavor.

The first non-cooking thought that hit me while stirring the batch was triggered by the aromas caressing my nose…. it was the mix of honey and, what must have been the volatile oils from the Meyer Lemon peels. The aromas were like the spring blossom time for citrus, most notably, from a midnight ride many years ago on my motorcycle down Sunset Blvd. The trip started on the UCLA campus and ended at Will Rogers Beach in Santa Monica. I have written in the past about the intoxicating scent of those Sunset Boulevard citrus blossoms on that cool and clear night. Just an amazing memory of the scents burned into my memories. My passenger that night I’m sure has similar memories of that scent filled ride, along the sweeping turns, cool and scent filled night leading down to the beach. Mmmmm – great memories triggered by the aromas buried in my gray matter.

As I was day dreaming and replaying that ride down the windy Boulevard the aromas coming off the batch of jam began to change. My first impression was that of a citrusy – Jasmine perfume scent. I had some, uh hum…. interesting thoughts….if a women was wearing a scent like this, the temptation to nibble and nuzzle her neck would have been overpowering. Plucked from somewhere deep in my memory banks was a connecting thought….pair this perfume aroma with the fresh scent of Herbal Essence shampoo and the beast within would have been testing the chains! – Careful Bishop…. I wondered if it was just my maleness fueling the thoughts when my wife popped into the kitchen and noted the perfume like aroma coming off the pot on the stove. She provided confirmation that my olfactory sensors were correct. Her comment pulled me back to the task at hand…..Jam!

The boiling process went on longer than the recipe called for. In hindsight, based on how thickly the jam set up, 15 minutes of boiling is probably correct time. I went well beyond that based on my sense of the thickening. During that time the aroma changed from arousing….(can I use that word?) to something very pleasant. The new aroma made me think more about hot, buttered and toasted sourdough bread lathered with this jam…I am very basic in my desires! I went from carnal to primal over the course of about 25 minutes.

I wound up with almost two pints of jam, probably a little darker in color than expected. If I had cut off the boiling time at 15 minute’s it may have been several shades lighter. I am assuming some “carmelization” took place. The jam is very well set and very tasty. I have many more lemons to pick so my next batch may be a little different….in results, but I hope that some same memories are triggered, memories that still make me smile. My lemons could not have been any fresher, once picked they were washed and in the boiling/simmering pot in less than 8 minutes….that may help explain the abundance of volatile lemon oils in the kitchen. Note to self……lets go ultra fresh again.

Honey Sweetened Meyer Lemon Jam

Yield: 3 to 4 half pints, plus a little for your morning yogurt

Ingredients

  • 1 1/2 pounds meyer lemons
  • 2 1/2 cups water
  • 2 cups honey

Instructions

  1. Wash the lemons and place them in a saucepan that can hold them in a single layer. Cover them with the water and bring to a boil.
  2. Once the water is bubbling, reduce the heat to medium-low and simmer the lemons for 25 minutes, until the skins are tender but still hold together.
  3. Remove the pot from the heat and let the lemons cool completely.
  4. Place the lemons in a blender carafe and add two cups of the cooking water.
  5. Blend at low speed to break up the lemons. Take care not to puree them entirely smooth.
  6. Pour the lemon mix into a low, wide pan and add two cups of honey (choose something mild in flavor so that it doesn’t overpower the lemons).
  7. Bring to a boil over high heat and reduce to medium-high.
  8. Cook, stirring regularly, until the jam thickens and sheets off the back of your spoon or spatula. You can tell it’s nearly completion when it hisses and spits when you stir. My batch took all of 15 minutes of vigorous boiling to achieve set, but times will vary.
  9. When jam is finished cooking, remove pot from heat.
  10. Funnel jam into prepared jars. Wipe rims, apply lids and rings, and process in a boiling water bath canner for ten minutes.
  11. When time is up, remove jars from canner and let them cool on a folded kitchen towel.

By on February 19, 2014 in jams, jellies, marmalades


My little dwarf Meyer Lemon tree on an earlier day.

My little dwarf Meyer Lemon tree on an earlier day.

In a few more weeks I should see my bees working the Lemon blossoms....Mmmmm so good!

In a few more weeks I should see my bees working the Lemon blossoms….Mmmmm so good!

TTFN

Bishop

The Last of the Strawberries

1 Comment

I used up the last of the 2014 strawberry harvest today. I made a low sugar recipe resulting in 2-12 oz. jars, 4- 8 oz. jars and 1-4 oz. jar of wonderful Strawberry Jam. This was a banner year for my strawberry harvest. I am not sure if my bees will make much difference next year as strawberries are largely self pollinated, but, they can’t hurt!

I do love my morning toast with a healthy dollop of backyard jam, whether it be my strawberry jam or my blackberry jam….wild or domestic! No domestic blackberries this year as they met with a breakdown in communication with my hired help. The sprinkler installation guy, my son Ben, was a little too rough with the existing plants, they all died….next year or the year after may be a good year.

So, what does lite jam mean? Standard recipe calls for 5 cups of strawberry mush and 7 cups of sugar…..so danged good. The lite recipe is also 5 cups of mush but only 4 cups of sugar. I really like the lite recipe as I think more of the fruit flavor comes through. I will admit that the last batch of Dewberry Jam, a wild blackberry, was made as a full sugar recipe….wow…very good!

An 8 ounce jar of my very good Strawberry Jam.

An 8 ounce jar of my very good Strawberry Jam.

Now…clean the kitchen and bottle my Russian Imperial Stout! – Tomorrow, I just sampled a couple of Kona IPA beers and they were awesome. That should be detailed in my beer blog in a day or so.

http://bishopsbeerblog.com/

TTFN

Bishop


TTFN

Bishop


Jams, Jellies and Jars

3 Comments

I just pick up an issue of “Better Homes and Gardens Special Interest Publications” titled

Canning

preserving+freezing+drying.

I was in awe of how my limited jam and jelly efforts are/were compared to the world opened up in this issue.

Canning Issue

Canning Issue

Let’s start with the jellies

  • Blood Orange-Vanilla Bean
  • Habanero-Mint
  • Apricot-Rosemary
  • Flower Petal – I made Rose petal jelly – pretty but lacked flavor, search edible flowers for potential petals
  • Ruby-Red Grapefruit
  • Jasmine Tea
  • Grape Juice – not unique
  • Rose Wine Jelly with Pink Peppercorns
  • Balsamic Vinegar-Ruby Port

I am not including recipes – US folks can probably find this issue, if you can’t send me a request and I will accommodate y’all.

Jams were next and I saw some very mouth watering combinations.

  • Cinnamon-Peach
  • Sweet-Basil Peach
  • Chipotle-Peach
  • Bourbon-Peach
  • Caramel Apple
  • Sweet Cherry
  • Peach
  • Cinnamon-Spiced Triple-Berry
  • Gooseberry-Mango
  • Nectarine Mango
  • Honey-and-Thyme Blackberry
  • Tomato-Basil
  • Dried Apricot-Fig Jam with Anise
  • Strawberry Margarita & yes it includes a 1/2 cup of Tequila and a 1/4 cup of Triple Sec
  • Cantaloupe Jam with Vanilla

I have a vision of returning to Houston and creating some amazing Jellies and Jams. I am on a garden break and my son’s good friend and former teammate is keeping the greenery alive and hopefully enjoying some of the bounty…..the long extended heat wave in our area has slowed a lot of my harvest. Old faithful cucumbers should overwhelm him….as long as he keeps them irrigated!

My return at the end of July may include a hunt for some Fredericksburg Peaches!

TTFN

Bishop

Jams and Curds

3 Comments

My pantry shelves a pretty well loaded with jams, jellies but, unfortunately the lemon curd has vanished. The last jar of the Meyer Lemon curd went to my daughter in California and shared with my grandkids. My granddaughter sent me a text message this morning after the gift package arrived  – “Please send more liquid gold….AKA lemon curd… It is amazing and I want to eat the whole jar but am required to share”. I shared with her a comment from one of my readers, Claire, a blogger from the UK. Claire’s favorite way to use and enjoy lemon curd is by the spoonful directly from the jar! I second that advice! See what Claire has to say and share. http://promenadeplantings.com/


On my shelf I do have some jars of rose petal jelly, beautiful in color but short on “rose” flavor. I made two batches of Pomegranate jelly, one from store bought juice and the other by extracting the juice myself….both were good but the home extracted juice gave the jelly a little more of a robust flavor. One jar remains of my Serrano Pepper jelly and one small jar of the Port Wine jelly with Rosemary. The Mother Lode is this year’s strawberry harvest. It is so good!

The last batch I chose to make in a chunky style. Chunky meaning I did not fully, completely, energetically mash and destroy the body of the berries. I like the results! My son does not appear to like it as well as the abused berry crushing approach! Why do I like it? It is more like enjoying the fruit as well as the jam. I always make the low sugar recipe version, i.e., 4 cups of sugar vs. the 6 or 7 called for in the full sugar recipes. I think the low sugar recipe allows more of the base fruit flavor to come through in the process. I can’t wait until the blackberries kick in.

Gently mashing the berries for the "chunky" jam.

Gently mashing the berries for the “chunky” jam.

The results. I the bowl is the foam scraped off before canning. My wife adds it to her oatmeal & egg white breakfast frittata.

The results. In the bowl is the foam scraped off before canning. My wife adds it to her oatmeal & egg white breakfast frittata.

My biggest berry of the season - a double butterfly strawberry.

My biggest berry of the season – a double butterfly strawberry.

Strawberries are still showing up in the garden, none of them make it into the house! I love to putter in the garden and snack on the fresh stuff. The sugar snaps, small asparagus, a carrot that escaped the clean-up of the beds. I had a couple of the miniscule Alpine berries this morning, two Pineberries and a few sugar snap pea pods. I also chopped up a cup of kale and added it to the blender with 6 oz. of orange juice, 1 cup of frozen pineapple, 1/2 cup of plain Greek Yogurt, a tbsp. of ground flax and a dash of nutmeg. Very tasty for such a healthy smoothie. PS, I used 50% less calorie orange juice….still had a great taste.

TTFN

Bishop

A Ride Through the Woods

1 Comment

I just needed to take a ride this afternoon………needed a break from the chores. I did finish the Pomegranate Jelly and it is so good! I headed out on my beater bike to the East End Park area here in my community of Kingwood. The sun was about 5 o’clock high and the light was looking good.

I love the sound of the tires making that little crunch/scrunch as they roll across the gravel. It was a quiet afternoon and other than the occasional plane overheard – it was just my breathing, the tires crunching along and the rustle of the leaves and branches. East End Park is adjacent to Lake Houston and extends north along the East Fork of the San Jacinto River. I took along my little Nikon J1 for a few pictures.

First stop along the trail – looking south toward Lake Houston.

Cypress knees are the coolest looking pieces of wood. Spotted these at my second stop as I headed north. Sometimes they don’t look like knees!

Looking across the East Fork of the San Jacinto River to the east.

An idyllic bench on a little island in the river. What isn’t seen is the fort some youngsters have built in the trees. What wonderful adventures they must have!

Now, I need to let you know that there are some interesting critters along the lake and river. One of the trails is aptly named “Alligator Alley”. I have ridden here for several years and have never seen the gator…….until this evening. Unfortunately the camera was in the bag. I saw the tail flash up out of the water as the gator spun around and took off under water leaving a nice big wake. Looked to be 6 or 7 feet long.

All is quiet looking across Alligator Alley – for the moment.

Another view across the Alligator Alley.

Almost hated to leave and come back home….the chores are still waiting and the danged ole weeds never stop growing!

TTFN

Bishop

Pomegranate Jelly – The Hard Way

Leave a comment

One of my favorite jellies is Pomegranate and more specifically that made by my Aunt Josie. Her husband, my Dad’s brother, Uncle Jim, worked for Western Water Works in Taft, CA. The equipment yards were fenced and ringed with pomegranate trees. They didn’t grow very tall but were loaded with juicy fruit every fall. The word pomegranate is an apt description – “seeded apple” – and by golly, tons of seeds. After my efforts to make pomegranate jelly the hard way I have a lot more respect for the effort and love my Aunt put into making that wonderful jelly she handed out around Christmas each year.

To address my wife’s concern about costs – $ 20.00 for pomegranates, $ 3.00 for the Sure – Jell low sugar pectin, 5 cups of sugar about $ 4.00, lemon juice less than a dollar. About $ 28.00 for a batch. Let’s not consider my labor costs, it is a labor of love, just like my love for my wife …… priceless! Commercial pomegranate Jelly – somewhere between $ 7.00 to $ 13.00 per jar ~ 8 ounces. My jelly is in that cost range, only better because I made it!!!!!

I was smart enough to use my outdoor potting bench and sink set-up to extract the seeds. It is a messy mess. As I worked through the extraction process I actually became more proficient in the process. The methods I found on the internet search did not help much at all. See the process below.


Pomegranate cut in half.

The next step is to break it apart. If done well, and that is a bit of a learning experience, it makes the removal of the kernels easy. If not it is a B……….!

Broken open and the sweet kernels on display in a bowl sloooooowly becoming full.

The sink comes in handy to rinse my hands off and to rinse the kernels. The white membrane like material floats and the kernels sink making it relatively easy to separate the good stuff from the chaff.

The bowl with kernels on the bottom and the chaff floating on top of the water. Makes it easy to segregate the good stuff from the trash.

The trash….oh my, it is quite a bit, but it is all destined for the compost bin. Hopefully it breaks down fairly quick!

About halfway through the effort! Lots of trash.

Next is the extraction of the juice. I dumped the seeds into a pot, added a little water and heated it all to the boiling point. I used a potato masher and then ran the mix through my food mill. The juice is a bit murky after sieving and filtering. I have it siting in the fridge to clarify a bit before making the jelly some time today. More on that later. Can’t hardly wait to sample the results…..To my cousin Drew….I will send you a jar!

TTFN

Bishop


Rose Petal Jelly and Other Gardening News

2 Comments

I stepped out into the front yard yesterday and picked up the scent of my wife’s roses in bloom. What immediately hit my mind was an article I read a few days ago about “Rose Petal Jelly”. I knew that I had to get it made this weekend before I left for Long Beach California for a week-long session with a client.

I picked this recipe up from “The Creamer Chronicles” blog. Easy recipe!

The ingredients you need are:
1 cup packed fresh flower petals
3 cups of water
Juice of one lemon
1 box powdered pectin
4 cups sugar

“Bring the water to a boil in a small saucepan and stir in the roses. Remove from the heat, and let the mixture steep for 10 minutes, as if you were making rose-petal tea. Strain the “tea” making sure to squeeze the petals to get every last drop of flavor out of them. Now this is where the magic happens: Pour in the fresh lemon juice and the “tea” turns back into the color of the flowers you used………”

The jelly making from this point forward is pretty straight forward. After steeping, I went triple the 10 minute suggestion. I poured the tea through a coffee filter before the jelly cooking process.  Stir in the pectin and bring to a boil. Add the sugar stirring constantly and return to a full boil. Boil for 2 minutes at a full boil, remove from heat and skim any foam off before ladling into clean sterilized jars. I went ahead and processed the jars for 10 minutes in boiling water bath.

A small rose shown with the jelly. The jelly does take on a hue very similar to the color of the petals used.

I also put a few more strawberry plants out this afternoon. I ordered “Sweet Charlie” plugs from Ison’s Nursery. They are a recommended variety for my Zone 9 gardening area. I filled my strawberry towers and filled in a few spots in my beds. I had 5 of the 50 remaining so I went over to John’s house, you remember him, Mr. 2 – 4X4 raised beds that I tend part-time. He has been smitten and does a pretty good job keeping stuff alive.

My home-made dibble used to plant some strawberry plugs.

I thought that my Asparagus bed was done for the season…beginning to yellow and die back. I cut it back a week ago and look what I find. A few of the root crowns are still pushing up spears. I love to just snap them off in the garden, give them a quick rinse and munch away…..so sweet!

Renegade asparagus – I cut it all back last week and I have a few trying to break out…Guess I’ll just have to eat them!

TTFN

Bishop


Busy, Busy, Busy – Catching up in the Garden and the Kitchen

9 Comments

I went out and picked a little this morning before the sky opened up and poured buckets of rain. I wound up with a bunch of cucumbers, a few ox-heart tomatoes and peppers. I will go out tomorrow and gather many more tomatoes and peppers. Into the kitchen now for a recipe experiment – I had a bowl of cucumber gazpacho in Carlsbad New Mexico this past week. It was very nice and refreshing but just a bit too peppery hot for my tastes. I searched the web and found a few similar recipes that seem to match my tastes.

My Cucumber Gazpacho

  • 7-8 Cucumbers – several varieties, seeded and cut into chunks
  • 2 Ancho peppers – warm enough and a very nice dark green in color – seeded
  • 2 – Anaheim peppers seeded – one that had turned red and the other a reddish-brown – for color and flavor
  • A couple of garlic cloves – skinned and crushed
  • 1 tsp coarse black pepper
  • 1 tsp sea salt
  • 2 tbsp lemon juice
  • 1 cup extra virgin olive oil
  • ½ cup ice water
  • ½ cup white tequila
  • Tabasco sauce – season to taste – added a lot more after taste testing on day two!
  • Lime oil
  • Chopped fresh mint leaves

Puree the cucumbers with the olive oil, water, lemon juice, tequila, garlic, salt, black pepper and Tabasco. Add the coarse chopped Ancho and Anaheim peppers and pulse to chop coarsely…leaves a little bits of pepper chunks for color and texture. Refrigerate overnight. Garnish with a bit chopped fresh mint and a few drops of lime oil.

Next up for the kitchen before my wife returns from California – brew my American IPA Ale with Cascade and Chinook hops, can my strawberry and blackberry preserves and possibly a few more quarts of spaghetti sauce…..the last batch was very good – now where did I put that recipe????

Enjoy the slide show from the garden and –

This slideshow requires JavaScript.

TTFN

Bishop

Strawberry Jam – It’s As Easy As……..Well, Jam

5 Comments

I finally gathered up enough of the misshaped and odd looking strawberries that did not become treats for my wife…and yes, me too – to make a batch of strawberry jam. I keep a gallon sized freezer bag in the freezer(duh) and add to it as the consumption allows. When the gallon bag is bulging full it is time to make jam. So today was the day.

I use the “Sure-Jell” low sugar/no sugar pectin and I always default on using sugar, only 4 cups per batch vs. 6 cups for the regular recipe. It takes 6 cups of mashed up strawberries to get started…accurate measurement is critical to making successful jams and jellies. I still have a cup or so in the freezer bag for the next batch. Once measured and mashed up – see below – you add the pectin mixed with ¼ cup of the sugar (from the original 4 cups measured out) into the mix and begin cooking…another key is to follow the recipe…..I know it’s not a man thing to follow recipes or directions but I have learned many good lessons the hard way!

6 Cups of mashed up strawberries with the pectin/sugar mix stirred in.

Now – when it boils vigorously foam tends to build up on the surface of the jam…even when adding a dollop of butter in an effort to keep the foam down. The foam is not a bad thing….it just not aesthetically pleasing when viewed in the jars….. ewwwww, what’s that stuff floating in the jam? So, I just scoop it off, put it into a little bowl for immediate consumption. Today Kathy was making her special breakfast treat – 3 tbs. of quick oats, a 4 tbs. of egg whites, some cinnamon and topped with any sort of fruit compote…. Cooks two minutes covered in a very small fry pan, flip and add the fruit…today was the strawberry jam foam – must have been good because I got a real kiss as a thank you……nuff said.

The foam starting to show up on the surface of the mix….close to boiling. Keep stirring Bishop – you don’t want to scorch the jam….also, stirring is clearly stated in the recipe/directions!

Then into the sterile jars, processed for 10 minutes in a boiling water bath and now wait until cooled and probably at least 24 hours to make sure it jells well. I already tested it…the utensils used in the process pick up and hold lots of jam…if it jells well more sticks to the utensils and I get to clean-up the tools……yes I do use my tongue….it’s only me and my germs…..I don’t share. I hate to waste any of that precious sweetness!

A nice little bounty to stash away in the pantry. I still have a few jars of strawberry jam from the 2011 season so I may have to gift some of it or eat a lot more biscuits & jam, toast & jam and maybe try Kathy’s egg white concoction with strawberry jam lathered across the top! Yum!

The bounty….all in reused jars. The hexagonal jars get used up first as I don’t trust them to reseal with previously used lids. The rest of the jars get new sterilized lids. That’s what the recipe/directions tell me to do…….


TTFN

Bishop

Newer Entries